Essence of Life - Food
  • Home
  • From My Kitchen
    • Heirloom Recipes
    • From God's Own Country
    • Sadhya
    • Kongu Cuisine
    • Chettinaad Cuisine
    • South East Asian
    • Around the World
  • Ebook
  • I Me Myself
PUDDING
STRAWBERRY PUDDING


    When you have a whole batch of Strawberries, what would you do?  Try your hand with your favourite recipes?  I ended up making Milk Shakes, Puddings and my daughter added them in Cakes. During our visit of Cameroon Highlands, my daughter satiated her cravings for Strawberries to the utmost that she recently told me she literally overcame with her craze for Strawberries. When we saw the markets flooded with Strawberries we bought boxes & boxes impulsively only to wonder what to do with them, once we finished eating fresh fruits. I stored them in the freezer and it lasted for several months.
      Fresh Strawberries added an all-natural flavour into the dishes it was added into giving a naturally pink hue making the dishes adorable.  My son is recently in love with Pink coloured food and I saved few Strawberries until he was home to make these Strawberry Puddings. This is an Old-fashioned Strawberry Pudding made with Fresh Cream, Milk, Gelatin and Fresh Strawberries.  This is a perfect dessert as it is rich, creamy and delicious with all-natural flavours from fresh Strawberries.
     If you’re used to buying the instant pudding mixes and then you should try this homemade Strawberry Pudding recipe. I am sure you won’t go back to those packets ever again! Quick & Easy recipe with simple ingredients, which most of us would have in our pantry.
     Strawberry Pudding makes a rich, cool Strawberry-flavoured dessert that comes together within minutes! Simply cook the pudding, chill it in the refrigerator until firm, and unmold for an elegant, sweet ending to any meal.   This is a simple Dessert recipe which can be incorporated into your Party menu within no time.  Also, this Strawberry Pudding isn't overly Sweet. Garnish the Strawberry Pudding with Strawberries or thin Strawberry Slices. For an extravagant and rich dessert, serve this simple Strawberry Pudding with Whipped Cream.  This Strawberry Pudding is a wonderful Dessert, rich, creamy, smooth with a nice Strawberry flavour.

Recipe Type - Pudding, Dessert
Difficulty - Easy
Serves - 4- 6
Author - SM

Preparation Time - 10 -15 Minutes
Cooking Time - 10 -15 Minutes
Setting Time - 4 - 5 Hours

HOW TO MAKE STRAWBERRY PUDDING

PUDDING
STRAWBERRY PUDDING


INGREDIENTS :

Strawberry Puree - 1/2 Cup(of 10-12 Strawberries)
Fresh Cream/Whipping Cream - 3/4 Cup
Full Cream Milk - 11/4 Cups
Water - 1/2 Cup
Gelatin- 1 Tspn
Sugar - 1/2 Cup
Corn Flour - 3 Tbspn

For Garnishing:

Fresh Strawberry/Strawberry Slices - Few


PUDDING
STRAWBERRY PUDDING

METHOD:

  • Hull the Strawberries and cut them into small pieces.
  • Puree the Strawberries.
  • Strain through a sieve, if you need to remove the seeds. (Optional)
  • Boil 1/2 Cup of Water, add the Gelatin Powder and boil it on a low flame until well combined. Keep it aside.
  • Mix Corn Flour along with few teaspoons of cold water without any lumps and keep it aside.
  • Pour Fresh Cream/Whipping Cream in a wide bowl and boil it on a low flame stirring continuously for a few minutes.
  • Add Sugar to the above and cook on a low flame until Sugar dissolves.
  • Add the dissolved Gelatin mix and cook for another few minutes stirring continuously.
  • Stir the ingredients well while you cook the mixture.
  • This is to ensure that no lumps are formed in the Pudding.
  • Pour in the Corn Flour mixture and cook on a low flame stirring continuously.
  • Cook until the mixture thickens and slightly sticks to the ladle.
  • Switch off the flame.
  • Pour in the pureed Strawberry to the above mixture and mix well until well combined. 
  • Switch on the flame and cook the Strawberry Pudding on a low flame stirring continuously for few more minutes. 
  • Can add few small pieces of Strawberry to the pudding and switch off the flame.
  • Allow the Strawberry Pudding to cool down.
  • Pour it into the Pudding mould or any other serving bowl of your choice.
  • Refrigerate the Strawberry Pudding for about 4-5 Hours or until you serve the dish.
  • Serve the Strawberry Pudding chilled.
  • Garnish it with Fresh Strawberry or few Slices of Strawberry.
  • If you need to unmold, run a thin knife around the edge. Invert mould (or moulds) onto a serving plate.


    PUDDING
    STRAWBERRY PUDDING

NOTES :

  • The trick for smooth & silky-textured Strawberry Pudding is to simply stir, stir & stir! 
  • If you leave it unattended while cooking, you will end up with a lumpy mess, so the most important point to remember is, don’t forget to stir!
  • I have used Full Cream Milk and Fresh Cream in this recipe.
  • Can substitute Fresh Cream with Coconut Cream & Thick Coconut Milk for a dairy-free Strawberry Pudding Recipe.
  • Can substitute Gelatin with China Grass.
  • I have used 1/2 Cup of Sugar in this recipe, adjust to suit your taste preference.
  • Can substitute Sugar with Honey.
  • Good quality Strawberries have a sweetness of its own. So adjust the sweetness accordingly.
  • Can use Vanilla Extract/Strawberry Extract to flavour the dessert.
  • I have not added any extra flavourings, additives or artificial food colours in this recipe.
  • If you like tiny bits of Strawberry pieces in the Pudding can add about 1/4 Cup of Strawberry cut into small pieces.
  • Can also Serve the Strawberry Pudding topped with Whipped Cream.


MILKSHAKE, SMOOTHIES
STRAWBERRY MILKSHAKE


     Love is in the air and February comes along with it proclaiming the arrival of Valentine's Day.  Loads of Red Roses, Chocolates, Red Wine/Champagne and Strawberries.  I am not sure how these things got synonymous to Valentine's Day.  But in many countries, Food & Love are strongly entwined, and this celebration is no excuse for the same. Valentine’s Day is also a great time for making a variety of treats getting particularly fond of Strawberry & Chocolates.
     This is an amazing Strawberry Milkshake Recipes that would be a perfect treat to your loved ones this Valentine’s Day! A Dessert masqueraded into a simple Milkshake. This is a wonderful Strawberry Milkshake. Nothing fancy, nothing difficult and nothing of a gourmet kind. This Strawberry Milkshake tastes like pure Strawberry, with a natural taste not too sweet & not too milky. This Milkshake is loaded with Strawberries and Strawberry Ice Cream to give a creamy, thick & pink coloured treat for this Valentine's Day.
     I love to have a good Strawberry Milkshake and when it tastes all-natural it is extremely tasty & satiating to the senses.  But I feel that fast-food milkshakes are artificially flavoured and dyed-pink, which is extremely disappointing to the taste buds. And when it comes to certain dishes I never get it ill-conceived with the idea of making it any healthier which can surely be deceiving.  So for an occasional indulgence, get it real and tasty.
     Good quality & naturally flavoured Strawberry Ice cream gives an extremely tasty Strawberry Milkshake. And for the Berries, get them ripe, fresh and make sure they are sweet.  Happy slurping Strawberry Milkshake and a Happy Valentine's Day.


Recipe Type - Smoothie, Milkshake
Difficulty - Easy
Serves - 3 - 4
Author - SM  

Preparation Time - 15 - 20 Minutes

For more JUICES, DRINKS & SMOOTHIES, Click here...


HOW TO MAKE STRAWBERRY MILKSHAKE

MILKSHAKE, SMOOTHIES
STRAWBERRY MILKSHAKE

INGREDIENTS:

For Strawberry Milkshake:

Strawberries - 2 Cups
Sugar - 2 Tablespoons 
Milk - 1 Cups
Strawberry Ice Cream - 1 Cup

Serving Suggestion:

Strawberry Ice Cream - Few Scoops
Fresh Strawberries - a Few


METHOD:

  • Hull the Strawberries and cut them into slices.
  • Sprinkle some Sugar and leave it in the Freezer for about an hour.
  • Alternatively can freeze the whole Strawberries and use them.
  • When the Strawberries have frozen, add them into the blender along with the oozed out juices.
  • Pour in 1/2 a Cup of Milk and blend until smooth.
  • Add in the remaining Milk and the Strawberry Ice Cream and blend again for a few minutes until well combined.
  • Pour it out into serving glasses, top it up with a scoop of Strawberry Ice cream.
  • Serve Strawberry Milkshake chilled garnished with a Strawberry.

NOTES:

  • Use ripe, fresh & sweet tasting Strawberries.
  • Freezing the fruit yields a thick & creamy Strawberry Milkshake.
  • Use a good quality naturally flavoured Strawberry Ice Cream.
  • The sweetness from the Ice cream is more than enough to sweeten the Milkshake.  So adding Sugar is truly optional.


STIR-FRY, EGGS
STIR-FRIED LONG BEANS WITH EGG

     Stir-fried Long Beans with Egg is a quick-fix recipe with minimal ingredients.  This is a common stir-fry recipe prepared with Garlic & Light Soy Sauce and can be cooked with various vegetables using the same method.  The addition of Eggs along with the Vegetable makes this stir-fry extra special.  When perfectly cooked Long Beans taste Sweet & Crunchy.  This is a simple traditional Chinese style home-cooked side dish found in different versions more or less with similar ingredients throughout China and South East Asia.
     More or less I get acquainted with these dishes when I dine out & always make sure to try the recipe sooner or later at home.  When the ingredients become predictable, the job gets easier.  It’s all about having a different culture’s cuisine as often as possible. And my daughter getting easy with her choosy Vegetable eating mood when I cook in such a manner makes me cook such stir-fries as often as possible. 
     Spice is definitely something I do not hold back on, as my husband is a person who calibrates a dish with its spiciness.  At least a mild note of spiciness would be appreciated in such dishes and this Long Bean Stir-fry is no excuse.  In this Stir-fry recipe, I have cooked Long Beans & eggs along with Garlic in Light Soy Sauce with a mild note of Spiciness from Bird's eye Chilli.  For a mildly sweet note can add a dash of ABC Sauce(Kicap Manis) too, but it makes the dish slightly darker.  I usually cook Long Beans on a high flame for few minutes until they turn Crunchy & Tender.
    

For more VEGGIES & STIR FRY Recipes, Click here...


Cuisine - Chinese(Southeast Asian)
Recipe Type - Stir Fry
Spice Level  - Low
Difficulty - Easy

Serves - 2- 3
Author - SM

Preparation Time - 5 - 10 Minutes
Cooking Time - 5-10 Minutes


HOW TO COOK STIR-FRIED LONG BEANS WITH EGG

STIR-FRY, EGGS
STIR-FRIED LONG BEANS WITH EGG

INGREDIENTS :

Long Beans - 2 Cups
Garlic - 2 Cloves
Birds-eye Chillies(Red) - 1 No.(Optional)
Eggs - 3 Nos.
Turmeric Powder - 1/8 Tspn
Light Soy Sauce - 1 Tbspn
Salt - To Taste
Sugar - a Pinch.
Oil - 2 Tbspn.


METHOD:

  • Clean, snap-off the ends, wash and cut the Long Beans into 4-5 Cm Long Pieces.
  • Allow it to drain in a Colander.
  • Heat Oil in a pan over a high flame.
  • Add finely chopped Garlic, Bird's-eye Chilly and saute it over a high flame until aromatic(for about 20 seconds).
  • Add the Long Beans along with a dash of Salt & a pinch of Sugar, give a quick stir.
  • Cook this on a high flame for a minute.
  • Meanwhile, Crack open the Eggs, beat it lightly along with a dash of Salt and Turmeric Powder.
  • Push the Long Beans to one side of the pan.
  • Pour the beaten Egg into the Pan & Scramble it on a medium flame until cooked.
  • Now mix both the Long Beans and the scrambled Eggs.
  • Season it up with Light Soy Sauce and give a quick stir.
  • Immediately switch off the flame.
  • Serve Stir-fried Long Beans with Eggs hot with steam cooked White Rice/Jasmine Rice.

NOTES:

  • Cook the Long Beans over a high flame for a brief period.
  • Cooking on a high flame yields crunchy and sweet-tasting Long Beans. 
  • Long Beans should not be overcooked or turn soggy.
  • Pushing off the cooked Long Beans to one side of the pan and then pour the Eggs & scramble it up.
  • This way the eggs can be scrambled well until cooked and doesn't get coated to the Long Beans.
  • If you pour the eggs over to the Long Beans, it gets coated to the Beans and doesn't get cooked well, which may result in an eggy smelling stir fry.
  • Adding Bird's-eye Chilly is purely optional.
  • If you want a less spicy version, add Pepper Powder instead of Chillies.
  • I have used Peanut Oil in this recipe, can substitute it with any other vegetable oil of your choice.


RENDANG
TRADITIONAL CHICKEN RENDANG - RENDANG AYAM


      Rendang is a Malaysian Classic, universally loved by the locals, which originated from the ethnic group of Minangkabau people of Indonesia.  Rendang is normally served during special occasions, festivals and ceremonies in Indonesia and Malaysia.  Traditionally Rendang is slow-cooked on a stovetop along with local spices and herbs like Fresh Turmeric Root, Galangal, Kaffir Lime Leaves, Lemon Grass, Turmeric Leaves & Bay Leaves add a wonderful aroma to the dish and the Curry is richly laced with Coconut Milk and Kerisik which adds texture and richness to Rendang.
     The complexity of Spices and the slow cooking process is what makes a Rendang unique.  The taste and aroma of this Chicken Rendang with rich flavour laced with the creaminess of Coconut Milk & Kerisik makes this Traditional Rendang Ayam a rich and exquisite dish.  The method of preparation, the spices used and the slow cooking is a traditionally followed preservation method which helps to store this dish for a long time. Slow cooking yields soft & succulent Chicken Pieces well-coated with Rendang paste and yields a soft & silky-textured Chicken Rendang.  The same recipe can be prepared with Beef and Lamb too.
     Chicken Rendang - With the complexity of ingredients and time-consuming process, the dish proves uniquely exquisite by catering a tasty and richly flavoured Curry. Least to mention the aroma of the Rendang which lingers around. My kitchen was emanating a wonderful aroma of the Curry that I felt rewarded of the time & effort I rendered in making Chicken Rendang.
     Chicken Rendang goes well with Roti Jala, Roti, Nasi Biriyani, Nasi Kuning or any other rice dish of your choice. Rendang is a versatile dish which can be served with traditional dishes like Saffron Rice, Ketupat or Lemang.

For a detailed Recipe on How to Cook BEEF RENDANG, Click here...

Cuisine - Malaysia, Indonesia (South East Asian)
Course - Side Dish
Spice Level - Medium-High
Difficulty - Medium
Serves - 3- 4
Author - SM

Preparation Time - 25 - 30 Minutes
Cooking Time - 45 Minutes - 1 Hour


For more Recipes from MALAYSIAN CUISINE, Click here...


HOW TO MAKE TRADITIONAL CHICKEN RENDANG -

 MALAYSIAN RENDANG AYAM

RENDANG
TRADITIONAL CHICKEN RENDANG - RENDANG AYAM


INGREDIENTS:

For Chicken Rendang:

Chicken - 500 Grams
Coconut Milk - 1 1/2 Cup
Kerisik - 2 Tablespoons
Gula Melaka/Palm Sugar - 1 Tablespoon
Lemon Grass - 2 Stalks
Kaffir Lime Leaves - 3-4 Nos.
Salt - To Taste
Oil - 3 Tablespoons

Spices:

Cinnamon - 2 Sticks
Cloves - 5 Nos.
Star Anise - 2 Flowers
Cardamom - 4-5 Pods
Bay Leaf - 2 Leaves

For Rendang Paste:

Onions - 2 Nos.
Garlic - 5-6 Cloves.
Ginger 1" Piece - 2 Nos.
Galangal 1" Piece - 2 Nos.
Fresh Turmeric Root 1" Piece - 1 No.
Red Chillies - 3 Nos.
Dry Red Chillies - 10 -12 Nos.
Buah Keras/Candlenuts - 3-4 Nuts.
Coriander Powder - 1 Tablespoon
Fennel Seeds - 1 Teaspoon
Cumin Seeds - 1 Teaspoon


To Garnish:

Turmeric Leaves - 1 Leaf
Kaffir Lime Leaves - 2 Nos.


METHOD:

  • Soak Dry Red Chillies in hot water for about 15-20 minutes.
  • Clean, wash and cut Chicken into medium-sized pieces.
  • Grind the ingredients mentioned under for 'The Rendang Paste' into a fine paste along with soaked dry red chillies and keep it aside.
  • Clean and Cut the Lemon Grass Stalk(use the white part), slightly crush the stalks and keep them aside.
  • Heat Oil in a wide pan, once the oil is hot, lower the flame and splutter the ingredients mentioned under 'Spices' until they turn aromatic.
  • Immediately add the Lemon Grass Stalks and Kaffir Lime Leaves to the above and give a quick stir.
  • Pour in the ground 'Rendang Paste' and saute it on a low flame until oil separates from the mix and it turns aromatic.
  • Add the Chicken Pieces to the Rendang mix along with 1 Cup of Water and a dash of Salt.
  • Mix well, cover and cook the Chicken pieces on a low flame for about 20-30 minutes stirring occasionally.
  • Once the Chicken pieces are half cooked, pour in the Coconut Milk and cook on a low flame until the meat turns soft and tender. How to make Coconut Milk, Click here...
  • Add the *Kerisik & Palm Sugar to the Chicken Rendang and cook for another few minutes.
  • Cook until all the Coconut Milk is well absorbed into the meat and the curry reaches the desired consistency.
  • Finally, add finely chopped Turmeric Leaves and Kaffir Lime Leaves to the Chicken Rendang and mix well.
  • Serve Chicken Rendang hot or at room temperature.
  • Goes well with Roti, Roti Jala etc., 
  • Chicken Rendang is a good accompaniment for Nasi Biriyani, Nasi Kuning and other flavoured rice dishes.
  • Chicken Rendang is traditionally served with Ketupat, Lemang or Saffron Rice. 
  • Or simply pair it up with Jasmine Rice/White Rice/Basmati Rice.


RENDANG
TRADITIONAL CHICKEN RENDANG - RENDANG AYAM


NOTES:

  • Can cook the same recipe with Beef or Lamb, Can use Potatoes for a vegetarian version.
  • I have used thick Coconut milk to cook this Chicken Rendang.
  • Adjust the cooking time to suit the tenderness of the meat you are using.
  • Adjust the amount of spices to suit your taste preference.
  • Can de-seed the Dry Red Chillies for a less spicy Chicken Rendang.
  • Can substitute Palm Sugar with Brown Sugar or normal Sugar.
  • If you cannot get hold of Kerisik* in your region can avoid adding it into the dish or try preparing it on your own.
  • Slow-cooked Chicken Rendang yields soft & succulent chicken pieces with a wonderful silky texture & flavours well-infused into the meat from the spices and herbs.
  • This is a rich dish with a lot of fat and creaminess from Coconut Milk & Kerisik.

HOW TO MAKE KERISIK*

  • Dry Roast grated coconut on a low flame until the coconut flakes turn into golden brown in colour.
  • Use well-matured coconut with a thick flesh for the purpose.
  • Alternatively can use desiccated Coconut flakes or Copra(dry Coconut kernels) for the purpose.
  • Use finely grated or shredded coconut flakes for the purpose, which will yield evenly roasted Coconut.
  • Do not add oil while roasting the coconut for kerisik.
  • Dry roast the grated coconuts on a low flame until it is evenly browned.
  • Once roasted, allow it to cool down before pounding.
  • Pound the roasted coconuts with a Mortar and a Pestle into a fine powder.
  • Can also use a dry mixer-grinder or a small blender jar for the purpose.
  • The natural oils from the roasted coconut will ooze out while pounding.
  • Can store the Kerisik in refrigerator up to two weeks or in a freezer for about a month.
  • Kerisik can be used while preparing Rendang, Curries, Salads etc.,


HOW TO COOK RICE
HOW TO COOK WHITE RICE/RAW RICE


      This post is all bout "How to perfectly cook White Rice/Raw Rice".  Raw Rice in literal terms doesn't mean Raw/Uncooked Rice. Once the Paddy is harvested, the inedible husk(outer cover) is removed(De-husking) from it and what you get is the BROWN RICE.  Once the process of dehusking is done, the rice goes through another process which is Polishing or removing the bran from the Brown Rice and what you get is the refined version of Rice - WHITE RICE/RAW RICE.


HOW TO COOK RAW RICE/WHITE RICE
RAW RICE/WHITE RICE

In South India where Rice is a staple, we commonly use two types of Rice in daily cooking.

White Rice/Raw Rice - A refined version of Rice. It is the most common and widely consumed rice variety. However, milling takes away the significant parts (bran along with germ) thereby the grains lose many nutrients and phytochemicals.
  • Raw Rice is thin and polished.
  • It is White in colour.
  • This type of Rice contains more Starch.
  • Raw Rice cooks faster.
  • It is stickier when cooked.
  • It has a high Glycemic Index compared to Par-boiled Rice.

Par-Boiled Rice - Hydrothermal treatment ( Soaking, Steaming and Drying) is being given to the paddy before milling and that makes the grain partially cooked with the husk remain intact on it. The rice along with the hull/husk is soaked, steam-cooked and then dried. Once the Paddy is dried the hull/husk is removed.  Steaming enables the rice to absorb nutrients and changes the starch.

For a detailed Recipe on HOW TO COOK PAR-BOILED RICE, Click here... 

  • Parboiled Rice is sightly dull in colour
  • The hydrothermal treatment makes this type of Rice less starchy. 
  • It cooks into a firmer, less sticky dish of rice than regular white rice/raw rice.
  • It has a low Glycemic Index compared to White Rice/Raw Rice.

HOW TO COOK RAW RICE/WHITE RICE
RAW RICE/WHITE RICE

     Raw Rice & Par-boiled Rice are the most commonly used varieties of Rice for cooking Rice.  Raw Rice is commonly called as 'Pacharisi' in Tamil, 'Pachari' in Malayalam, 'Pachi Biyyam' in Telugu, 'Akki' in Kannada and as 'Arwa Chawal' in Hindi.  Raw Rice is widely used in South India, as for cooking Rice and for making a wide range of other dishes out of it.  Commonly we can buy two types of Raw Rice from grocery stores in South India.  One is called Maavu Pacharisi which is mainly used for grinding it into a batter for making Idli, Dosa, Adai, Appam etc., & making Rice Flours for Puttu, Idiyappam, Pathiri, etc., & for snacks like Murukku, Seedai, Thattai, Kozhukattai, Achappam, Kuzhalappam, Unniyappam, Ilayada.   Another variety of Raw Rice is Sothu Pacharisi which is used for cooking Rice and Rice dishes like Pongal, Variety Rice.  Most of the households use Raw Rice for cooking Rice and it goes well with most of the Curries, Rasam. Cooked Raw Rice can be converted into a variety of Flavoured Rice Dishes like Coconut Rice, Lemon Rice, Tamarind Rice, Tomato Rice, Curd Rice/Thayir Sadham and can also be used to prepare Arisi Paruppu Sadham, Venpongal etc.,  Raw Rice can be used while making Porridges/Kanji/Soups etc.,  
     Raw Rice is the most common variety of Rice used in South East Asian Countries, where rice is a staple.  Whether for cooking it as Rice or converting it into Fried Rice Recipes or into Kuihs, Sweets, Porridges, Desserts etc., Raw Rice is one major Rice Variety used throughout South East Asian Countries. 
     What's a deal cooking a White Rice/Raw Rice?  May be that is the first thing which can pop up into our mind. Cooking rice is a daily chore done without a second thought.  It can be any type/variety of rice -Raw Rice, Par-boiled Rice, Kerala Rose Matta Rice, Glutinous Rice, Fragrant/Jasmine Rice, Basmati Rice, Brown Rice,  Sushi Rice, Risotto Rice, Calrose Rice etc., & etc.,
     In general, any variety or type of Rice is cooked in pretty much the same way. They just sometimes vary only with Rice:Water Ratio & cooking time. You can easily adjust the texture of your rice to your liking by adding more or limiting water. My technique to get perfectly cooked rice is 'Trial and Error Method'. Any variety or type of Rice it can be, cooking with your instincts and mainly to suit your preference is the only foolproof method.  Few trial and errors don't matter in the long run of cooking and it is the only way to perfect yourself and find a suitable method of your own which perfectly suits your cooking style.
     Pacharsi/Pachari/Raw Rice is a common rice variety used next to Par-boiled/Puzhungal Arisi in South India.  Rinsing the Rice well before using and traditionally cooking the Rice in a Saucepan or an earthen Pot with a lot of water and then draining off the extra starch is one best method to cook Raw Rice, any type of Rice as a matter of fact.  This old-school method is followed by most of the yesteryear people. This method removes any extra starch from the Rice making it healthier.
     Hectic lifestyle has brought forth easy and less time-consuming methods like cooking the rice in Rice Cooker/Pressure Cooker.  I have tried to give few easy methods to perfectly cook Raw Rice/Pacharisi, generally, I cook Raw Rice in a Rice Cooker or in a Sauce Pan. The other methods are also tried and tested.


For detailed recipes on HOW TO COOK DIFFERENT VARIETIES OF RICE, Click here...

HOW TO BUY AND STORE WHITE RICE/RAW RICE/PACHARISI:

HOW TO COOK RAW RICE/WHITE RICE
RAW RICE/WHITE RICE


  • A good quality Older Rice would last longer.
  • Buy a long-grained Raw Rice (make sure the pack doesn't contain too many broken pieces).
  • Make sure the Rice is free from bugs(Weevils).
  • Store it in a clean and dry place in an airtight container free from moist.


HOW TO COOK PERFECT WHITE RICE/RAW RICE

HOW TO COOK RICE
HOW TO COOK WHITE RICE/RAW RICE

FOR PERFECTLY COOKED WHITE RICE/RAW RICE :

  • A good brand of Raw Rice will do half of the job.
  • The secret of perfectly cooked Raw Rice is getting the right ratio of water to rice. Typically, the instructions on the package call for 11/2 cups Water for every 1 cup of Rice (1:11/2 Cups Rice: Water Ratio), if you like your rice “al dente.”  If you need a bowl of softer rice, add a bit more water. 
  • Though it isn't necessary, I would prefer to rinse the rice before cooking. Rinse the rice once or twice, moving your fingers through the rice, until the water runs clear.
  • Drain the water.

METHOD:

HOW TO COOK WHITE RICE/RAW RICE IN A SAUCEPAN

  • Place the White Rice/Raw Rice in a saucepan big enough to hold the rice and water.
  • Add enough water to cover the rice by a little over 3/4 inch above the rice. (For 1 Cup of Raw Rice, I use just over 13/4 cups of  Water).
  • Keeping the saucepan uncovered, bring the rice to a boil.
  • Once the water begins to boil, lower the flame.
  • Cover the pot and cook the rice in low flame for about 15-20 minutes.
  • Once the rice is cooked, remove from fire and keep it aside for at least 10 minutes to cool down.
  • Fluff up the White Rice/Raw Rice with a fork or a chopstick before serving.
*Sometimes the rice is cooked with more water.  Once the rice is cooked the remaining water is drained from the Saucepan. This reduces the stickiness of the rice.

HOW TO COOK WHITE RICE/RAW RICE IN A RICE COOKER

(Rice Water Ratio 1: 11/4 Cups)

  • Place 1 Cup of White Rice/Raw Rice in the rice cooker
  • Add 11/4 Cup of Water.
  • Cover the Rice Cooker and turn it on.
  • Cook until it automatically turns off.
  • Leave the in warm mode for another 5-10 minutes.
  • Allow it to cool for a few minutes.
  • Fluff up the White Rice/Raw Rice with a fork or a chopstick before serving.


HOW TO COOK WHITE RICE/RAW RICE IN A PRESSURE COOKER

(Rice Water Ratio 1: 11/2 Cups)

  • Place 1 Cup of White Rice/Raw Rice in a bowl.
  • Add 11/2 Cups of Water.
  • Place the bowl inside the Pressure Cooker.
  • Fix the gasket inside the lid and cover the pressure cooker.
  • Begin cooking under pressure over high heat for a Whistle.
  • Then lower the flame and cook for 2 more whistles.
  • Switch off the flame and wait for the pressure to release.
  • Once the pressure is totally released, open the lid and remove the bowl with cooked rice from the pressure cooker.
  • Allow it to cool for a few minutes.
  • Fluff up the White Rice/ Raw Rice with a fork or a chopstick before serving.
*If you want a softer Rice or while cooking for recipes like Curd/Thayir Sadham or to combine it up with Rasam, can cook with 2 Cups of Water for 1 Cup of Rice.


HOW TO COOK WHITE RICE/RAW RICE IN A MICROWAVE OVEN

(Rice Water Ratio 1: 11/3 Cups)

  • Place 1 Cup of White Rice/Raw Rice in a Microwave safe Bowl with cover.
  • Add 11/3 Cups of Boiling Water.
  • Cover the bowl and cook on Micropower High for 10-12 minutes.
  • Remove from the Microwave and leave it aside for a few minutes to cool down.
  • Fluff up the White Rice/Raw Rice with a fork or a chopstick before serving.


HOW TO COOK WHITE RICE/RAW RICE IN A STEAMER

(Rice Water Ratio 1: 1 Cups)

     White Rice/Raw Rice tastes best steamed. Steam cooking fluffs up the rice and retains the fullness of its natural texture.  And the most important factor they are gluten-free.  Any type of steamers do the trick brilliantly, maybe the traditional bamboo steamers, Stainless Steel/ Aluminium steamers, or Electronic Steamers. In each of these devices, hot, moist steam completely surrounds the grains of rice inside, cooking them perfectly.

  • Fit a rack or steaming trivet into a pot or a steamer large enough to accommodate the bowl.
  • Pour about an inch of water into the pot or a steamer. 
  • Place 1 Cup of White Rice/Raw Rice in a bowl on the rack (it shouldn’t touch the water in the pot),
  • Pour 1 Cup of Water to the Rice.
  • Cover the pot or steamer, and bring the water in the steamer to a boil in high flame. 
  • As soon as the water in the pot begins to boil, set a timer for 25 minutes and reduce the heat.
  • When the timer goes off, switch off the flames and take the pot off the heat.
  • Use tongs or a hot pad to remove the hot bowl from the pot.
  • Leave it aside for a few minutes to cool down.
  • Fluff up the White Rice/Raw Rice with a fork or a chopstick before serving.

HOW TO COOK WHITE RICE/RAW RICE IN AN ELECTRONIC STEAMER

(Rice Water Ratio 1: 1 Cups)

  • If using an electric steamer, fill the steamer's water reservoir to the "max" line.
  • Place 1 cup of White Rice/Raw Rice and 1 Cup of Water in a bowl.
  • If your steamer has multi-level,  place the rice bowl at the lowest level.
  • Cover the rice bowl.
  • Turn on the steamer and set the timing for 20-25 minutes.
  • Once it's cooked remove the rice bowl from the steamer and allow it to cool down for a few minutes.
  • Fluff up the White Rice/Raw Rice before serving.


NOTES :

  • The amount of water needed can vary depending on the type of White Rice/Raw Rice. The new crop needs less water compared to the old rice.
  • Cooking Raw Rice in a rice cooker is equally tricky & easy. If you get the knack of it then it's really easy. Try cooking as per the ratio mentioned in directions of the Rice Cooker manual. Adjust the water until you get a perfectly cooked Raw Rice.  Few trial and errors don't matter.
  • I get perfectly cooked White Rice/Raw Rice at 1:11/4 ratio in Rice cooker.
  • Use your preferred method to cook White Rice/Raw Rice.
  • Cold or @room temperature Raw Rice suits well for making Fried Rice & Variety Rice dishes like Coconut Rice, Lemon Rice, Tamarind Rice, Tomato Rice, etc.,
  • While making Curd/Thayir Sadham mash the cooked Raw Rice when it is warm and then prepare Curd Rice.
  • I haven't yet tried the traditional bamboo steamers for steam cooking Raw Rice/Jasmine Rice.  
  • If you do not have a steamer, a large wok or a pan with a lid will do the job.
  • Fill the wok or pan with water, set a rack inside the wok to place the rice bowl and close the lid.


EGG
EGG BHURJI


     Egg Bhurji is an Indianised Scrambled Egg converted to suit the Indian Palate.  What makes it different and unique is the addition of Spices. Onion and simple spices transform this plain scrambled eggs into a spicy side dish in a matter of minutes. Egg Bhurji is an easy to make spicy and flavourful Scrambled Eggs recipe which is quite famous as a Street Food. A quick fix fast food served in to-go along with slices of  Bread or Chapatis. An egg is a versatile ingredient and a rescuer in a kitchen.         
     During our childhood, with working Mom, I & my brother usually ended up with some kind of quick-fix egg recipes for dinner.  Maybe as an Egg Omelette, simple Egg Bhurji(We call it Mutta Chikki) with variations like spicing it up with Green Chillies or Red Chilli Powder and sometimes we add Spring Onions or Tomatoes for a variation in the recipe etc., & etc.,  We even came up with our version of soft-centred Egg Omelette and called it Kola-kola which is exactly a version called Kalakki(famous Madurai style Street Food).  Eventually, we ended up with quite a number of quick-fix Egg Recipes.
     This Scrambled Egg/Egg Bhurji recipe comes handy for working folks who want to make something quick, healthy and delicious for their breakfast or for their kids' lunch box. This one is the best try for beginners venturing into cooking or students/bachelors living outside their homes. One of the best dish ever which is hassle-free and can be prepared with minimal ingredients.  Above all combine it up with few Slices of Bread or Chapati for a complete meal.  Goes well with Rice too.
    In this Egg Bhurji Recipe, I have scrambled the Eggs with Onions, Turmeric Powder, Red Chilli Powder and Curry Masala(Mutton Masala).  You can also add some tomatoes while sauteeing or substitute Red Chilli Powder with finely chopped Green Chillies.  You can also be easy with the Masala - use Garam Masala/Curry Masala/Mutton Masala... Anything which fancies you.  If you do not have any simply prepare it with Onions and Green Chillies.  The options are to go along with your whims and fancies... or cook with what ingredients you readily have.  

For more EGG RECIPES, Click here...

Cuisine - Indian
Course - Side Dish
Spice Level - Medium
Difficulty - Easy
Serves - 2 -3
Author - SM

Preparation Time - 5-7 Minutes
Cooking Time - 5-7 Minutes


HOW TO COOK EGG BHURJI


EGG
EGG BHURJI


INGREDIENTS :

Eggs - 3 Nos.
Onion - 1 No.
Garlic - 1 Clove
Turmeric Powder - 1/8 Tspn
Red Chilli Powder - 1/2 Tspn
Curry Masala/Mutton Masala Powder - 1 Tspn
Salt - To Taste
Oil - 2 Tbspn.


METHOD:

  • Heat Oil in a pan over a high flame.
  • Reduce the flame to medium-low and add finely chopped Onions, Garlic and saute it until Onions turn translucent.
  • Add Turmeric Powder, Red Chilli Powder and Curry Masala Powder to the above and fry this on a low flame until aromatic.
  • Crack open the Eggs in a small bowl one by one and then combine it up in a big bowl.
  • Beat the Eggs lightly along with a dash of Salt.
  • Gently pour the beaten Egg into the Pan & Scramble the Eggs into tiny pieces on a medium-low flame until well cooked.
  • Once the eggs are finely scrambled and well-cooked switch off the flame.
  • Serve Egg Bhurji/Scrambled Eggs hot with slices of Bread/Chapati.
  • Can serve this as a side dish along with Rice.

NOTES:

  • I have used Red Chilli Powder in this recipe.  Can substitute it with 2-3 finely chopped Green Chillies.
  • I have used Curry Masala Powder, can substitute it with Mutton Masala/Garam Masala Powder.
  • Adjust the spices to suit your spice level.
  • Can also add finely chopped Tomatoes and saute it well before adding Eggs.
  • The idea of breaking the eggs one by one in a small bowl and then combining it in a bowl is, by any chance one of the Eggs turns out to be bad, then the entire bowl gets wasted.
  • So I usually do this way while using up more than one egg in a recipe. 
  • Also beating the eggs along with salt before scrambling it helps you to yield perfectly scrambled eggs.  
  • I like to scramble it up into tiny pieces and well cooked.
  • All the way while cooking Egg Bhurji I keep the flame at medium-low.
  • This way it doesn't smell "eggy" when packed in Lunch Boxes. 
  • Cook the Egg Bhurji to your preferred consistency.


HOW TO MAKE CHINESE TEA
 CHINESE TEA


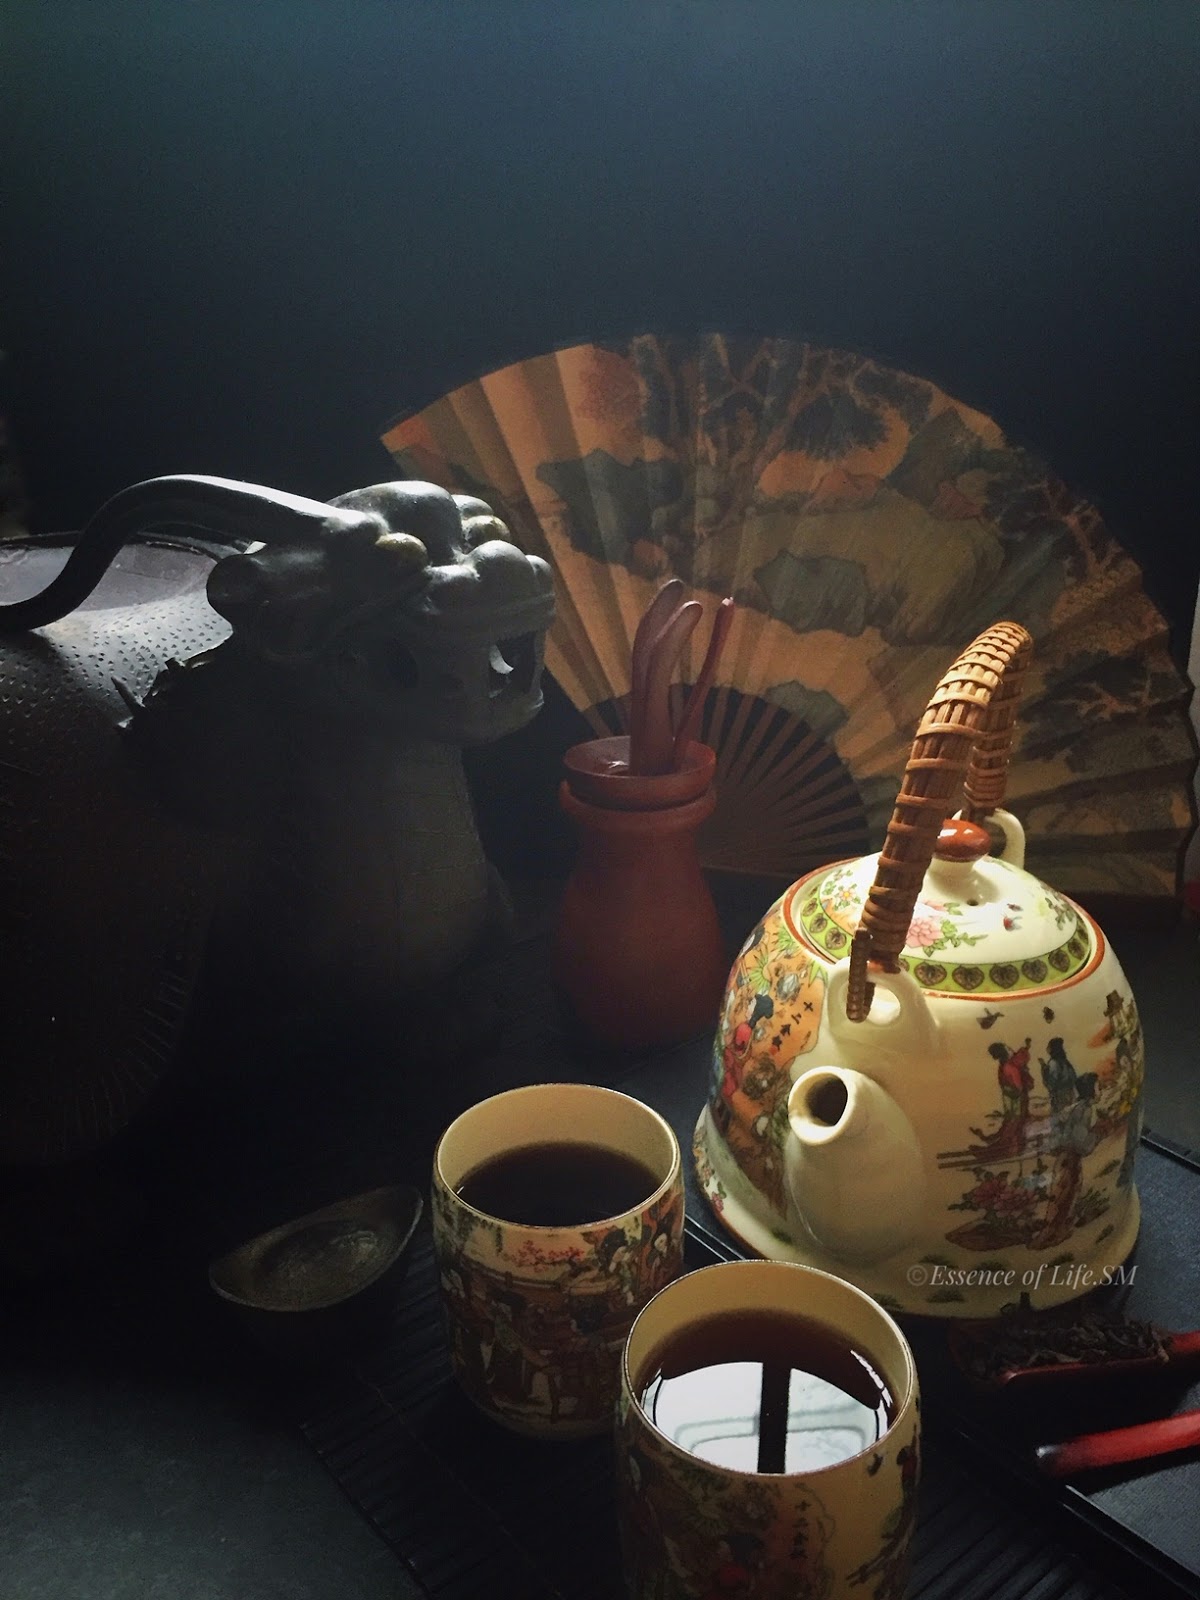
     What do I have to do with Chinese Tea?  "When in Rome be a Roman" & "When in Rome do as a Roman do." Living in Malaysia - a food haven with multicultural reflections, the region is open to Chinese Culture in its unique form.  And here I got the chance of tasting Chinese Tea. While dining in Chinese Restaurants, they serve their unique tasting Chinese Teas.  I was literally fancied by the Tea sets and the Tea making equipment that long back I collected a few items along with a huge Antique Dragon-Turtle Tea Pot big enough to brew Chinese Tea for a crowd.
    Well, I am not a tea person, but still, I love to drink these Chinese Teas when dining out.  Especially I love the Jasmine & Rose flavoured Chinese Teas prepared with dried flowers and Tea Leaves. Mildly flavoured and rejuvenating to the senses.
     Tea has a history of its own. In China, drinking tea is mostly a cultural thing, with the majority of people drink tea throughout the day. Chinese Teas can be traced back all the way to the Tang Dynasty and is believed to have been first discovered in 2737 BCE, by the legendary founder of herbology, Shen Nong. He contributed to the development of Chinese medicine with his extensive knowledge of herbs.
     In Chinese Culture, Tea was considered as an Elixir in ancient China & one of the 7 necessities of life. There are 5 basic categories of teas in China - White, Green, Oolong, Black and Post-fermented (Pu’erh Tea). Chinese Tea has become a part of Chinese Culture, where the tea is drunk more frequently for healthy living than to quench the thirst.

CHINESE TEA


HOW TO MAKE CHINESE TEA
 CHINESE TEA

Different types of Chinese Tea:

White Tea - White Tea is made from steeping the dried immature leaves of the Camilla Sinensis Tea Bush. White tea is frequently consumed for its presumed health benefits as an anti-ageing and promotes healthy and smooth skin.
Green Tea - Green Teas are made from leaves of Camilla Sinensis Tea Bush and are put through a very short fermentation process.
Oolong Tea - Oolong Teas are made by using a unique process of withering the leaves of Camilla Sinensis Tea Bush and using a special drying and oxidation process. Like other Chinese Teas, it has widely accepted health benefits.
Black Tea - Black Tea leaves are put through the oxidation similar to several other types of tea, but it goes through the process longer and therefore the teas are much darker.
Post-fermented/Pu’erh Tea - Post-fermented (e.g. Pu'erh) Teas are dark variety teas that are made from leaves that have gone through a unique process that exposes the freshly picked leaves to humidity and oxygen for an extended period, even longer than that of black teas. Puerh Tea is highly regarded in traditional Chinese medicine for its wide range of health benefits.

Health Benefits of Chinese Tea:

     Chinese Teas have been consumed by people in China and all over the world in centuries. While some people drink the tea for enjoyment, others drink it for one or more of the healthy benefits that come from drinking one or more cups of hot or even cold tea every day. Tea has both sweet and bitter flavours and possesses cooling properties. Tea helps to refresh the mind, enhance alertness and boost concentration. Tea can also promote body fluid production, quench thirst, clear heat and phlegm, promotes digestion and urination. It is good to drink Tea unsweetened or only lightly sweetened.

Anti-inflammatory - Chinese Teas are loaded with Polyphenols which have anti-inflammatory and antioxidant properties which help to reduce the risk of heart diseases.  
Weight Loss - Tea, when consumed hot, is believed to be the best weight loss agent.
Increased Muscle Endurance - The antioxidants in Green Tea help to fuel your energy and helps your body burn fat. It also helps in increasing the stamina.
Cancer Protection - The high quantity of antioxidants have shown to be effective at warding off certain forms of Cancers like Breast Cancer, Prostate Cancer, Ovarian Cancer and Colon Cancer.
Fights Free Radicals - The antioxidants found inside Chinese Teas helps to fight off the free radicals that are responsible for several health disorders like Cancer, Alzheimer's, Heart Diseases etc.,.
Defends Bone Loss - Green Teas helps to improve bone strength and bone density.
Regulates Blood Sugar levels - Several compounds found in Tea helps the body to metabolize sugars in a better way, which is excellent for people with type 2 Diabetes.  
Boost Brain Power - Chinese Tea is believed to help ward off the effects of neurodegenerative diseases such as Alzheimer's and Dementia.  
Healthy Teeth and Gums - Teas contain a naturally occurring Fluoride which helps to prevent plaque build-up which helps promote healthy gums and teeth.
Anti-ageing Benefits -  The compounds in Chinese Tea are believed to slow down the ageing process.


HOW TO BREW CHINESE TEA

HOW TO MAKE CHINESE TEA
 CHINESE TEA


     Few basic knowledge of Tea Brewing, a decent quality Tea & a bit of patience is all you need for a good Chinese Tea, any Tea as a matter of fact. The best Tea in the world can taste horrible if prepared incorrectly, but even an inexpensive Tea can be more satisfying if prepared in the best possible way.  So remember these 7 little facts before brewing any type of Teas.

  • The quality of the Tea
  • The quality of the Water
  • Correct measurement
  • Correct steeping temperature
  • Correct steeping time
  • Allowing the tea-leaf to expand fully
  • Separating the leaf from the liquid at the end of the steeping process

TEA

HOW TO MAKE CHINESE TEA
 CHINESE TEA

     Use the best tea that is available to you. Scoop the loose tea leaves from the tea canister. Measure the correct amount of tea & add it into the Teapot. This step is called "The black dragon enters the palace."

WATER:

  • When making any tea, try to use fresh & good quality water.  Water quality reflects greatly on the taste of the Tea.
  • Always start with fresh water out of the tap, not water that has been previously boiled or has been sitting around. 
  • First, use a small amount of heated water to warm the Tea Pot and Tea Cups before beginning to make your tea.
  • To prepare the Chinese Tea, heat water in a kettle. 

CORRECT MEASUREMENT:

     The amount of Tea and Water will vary on the type of tea, its quality, and the size of the teapot, but generally, 1 Teaspoon of tea leaves for every six ounces/3/4 Cup of water will do.

RIGHT WATER TEMPERATURE FOR TEA:

      Different teas require different steeping temperatures. Using the wrong steeping temperature is probably the most common error people make when preparing tea. You can buy a thermometer to gauge temperature or if you are experienced enough can look for visual clues. Heating water to the proper temperature is important when making Chinese tea, and ideal temperatures vary by tea type.

  • White and Green Tea - 77-85 °Celsius/172–185° Fahrenheit
  • Black Tea - 99 °Celsius/210 °Fahrenheit
  • Oolong Tea - 85 - 100 °Celsius/185–212 °Fahrenheit
  • Pu’erh Tea - 100 °Celsius/212° Fahrenheit


BREWING THE TEA

HOW TO MAKE CHINESE TEA
 CHINESE TEA

     Raise the kettle at shoulder-length, and pour the hot Water into the Teapot over the tea leaves. 
The water should be poured just above the teapot to not remove the flavour from the tea leaves too quickly. After pouring the water, scoop away any excess bubbles or tea leaves. Place the lid on the teapot.

BREWING TIME:

The size of the tea leaves and their quality determine the length of the steeping time. A whole-leaf tea is steeped longer and high-quality tea has a shorter brewing time.

  • Green Tea - 30 Seconds to 3 Minutes
  • Black Tea - 3 to 5 Minutes
  • Oolong Tea - 30 Seconds to 10 Minutes
  • Pu’erh Tea - 45 Seconds to 10 Minutes

ROOM FOR THE TEA LEAF TO EXPAND:

All teas require room for the leaf to expand greatly in size as it steeps. Make sure there is enough room for the leaf to expand up to 3-5 times in size.

SEPARATING THE LEAVES:

After the tea has steeped the proper length of time, separate the leaves from the brewed Tea. Most teas will turn bitter if steeped too long.

SERVING THE CHINESE TEA

HOW TO MAKE CHINESE TEA
 CHINESE TEA
        Gently transfer the brewed Teas from the Tea Pot or from a jug into the Tea Cups.
It's finally time to drink the tea. Good etiquette dictates that tea drinkers cradle the cup with both hands and enjoy the tea’s aroma before taking a sip. Traditionally, the cup should be drunk in three sips of different sizes. The first sip should be small; the second sip is the largest, the main sip; the third is to enjoy the aftertaste and empty the cup.


Enjoy The Pure Goodness of Chinese Teas!!!

Wishing all my Chinese Friends a Happy Chinese New Year!

"Gong Xi Fa Chai"

SM


JUICES, DRINKS & SMOOTHIES
CARROT JUICE

     My Mom always says eat Carrots... they are good for your Eyes!!!  I have grown up listening to such food quotes, this one is good for that and that one is good for this. She even says "Vitamin A Undu, B Undu, C Undu and Ooo... Undu..."('Undu' means 'there is') when she has to convince us to eat something.  Like Spinach, Green Grams, Bittergourd etc., & etc., She would say that eating spinach is good for your hair and it will grow long for which I would surely fall for.  I know that were her tactics then, to make us eat healthy food.  But the idea got into my head along with the food she served that Spinach has Iron, Papaya has Vitamin A, Green Grams are a good source of Protein etc.,
     So Carrot was one vegetable frequented at home. My brother had to eat it every day, as he started wearing glasses at an early age. She just peels it off and asks us to eat it as such, or sometimes makes Carrot Juice & sometimes add milk and make Smoothies out of it and mostly she makes Carrot Poriyal/Thoran, Carrot Pachadi or add it in Curries and once I even remember her making Carrot Payasam.
    Ok... coming to Carrot juice, it is an easy recipe which can be blended up within minutes in a mixer/juicer. The best way to consume Carrots is to have them raw.  So Juicing is one best way and you even don't have to worry about losing the nutrients from it. So I don't think I have to convince you all more into having Carrot Juice but still with a few words of Health Benefits on this Orange Beauty - Carrots.  BTW Carrots are not only Orange/Red, but they also come in various other colours like Pink, Purple, Black, Yellow and White.
     Carrots are rich in Vitamins and Minerals. Carrots contain a type of Carotenoid called Beta-carotene that the body can convert into Vitamin A. It is loaded with Vitamin A, Vitamin C, Vitamin K & B and several antioxidant compounds. It is a good source of Potassium and other minerals like Iron, Calcium and soluble Fibres. Carrots are used for preparing Stir-fries, Stews, Salads, Beverages, Desserts, Smoothies, and Candy, as well as it is loaded with a wealth of Health Benefits.

  • Eye Health - Beta Carotene present in Carrots are converted into Vitamin A which plays an important role in boosting Eye Health.
  • High Source of Anti-oxidants - Carotenoids, found in carrots and other orange vegetables, are potent antioxidants that can help reduce your risk of various forms of temporary illnesses and serious chronic diseases.
  • Reduces the Risk of Cancer - High amount of Anti-oxidants & Carotenoids in Carrots & Carrot Juice helps to eliminate free radicals from the body and prevents the growth of Cancerous Cells.
  • Boosts Immunity - Carrots and carrot juice benefit the immune system by helping to defend the body from free radical damage, harmful bacteria, viruses and inflammation. Antioxidants play a major role in boosting immunity.
  • For a Healthy Heart - Carrots & Carrot Juice can help to keep the Arteries flexible,  decreases the inflammation in the lining of blood vessels, reduces the risk of blockages and thus helps maintain a healthy heart.
  • Maintains Blood Pressure  - Fiber can help to remove excess LDL cholesterol from the walls of arteries and blood vessels. Carrot is a good source of Potassium, which is beneficial for maintaining a healthy Blood Pressure.
  • Regulates Blood Sugar Levels - Potassium present in Carrots & Carrot Juice helps in maintaining cholesterol and blood sugar levels. Carrots are low in calories and sugar content. The essential Vitamins and Minerals present in Carrots helps to prevent Diabetes.
  • Helps Prevent Alzheimers - Carrots play a major role in boosting brain health, improving memory, and defending against other types of cognitive decline. A regular intake of Carrots & Carrot Juice may curb the onset of neurological problems like Alzheimer disease.
  •  Weight Loss - Carrots & Carrot Juice has no Saturated fats or Cholesterol. It also increases bile secretion, which helps in burning fat.  So it is highly recommended for those aiming to lose weight. 
  •  Aids Digestion - Carrots & Carrot Juice aids in the smooth functioning of the stomach, heart and liver. The high amount of dietary fibre and its ability to increase bile secretion helps to improve digestion and regulate bowel movement.
  • Good for Skin & Wound Healing - Beta-carotene, Lutein and Lycopene present in Carrots helps to reduce Wrinkles, heals scars, is also known to prevent Pimples. Beta-carotene is known for healing wounds  The juice, when applied topically or taken as a drink, is an excellent home remedy for healthy, vibrant and youthful skin.


For more JUICES, DRINKS & SMOOTHIES, Click here...


Recipe Type - Drink
Difficulty - Easy
Serves - 1- 2
Author - SM  

Preparation Time : 3 -5 Minutes


For more Recipes with CARROT, Click here...


HOW TO MAKE CARROT JUICE

INGREDIENTS:

Carrots - 2 Cups
Sugar/Honey - 2 Tablespoons
Water - 1 Cup

Add-ons(If preferred):

Lime Juice/Orange Juice - 1/2 Tablespoon
Ginger - a small piece


METHOD:

  • Thoroughly scrub and wash the Carrots under running water.
  • Peel off the skin(Optional).
  • Cut Carrots into small cubes.
  • Add Carrot Cubes along with some Water into a blender.
  • Blend until it turns smooth.
  • Pour the Carrot Juice through a strainer(optional). 
  • The pulp would be thick so it will take some time for the juice to be strained.
  • To speed up the process, press the pulp with a spoon/spatula.
  • I use my juicer jar(which came along with my blender) for the purpose, which has a strainer within which makes the process easier.
  • Collect the strained Carrot Juice in a bowl. 
  • Add Honey/Sugar to sweeten up the Juice.
  • Pour it into a tall glass and serve the Carrot Juice chilled or at room temperature.
  • Can add few teaspoons of Lemon Juice/Orange Juice to add zing to the Carrot Juice.
  • If adding Ginger grind it along with Carrots.

NOTES:

  • I use a simple blender for making Juices & Smoothies.
  • Straining the Carrot juice is purely optional.
  • Blend it until smooth.
  • Can substitute 1 Cup of Milk/Yogurt with Water and convert the same into Carrot Smoothie.
  • Adding Sweeteners to Carrot Juice is purely optional.
  • Adding Lemon Juice or Orange Juice can give you an extra note of taste and flavour to Carrot Juice. But it is purely optional.
  • Freshly extracted Carrot Juice(without added sweeteners) can be stored in the refrigerator for about 2-3 days.
________________________________________________________________________________

*TRIVIA: A SIMPLE NOTE

    *Carrot Juice is Alkaline, so it is always advisable to juice it alone or combine it up with fruits like Orange, Lemons, Tangerines, Grapefruits etc.,
    *Excessive consumption of Carrot & Carrot Juice may cause Carotenemia, a condition where one’s skin turns slightly orange, although this is a rare condition.


    Newer Posts Older Posts Home
    Search Essence of Life - Food

    I Me Myself

    A vintage-style horizontal oval frame showcasing ornate silver spoons on a dark rustic surface

    Essence of Life - Food is all about daily cooking with a simple sense of taste and health. It is all about food. Not a day goes by without eating for most of us, so what we eat matters on the whole. Food in the mode of goodness increases the duration of life, purifies one's existence, and gives strength, health, happiness, and satisfaction. Above all ingredients, the most vital one in my kitchen is love.

    Sm @ Essence of Life - Food

    Popular Posts

    • Kizhi Parotta: Kothu Parotta and Salna Wrapped in Banana Leaves
    • Kerala Sadhya Vibhavangal: Ultimate Guide to Traditional Onam & Vishu Sadhya
    • Nannari - Indian Sarsaparilla Roots
    • How to Make Kerala Kanji | Traditional Rice Porridge with Payar, Chammanthi & Achar
    • Brewing Authentic Malaysian Kopi: A Step-by-Step Guide to Mastering the Art of Kopi Making
    Ebook - What I Cook - For Onam

    Ebook - “What I Cook - For Onam”

    Amazon.com/dp/B0CGPVY6J3

    Indulge in Kerala’s Culinary Heritage: Traditional Onam Sadhya Recipes, with Expert Serving Tips! Celebrate Onam the authentic way! Discover 25 timeless Kerala Sadya recipes in my ebook. From avial to payasam, bring home the flavours of tradition. Available now on Amazon!

    Essence of Life

    Subscribe & Follow

    © 2026 | Essence of Life - Food

    • Home
    • Ask First
      Please note that all rights for the photographs and texts on this blog, unless otherwise mentioned, rests with the author. Please do not use without permission.
    • Privacy Policy