Essence of Life - Food
  • Home
  • From My Kitchen
    • Heirloom Recipes
    • From God's Own Country
    • Sadhya
    • Kongu Cuisine
    • Chettinaad Cuisine
    • South East Asian
    • Around the World
  • Ebook
  • I Me Myself
STIR FRY
OKRA / LADY'S FINGER  STIR FRY
     Lady's finger/Okra as it is popularly called in English-speaking countries is a vegetable rich in Iron, fibre & folates.  Loaded with nutritional benefits it also serves as a tasty accompaniment when cooked and served to suit your palate.  Mostly used in Curries, Stir-fries and Salads around the world, this vegetable is known for its unique slimy nature.
     This is a simple recipe which can be prepared within minutes and all the more it goes along well with Roti & Rice equally.  Mildly seasoned and spiced Okras are stir-fried to perfection.

Course : Side dish
Spice Level : Moderate
Difficulty : Easy
Serves : 4
Author : SM


Preparation Time - 5 Minutes
Cooking Time - 5 - 10 Minutes

For more VEGGIE recipes, click here...


HOW TO COOK OKRA / LADY'S FINGER  STIR FRY


INGREDIENTS :

Lady's Finger / Okra - 250 Gms.
Onion - 1 No
Turmeric Powder - 1/4 Tspn
Red Chilli Powder - 1 Tspn
Kitchen King Masala- 1 Tspn
Cumin Seeds - A pinch
Oil - 1 Tbspn
Salt - To Taste
Sugar - A Pinch


METHOD :

  • Wash and clean the Okra / Lady's finger. Trim off the corners and chop them into small pieces
  • Heat Oil in a Pan, splutter Cumin Seeds.
  • Immediately add finely chopped Onions and saute until onions turn translucent. 
  • Add chopped Okras, Turmeric Powder, Red Chilli Powder, Kitchen King Masala, Salt and a pinch of Sugar and give a quick stir.
  • Saute the Okras on a low flame until they are done and the stickiness of the vegetable is totally gone.
  • Serve hot with Roti/Rice. 


TIPS & TRICKS:

To avoid slimy Okra/Lady's Finger:
  • Cook the Vegetable on a high heat.
  • While Stir Frying or for Poriyals/Thoran, avoid crowding your pan or skillet, as this will reduce the heat and cause sliminess.
  • Adding Salt to Okras at the initial stage while cooking also help in getting rid of the sliminess quickly.
  • Cooking the vegetable along with acidic based ingredients also reduces the sliminess.
  • Saute Okra/Lady's Finger briefly in oil before adding it into Curries like Sambar, Puli Kozhambu, Pachadi etc.,
  • Can also simply slice and roast okra in an oven.


TIFFIN ITEMS
PANIYARAM
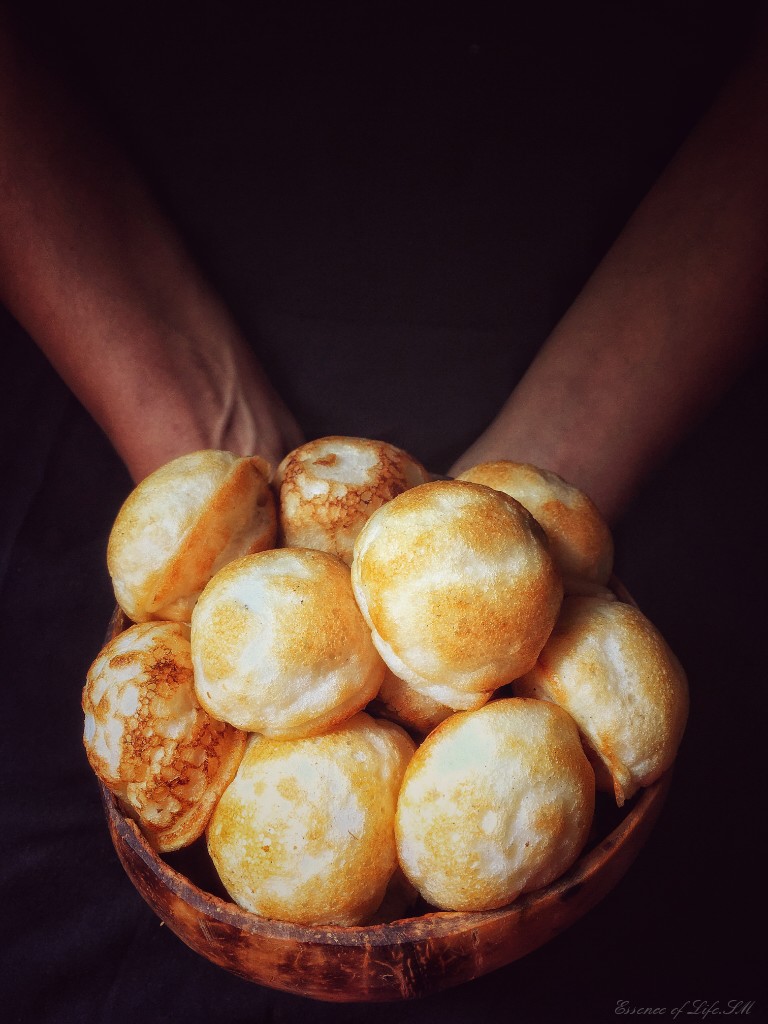
   Most of the days in a week goes with Idli/dosa in a South Indian household.  It is one of the must have breakfast/dinner item served in most of the houses.  When you are bored with Idli/Dosa, then this enigmatic Paniyaram comes for rescue. Mostly paniyarams are prepared with Idli/Dosa Batter, and they are cooked in a metal pan/ mould with small fissures called 'Paniyarakkal'. Even Non-stick Pans are available in the market these days.
     It is one of the popular tiffin items in south India and is called in different names in and around the region.  Basic ingredients for preparing the batter are Rice and Urad Dhal, but some ingredients like Sago/Beaten rice/Cooked Rice are added while grinding the batter to add fluffiness to the Paniyaram and Fenugreek is added for more flavour, texture and gives a golden finish once cooked.
     These crispy yet soft small globes can be prepared as a sweet or savoury dish.  For a sweet version Melted jaggery/palm sugar is added to the batter which is called Inippu Paniyaram.  The plain version or the simple Kuzhi Paniyaram and the savoury version called Kara Paniyaram with simple seasonings can be prepared with the same batter. This is a recipe for simple Kuzhi Paniyaram without any add-ons or seasonings. Paniyarams can be prepared with Idli/dosa batter too.  But this is a fool proof recipe for White, Crispy & Fluffy Kuzhi Paniyarams.

Cuisine : South Indian
Course : Main Course
Difficulty : Medium
Serves : 3-4
Author : SM

Preparation Time : 15-20 Minutes
Soaking Time : 3-4 Hours
Fermentation Time : 8-10 Hours/Overnight
Cooking Time : 20 - 30 Minutes

For more recipe on Tiffin Items, Click here...


INGREDIENTS :

Idli Rice - 1 Cup
Urad Dhal - 1/4 Cup
Beaten Rice / Poha / Aval - 1 Cup
Fenugreek Seeds - a Pinch
Salt - to Taste

METHOD :

  • Clean, wash and soak Rice and Urad dhal along with Fenugreek seeds for about 3-4 hours.
  • Soak Beaten Rice in 1 Cup of water for 10-15 minutes.
  • Grind the rice and dhals nicely.
  • Let the consistency of the batter be slightly thicker, like Idli batter.
  • Drain waters from Beaten rice and grind it in a small blender jar into a thick paste.
  • Add it to Rice- Dhal batter along with Salt and mix well.
  • Allow this to ferment for about 8-10 hours or overnight.
  • The batter would have increased by volume if it has fermented.
  • Before making Paniyarams, mix the batter well until the air is well incorporated.
  • Heat the Paniyarakkal on a medium flame.
  • Add 1/2 Teaspoon of oil into each fissure.
  • Once the oil is heated, pour the batter into the fissures until the 3/4 level.
  • Wait for about 2-3 minutes, cover the Paniyarakkal with a lid and wait for another 2-3 minutes.
  • Open the lid, flip the Paniyarams with a skewer and wait for another few minutes until both sides turn crispy and slightly golden.
  • Remove the Paniyarams from the pan and serve it hot with Coconut chutney, Sambar or Tomato Chutney.
  • Coconut Chutney ground with Dry Red Chillies goes well with Paniyarams.

NOTES :

  • Par-boiled Rice can be substituted for Idli Rice.
  • Adding Beaten Rice makes fluffy Paniyarams.  Can substitute it with Raw Rice.
  • If Using Raw Rice soak and grind it along with other ingredients.

RASAM
PARUPPU RASAM
     Would you believe, If I say there are more than 100 versions of Rasams?  But it is a truth gone unrealized with different varieties of Spices and ingredients added while preparing Rasam, makes it uniquely unique. Making Rasam may sound as simple as the dish, but it is a skill to be perfected.    As it differs along with regions in and around South India, I feel it takes different roles and caters different flavours as a signature dish of every cook and kitchen as a matter.
     For the Love of Rasam - a simple soupy dish which performs its role as an appetizer, digestive agent, taste enhancer and also relieves from cold and flu.  This simple dish is cooked almost every day in a South Indian household, along with Sambar/Curries, Kootu and Poriyals.  This makes it a task for it to be served in different versions daily.  Rasam is an integral part of a daily lunch menu and also is also one of the must have dishes in an elaborate South Indian Banquet(Virundhu/Sadhya).
     Rasam is a watery/soupy preparation made with Tuvar Dhals, Horse Grams, Tomatoes, Tamarind, Garlic, Shallots, Neem Flower, Mango, Pineapple etc., along with spices like Pepper, Cumin, Fenugreek, Asafoetida, Dry Chillies, Coriander Seeds, Cinnamon etc., and sometimes flavoured with Lemon or Oranges too. Some Rasams are prepared with one or more of above ingredients mixed and added together to suit your palate.
     This Paruppu Rasam is a version most commonly prepared with Cooked Tuvar Dhal, Tomatoes and spices. Mashed Tuvar Dhal is added to cooked Tomatoes, Tamarind extract and Rasam powder along with the excess water used for cooking Dhal.  It is seasoned with Mustard seeds, Garlic Pods, Dry Red Chillies, Asafoetida powder and Curry Leaves and garnished with fresh Coriander Leaves to enhance the overall flavour and taste of this Rasam.  I usually add Jaggery to any dish which has Tamarind in it.  Both Jaggery and Tamarind goes hand in hand to give a balanced taste.


Cuisine - South India
Recipe Type - Soup / Rasam
Spice Level  - Medium
Difficulty - Easy
Serves - 4
Author - SM


Preparation Time - 10 - 15 Minutes
Cooking Time - 10 - 15 Minutes


HOW TO COOK PARUPPU RASAM


INGREDIENTS :

For Rasam :

Water used for cooking Tuvar Dhal - 1 Cup
Tamarind - 1 Lime Size.
Cooked Tuvar  - 1/4 Cup
Tomato - 1 No.
Rasam Powder - 2 Tbspns
Turmeric Powder - 1/2 Tspn
Salt - To Taste
Jaggery / Sugar - A pinch (Optional)

For Tempering :

Sesame Oil/Ghee - 2 Tspns
Mustard Seeds - 1/2 Tspn
Asafoetida Powder - A Pinch
Dry Red Chillies - 1-2 Nos.
Garlic - 5-6 Cloves
Curry Leaves - 2 Sprigs


For Garnishing :

Coriander Leaves - Few

METHOD : 

  • Clean the Tuvar Dhal and wash them thoroughly to remove any debris or dust.
  • Pour 3/4 - 1 Cup of Water for 1/4 Cup of Dhal.
  • Pressure cook the lentils for 2-3 whistles on a high flame, lower the flame and cook for another 3 whistles. 
  • Drain the cooked water and leave it aside.
  • Soak Tamarind in water for few minutes and extract tamarind juice out of it.
  • Add Chopped Tomatoes into the Dhal Water along with Tamarind extract and Rasam Powder.
  • Boil this for about 5-8 minutes and leave it aside to cool down. 
  • Mash the Tomatoes and remove the skin.
  • Add mashed Tuvar Dhal, Turmeric Powder, Salt and Jaggery to the Tomato- Dhal water and allow it to boil for few minutes on a low flame.
  • Heat Sesame Oil/Ghee in a pan, lower the flame, splutter Mustard seeds, Curry Leaves, and Dry Red Chillies.
  • Saute Garlic cloves along with it.
  • Add Asafoetida to the above and give a quick stir.
  • Pour Tomato - Dhal mix to the seasonings and mix well.
  • Finally, add mashed Tuvar Dhal, Jaggery and mix well.
  • Switch off the flame, garnish with Coriander Leaves and immediately cover the Rasam bowl.
  • Serve Paruppu Rasam hot with Rice.

NOTES :

  • For more details on How to cook Beans, Lentils and Pulses, click here ... 
  • Add some extra water to the cook the Dhal for Rasam.
  • Seasoning Paruppu Rasam with Ghee gives a nice flavour to the dish, but it is truly optional.
  • Adding Jaggery also is purely optional.
  • Covering the Rasam bowl immediately after the seasonings are added is to retain and infuse the flavours into the Rasam.

PRISTINE POULTRY
KADAI CHICKEN MASALA
     Kadai/Karahi Chicken is nothing but a rich gravy cooked and served in a utensil called Kadai/Wok.  Kadai/Karahi is a Deep, heavy bottomed Circular pans used for cooking in India, Pakistan, Bangladesh and Nepal.  Slightly shallow pans of the same genre are found in other Southeast Asian countries.
    This method of cooking Chicken/Lamb is most prevalent in North India and Pakistan. Whereas the Pakistan version of this dish does not add Capsicums, but North Indian version is loaded with Capsicums(Bell Peppers).  The flavour of Bell Peppers induces a wonderful taste to this traditional Chicken Masala.  Freshly ground spice powders enhance the overall flavour of the dish.
     Can adjust the consistency of the gravy to suit along with the dish it is served with.  While preparing as a side dish for Rotis I usually prepare it with some gravy and add Cashew Paste/Fresh Cream.  But for Rice dishes, I make it slightly thicker than the above. For an elaborate vegetarian twist, this recipe can be prepared with Paneer, Mushrooms or Green Peas.


Cuisine : North Indian, Pakistani
Course : Side Dish
Difficulty : Medium
Serves : 6
Author : SM

Preparation Time : 15-20 Minutes
Cooking Time : 20-30 Minutes


HOW TO COOK KADAI CHICKEN MASALA / KARAHI MURG

INGREDIENTS :

Chicken - 500 Gms
Onions - 2 Nos.
Ginger-Garlic Paste - 4 Tbspn
Green Chillies - 5-6 Nos.
Tomatoes - 3 Nos.
Turmeric Powder - 1 Tspn.
Oil/Ghee - 3 Tbspns.
Fenugreek Seeds - 1/2 Tspn
Cashew Nuts - 10-12 Nos.
Salt - To Taste
Sugar - 1/2 Tspn


For Spice Powder :

Coriander Seeds - 1 Tbspn
Green Cardamom - 6-7 Nos.
Cloves - 6-7 Nos.
Peppercorn - 1/4 Tspn

To Garnish :

Coriander Leaves - Few
Kasuri Methi (Dried Fenugreek Leaves) - Few

METHOD :

  • Clean and Cut Chicken into small pieces.
  • Dry roast all the ingredients mentioned under the 'for the spice powder' until fragrant on a low flame and keep it aside.
  • Grind the dry roasted spices into a fine powder.
  • Puree the Tomatoes and keep them aside.
  • Heat oil/ghee in a pan, splutter Fenugreek seeds.
  • Saute Ginger-Garlic paste until fragrant.
  • Add finely chopped Onions and fry them until translucent.
  • Add 1/2 the amount of ground Spice powder, Turmeric, Red Chilli Powder, slit Green chillies and mix well.
  • Add Tomato Puree to the above Mix and give a quick stir.
  • Leave this on a low flame until raw flavour goes and oil separates from the curry.
  • Now add Chicken pieces, salt and enough water for the chicken to cook. 
  • Cover and cook until chicken turns soft and tender.
  • Add Capsicum slices and cook for few minutes.
  • Finally, add ground Cashew paste, Sugar into the gravy and leave it on a low flame for few minutes.
  • Finally, sprinkle the remaining freshly ground Spice Powder and give a quick stir.
  • Garnish it with Coriander Leaves and Kasuri Methi.
  • Serve hot with any type of rice dishes like Pulaos, Biriyanis or Steamed Rice.
  • Goes well with Roti, Naan, Kulcha, Parathas, Chappatis etc.,

NOTES :

  • Can marinate the chicken pieces with turmeric, red chilli powder, coriander powder and 2 Tbspns of curd for 30 minutes.
  • Dry roast the spices in order as I have mentioned in the list. (smaller spices tend to brown sooner) 
  • Adding freshly ground Spice Powder gives an enhanced flavour to the dish.
  • Adding Capsicum is optional.


SPINACH
SPINACH STIR FRY/BAYAM GORENG
      A simple Spinach Stir Fry / Bayam Goreng with very few ingredients and it can be cooked within minutes.  Maybe Spinach is rather a different green when seeking deep into what BAYAM is, I would like to call it - Asian Spinach.  Universally known as Amaranth Leaves, locally called as Bayam in Malaysia, Singapore & Indonesia. It is called as Thandu (Stalk) Keerai/Cheera(Green) in Tamil & Malayalam. And this is one ancient or first plant variety ever to be domesticated and grown for personal use. It has travelled a long way since civilizations to the present era.
      An easy to grow Green variety, which is available in shades of pink and green. We can get them at a very cheap cost in the market and the farmer's market is always loaded with bunches of fresh and luscious locally grown greens.  But growing these Greens in your backyard is another technique which can cater you with fresh leaves at your service, whenever needed.  It is more than enough that you buy the seeds once, they shoot up and grow into matured plants, flower up and give you a new batch of black coloured tiny seeds, which you can sow it again and again for fresh produce.
     Amaranth Leaves are popular around the world for its rich and nutritious values.  The most common green consumed in Asian countries is rich in Proteins, Vitamins and minerals like Iron, Calcium & Phosphorus.  The Red Variety of this green is more flavourful and nutritious compared to the Green variety. This recipe is a simple stir-fry with Garlic and Dry Chillies and slightly seasoned with Oyster Sauce/ Light Soy Sauce. Bayam is quickly stir-fried in high heat to retain its crunchiness, colour and nutrition.

Cuisine - Southeast Asian
Course - Side dish
Spice Level - Low
Difficulty - Easy
Serves - 4
Author - SM


Preparation Time - 5 Minutes
Cooking Time - 5 - 7 Minutes

HOW TO MAKE SPINACH STIR FRY / BAYAM GORENG


INGREDIENTS :

Bayam (Amaranth Leaves) - 1 Bunch
Dry Red Chillies - 3-4 Nos.
Garlic - 2 -3 Cloves
Sugar - a Pinch
Salt - To Taste
Cooking oil - 1 Tbspn
Oyster Sauce / Light Soy Sauce - 2 Tspns


METHOD :

  • Wash the greens and allow it to drain in a colander.
  • Cut them into long strands discarding the hard stalks and roots.
  • Heat the pan with oil over high heat.
  • Add Dried Red Chillies and toss them for few seconds until then fluff up.
  • Add minced Garlic and stir-fry for about 10 - 15 seconds till fragrant(should not be browned).
  • Toss in the Bayam along with a dash of Salt and a pinch of Sugar, stir-fry in quick strokes. 
  • When the Bayam starts to wilt, add Oyster Sauce/ Light Soy Sauce and give a quick stir.
  • Remove from fire and serve it immediately.
  • Goes well with plain fragrant rice or along with any rice/noodles recipe.

NOTES :

  • Do not add extra water to the dish.
  • Water from the Greens should be sufficient to keep them moist until cooked.
  • Do not cover the pan while cooking.
  • Stir fry the greens/ bayam on high heat for a short time.  This will retain its nutrients and keep them fresh, green and crunchy. 
  • Do not brown the garlic, as they would tend to give a bitter taste to the dish. 
  • Adding Sugar will help in retaining the colour of the vegetable.

PRAWNS
 SAMBAL UDANG /PRAWN SAMBAL


     If Prawns/Shrimps can be converted into an exotic dish, then it could be done with Prawn Sambal.  It is a common cooking method followed in Malaysia, Singapore and Indonesia.  Cooking Prawns in Sambal - which is nothing but an aromatic spicy Chilli paste with wonderful notes of locally available Aromatic herbs and spices. This recipe is a wonderful Malaysian Style Seafood recipe, a standalone dish in Malaysian households.
     Prawns being a delicacy at our household, I try new versions whenever I come across with a new recipe.  The first trial with a new recipe was Indonesian Prawn Curry, which I tried after eating at a famous native run seafood restaurant near our place. When I came up with Sambal Udang during another encounter at a local eatery. Though it looked like a normal Prawn Masala, it had some new flavours. I least had a clue what ingredients were used in it.
     During our initial years in Malaysia, I was even oblivious about the ingredients like Galangal, Belacan, Bunga Kantan, Daun Kesum, Daun Selasih etc.,  Gradually I started asking the vendors in fresh market what they were, but with my little knowledge of the language I always end up having a lot of information, unfortunately not understanding them.  But I make sure to catch up with one main information, the name of the herb. The funny part is I keep repeating it to remember, or immediately I would jot it down. The next thing I would do is to search for them on the internet.
     In due course, I started to try my hand with local cuisine and I am yet trying to perfect it in my best possible way.  I specifically love dishes with Lemongrass, Galangal and Kaffir Lime Leaves which gives a refreshing note to the dishes they are added into. This spicy Sambal Udang is one dish we can hardly resist. It pairs well with steamed Jasmine Rice and needless to say that it goes perfectly well with Nasi Lemak.

Cuisine : South East Asian
Course : Side Dish 
Spice Level : High
Difficulty : Medium
Serves : 4
Author : SM

Preparation Time : 20 - 30 Minutes
Cooking Time :  20 - 30 Minutes

INGREDIENTS:

Prawns/Shrimps - 500 Gms
Onions - 1 No.
Oil - 3 Tbspns
Tamarind - 2 Tspn
Salt - To Taste
Palm Sugar (Gula Melaka) - 3 Tspns

For Sambal Paste :

Dry Red Chillies - 10-12 Pieces.
Birds-eye Chillies - 5-7 Pieces
Shallots - 10 Nos.
Garlic - 3 Cloves.
Lemongrass/Serai - 2 Stalks
Fresh Turmeric Root - a Small Piece
Dry Shrimp Paste(Belacan) - 2 Tspns


METHOD :

  • Soak the Dried Red Chillies in hot water for 20-30 minutes until they are soft.
  • Dry roast the Shrimp paste (Belacan) until fragrant.
  • Grind soaked Dry Chillies, Roasted Shrimp Paste, Birds Eye Chillies, Garlic and Shallots into a smooth paste.
  • Cut Lemon Grass Stalks into small pieces, use just the white part of it.
  • Can Grind Lemon Grass along with the Sambal ingredients, or just bruise them and add it while sauteing.
  • Peel, devein and wash the Prawns and keep it aside.
  • Heat oil in a wok and saute the ground Sambal paste on a high flame for about 10 minutes or until all moisture evaporates.
  • If the mix is a bit dry, add some more oil and saute them on a low flame for another 5-10 minutes or until oil separates from the mix.
  • Now add Prawns to the Sambal and mix well. 
  • Add Salt, Palm Sugar and mix well.
  • Cook this in low flame until Prawns are cooked.  Can add some water at this stage.
  • Once the prawns are cooked, add tamarind extract and boil it for another 5 minutes on a low flame.
  • At this stage, the Sambal turns fragrant, if not saute it for some more time on a low flame.
  • Finally, add the onions cut into rings and give a quick stir.
  • Leave this on a low flame for few minutes. 
  • Serve hot Udang Sambal with steamed rice, fried rice or nasi lemak.

NOTES :

  • I used the long- wrinkled variety which is less spicy. To reduce the spiciness can snip off the soaked dry chillies into two and de-seed them. 
  • Adjust the number of Chillies to suit your spice preference.
  • Blend the Shallots coarsely.
  • I usually bruise the Lemon grass stalks and add it to the Sambal mix while Sauteing, because grinding it along with Sambal mix ends with Lemongrass strands all over.
  • Grind the paste with less water to avoid splattering while sauteing the Sambal in high flame.
  • Adding the onions cut into rings gives a good texture to the sambal.
  • Can add few Petai(Stinky Beans) along with Prawns.
  • Substitute Sugar instead of Palm sugar.
  • Can add Turmeric Powder to the Sambal Paste instead of Fresh Turmeric Root.
SPICE POWDERS
GARAM MASALA

  GARAM MASALA -  A potpourri of spices created into an aromatic blend. It is considered to be one of the must have  Spice Mix in every Indian Kitchen, and an unavoidable Masala in traditional Indian Cuisine. Garam Masala means 'Hot mixture of Spices', where Garam means 'Hot' in Hindi. This pungent Mixture has gained its popularity for the warming/heating nature of the spices and also in increasing the body's metabolism.
     Authentic to North Indian Cuisine, with the history of its usage during winters to warm up the body. In due course, it gained popularity in Indian Cooking during the Mughals. Mughlai Cuisine renown for its extensive use of flavours and richness incorporated Garam Masala in most of its dishes. Since Mughals, the flavour and fragrance of the Masala have spread its hands to every nook and corner where Indian food is cooked.
      The ingredients in the preparation of this particular Masala varies according to region and cuisine across India.  Even it takes its twist and turn to suit personal taste.  Keeping most of the ingredients common, various combinations are tested and tried to suit regional variations and also there are special types of mixes created individually to suit Lamb, Chicken, Fish and Vegetable dishes. But I feel every combination sticks to keep up its nature and turns out be perfect and authentic.
      The beauty of Spices is that they maintain their flavours and get more and more infused when mixed together.  Choose the fresh and good quality of whole spices for this masala.  Perfectly mixed spices will yield the most flavourful Garam Masala. And the major factor to get the flavours as new as it is every time you use is to store them in airtight containers kept away from heat, sunlight and moisture. If you get everything right, then it will stay good for months.
     Some recipes just call for combining and grinding the spices without roasting them. The spices are carefully combined and blended to achieve a balanced flavour. If a single flavour has to be emphasized for a particular dish the spices are roasted and ground. While dry roasting the spices add the biggest spice first followed by the next in size and so on.  So that the biggest spices are cooked for a long time bringing out the volatile oils.  This process releases the flavours and aromas of the spices making the dish more desirable.

Cuisine : Indian
Recipe Type : Spice Powder
Spice Level : Medium
Difficulty : Easy
Yields : 200 - 250 Gms
Author : SM

Preparation Time : 5 -7 Minutes
Cooking Time : 5 - 10 Minutes

INGREDIENTS :

Coriander Seeds - 1/2 Cup
Cumin Seeds - 1/4 Cup
Peppercorns-1 Tbspn
Cinnamon  (1" Piece) - 8-10 Pieces
Cloves - 2 Tbspn
Green Cardamoms - 10 - 12 Pods
Bay Leaf - 10 Leaves
Dry Ginger (1" Piece) - 2 Nos.
Nutmeg - 1/2 Tspn
Rock Salt - 1/2 Tbspn


METHOD :

  • Dry roast all the ingredients one by one (starting from bigger ones followed by the next in size) in a very low flame until they are totally dry and fragrant.
  • Do not roast Dry Ginger and Nutmeg.
  • Roast Cumin Seeds until they pop, in a very low flame.
  • Roast all the spices until they turn aromatic and keep them aside.
  • Allow the ingredients to cool.
  • Finally, add Dry Ginger, Nutmeg and Rock Salt to the above ingredients.
  • Grind them into a smooth powder in a coffee grinder or in a mixer-grinder.

NOTES :

  • Can dry the ingredients in sun, but it is totally optional.
  • Care should be taken not to burn the ingredients.  It would totally spoil the taste of the spice powder.
  • Roast all the ingredients in a very low flame starting from bigger ones followed by the next in size.
  • If making a big batch can grind it in a mill.(if the facility is available in your neighbourhood).
  • If grinding at home, do not overload the mixer.  Grind them in small batches and mix them together finally.
  • Store the ground Masala in an airtight container in a dry place away from heat and sunlight.
  • Do not use a wet spoon or wet hand while using the powder.
  • Proper storage and handling will increase the shelf life of the Masala.
  • Garam Masala can be used in the preparation of Indian dishes, particularly North Indian Curries and Subzis. It can also be used in Vegetable Pulao or in Biriyani.
  • It can be used in Butter Chicken, Green Peas Masala, Vegetable Korma, Chicken 65, Chicken Tikka Masala etc.,

 Health Benefits of Garam Masala :

      In Ayurvedic medicine, Garam Masala has been used for centuries to treat a number of common health issues as well as in the promotion of overall good health.
  • Reduces bloating
  • Fights bad breath
  • Staves off disease
  • Boosts the immune system
  • Aids in detoxification
  • Acts as an effective pain killer
  • Lowers blood sugar levels
  • Slows the ageing process
  • Relieves gas & heartburn
  • Soothes upset stomach
  • Promotes weight loss
  • Increases the body’s ability to absorb vitamins, minerals & other nutrients
  • Increases metabolism
  • Warm up the body
PICKLES
NYONYA ACHAR / PERANAKAN MIXED VEGETABLE PICKLE
     
      As vibrant as Nyonya Culture is this Fragrant, Flavour filled and all the more Colourful Nyonya Achar (Pickle).  This pickle is unique to the Peranakan Culture of Singapore and Malaysia.  A culture developed through ages due to the marriage between immigrant Chinese settlers and indigenous Malays.  The culture has a beauty and elegance of its own, their traditions, architecture, dress codes, porcelain wares and above all the crowning result of two different culture is its Nyonya Cuisine which is the best out of both the worlds!  A perfect mixture of two cultures - Chinese cooking style with locally available produce.  The culture also reflects a slight Portuguese influence.
     This Peranakan Mixed vegetable Pickle/ Nyoya Achar is one of the favourite appetizers in South East Asian Cuisine especially in Malaysia, Singapore and Indonesia. It is a Pickle with a great combination of Crunchy Vegetables and Pineapple along with the exquisite flavours from toasted Chillies and Spices. Needless to say the dramatic effect of tarty Sweetness, tickling Tanginess and fiery Spiciness it renders into your taste buds. It's a treat to your eyes and your senses. The fermentation process in an Achar makes it even a healthier substance in a meal which helps in digestion.
      This pickle tastes better after two to three days, but keep them refrigerated.  I nearly ended up eating few spoons as soon as it was ready- my utter temptation and my love for pickles got me into a frenzy.  But it tasted better the next day.  Just a cup of fragrant rice and few teaspoons of Nyonya Achar can be converted into a complete meal. Goes well with Malaysian delicacy NASI LEMAK too.
      Being an Indian, I have always felt pickles should be Salty, Tangy, Spicy and Oily and above all, it should be Red and fiery to the look.  Salted and vinaigrette pickles have been there in our pantry, but not devoured and relished as the spicy ones.  The taste and flavour of NYONYA ACHAR are so intense that I would crown it as one of the Best Pickles I have ever had.

Cuisine - Peranakan (Malaysian, Southeast Asian)
Recipe Type - Pickle
Spice Level  - Medium-High
Difficulty - Easy
Yields - 2- 21/2 Cups
Author - SM

Preparation Time - 15 - 30 Minutes
Maturing Time - 1 Day
Cooking Time - 20 - 30 Minutes


HOW TO MAKE NYONYA ACHAR / PERANAKAN MIXED VEGETABLE PICKLE


INGREDIENTS :

Cucumber - 1 Medium sized
Carrot - 1 No.
Long Beans - Few
Fresh Pineapple - 3/4 Cup
Rice Wine Vinegar - 1/4 Cup
Salt - 1 Tspn
Sugar - 2 Tspn
Water - 1/2 Cup


For the Rempah (Spice Paste) :

Shallots - 5-7 Nos.
Garlic - 2 Cloves
Ginger - 1/2" Piece
Fresh Turmeric - 1 Small Piece
Dry Red Chillies - 2-3 Nos.
Red Bird's Eye Chillies (Chilli Padi) - 5-6 Nos.
Belacan (Dried Shrimp Paste) - 1 Tbspn
Buah Keras ( Candlenuts) - 2 Nos.

To Saute and Mix :

Oil - 3 Tbspn
Salt - 1-2 Tbspn
Gula Melaka/Palm Sugar - 3 Tbspn
Rice Wine Vinegar - 1/4 Cup


METHOD :

  • Cut Cucumbers into thin strips, sprinkle a teaspoon of salt over it and leave it aside for about 15-20 minutes.
  • Clean, Peel and Cut Carrots into thin strips.
  • Cut Long Beans into 1' long pieces.
  • Boil Rice Wine Vinegar along with 1/2 Cup of Water, a dash of Salt and a teaspoon of Sugar. 
  • Blanch Carrots and Long beans in the vinegar mix for a few minutes.
  • Remove the vegetables from the vinegar mix and allow them to dry on a clean kitchen towel.
  • Squeeze the Cucumber to remove any excess water and dry them along with the other vegetables.
  • Cut Pineapples into thin strips and keep it aside.

For the Rempah (Spice Paste) :

  • Soak Dried Red Chillies in hot water for 10 minutes.
  • Heat a pan and Dry Roast Belacan(Dried Shrimp Paste) until aromatic.
  • Grind it along with other ingredients mentioned under 'for the Rempah' into a fine paste.
  • Heat Oil in a pan and saute the Rempah Paste on a low flame until oil separates from the mix and it turns aromatic for about 10-12 minutes.
  • Add Rice Wine Vinegar, Salt and Palm Sugar to the spice paste and mix well.
  • Saute it until the spice paste turns a bit dry.
  • Switch off the flame and add the vegetables and pineapples to the above and mix well.
  • Can add toasted Sesame seeds to the pickle if preferred.
  • Store them in clean and dry Porcelain/Glass/Ceramic Jars.

NOTES :

  • Blanching, drying and squeezing process, gives a crunchy texture to the vegetables.
  • Adjust the salt and chillies as per your taste preference.
  • Can substitute Red Chilli Powder instead of Chillies and Turmeric Powder instead of fresh Turmeric. 
  • Can use canned pineapple for the recipe. 
  • Initially, the spice paste wouldn't be enough to cover all the vegetables.
  • Next day press the pickle well into the jar and mix well, the pickle tends to ferment by time and release some water.
  • Also, the vegetable gets soaked up well into the spices and releases a perfect blend of flavours.
  • Avoid using steel/aluminium/copper containers for storing the pickles, as they tend to react with the acidic nature of salt and vinegar
  • Store them in clean and dry Porcelain/Glass/Ceramic Jars.
  • Always use clean & dry spoons(preferably wooden spoons) for the pickle.
  • Wet Jars/spoons can spoil the pickles as the moisture in them helps in the growth of Fungus.
  • Allow it to cool completely before storing it into sterilized bottles. 
  • Refrigerate the pickle.  It can stay good even with less oil and preservatives. 


CHUTNEY/SPICY CONDIMENT
CHUTTARACHA THENGA CHAMMANTHI


     Chuttaracha Coconut/ Thenga Chammanthi is a South Indian spicy dry chutney or condiment, a speciality common in North Malabar(KERALA). Coconut and spices are dry roasted in a pan and ground to a paste, mostly a thicker one, locally known as Uruttu Chammanthi/Chuttaracha Chammanthi. It is usually served with cooked rice at lunch and dinner, or along with hot-hot Rice Gruel/Porridge(kanji). Ingredients for making this Coconut chammanthi can vary from region to region. Generally, the ingredients are grated Coconuts, Dried Red Chillies, Shallots and Ginger/Garlic. Other optional ingredients include tamarind, curry leaves, coriander seeds/powder etc., For a twist, some add Dry Shrimps or Dried Fish into it.
     Chuttaracha means Roasted and then Ground and Uruttu means rolling the ground ingredients into a ball. So this Spicy Dry Chutney is called Chuttaracha Chammanthi and Uruttu Chammanthi colloquially. This is a must have condiment in a Kerala household.  One of the best and all the more unavoidable accompaniment served with rice-gruel/porridge(Kanji).
    Coconut is one of the main and major ingredients in almost every dish in Kerala, it's mainly because of its availability locally.  No wonder the State is named Kerala, where 'Kera' means 'Coconut'.  Traditionally the ingredients for this Chammanthi is roasted directly over the flame, slowly and carefully without burning them and then, they are ground in an Ammikkal (A flat stone) and rotund round stone called Kozhava to grind the ingredients).  Grinding them traditionally in a Stone mortar and Pestle, brings out the natural oil from the ingredients, making them tasty and nutritious.
    But in this busy world, I wonder how many households still use this ammikkal, if at all we have them at home, we don't find time and patience to grind in them.  My husband is a big fan of curries and chammanthis ground in ammikkal.  But the irony is I don't have one here in Malaysia and the funny part is, I have never or specifically couldn't master the art of grinding in an Ammikkal.

Cuisine - Kerala (South India)
Recipe Type - Condiment
Spice Level - Medium - High
Difficulty - Easy
Serves - 3- 4
Author - SM


Preparation Time - 5 Minutes
Cooking Time - 5 - 7 Minutes


You can find more recipes from GODS OWN COUNTRY - KERALA  click here...


INGREDIENTS :

Coconut - 1 Cup
Dry Red Chillies - 8 Nos.
Shallots - 6 Nos.
Curry Leaves - 1 Sprig
Ginger - 1 Small Piece (Optional)
Tamarind - 1 Small Lime Size
Salt - To Taste
Oil - 2 Tbpsn


 METHOD :

  • Heat Oil, roast the Dry Red Chillies until they fluff up.
  • Add Shallots and saute it until they turn translucent in a very low flame.
  • Add Curry leaves, Ginger, grated Coconut and fry until coconuts are dry and turn into a slight golden colour. (Care should be taken not to burn the ingredients).
  • Add Tamarind and Salt to the above ingredients, fry until they are dry.
  • Allow this mixture to cool.
  • Grind it into a smooth paste in Mortar and Pestle or in dry blender jar.
  • Do not add water while grinding. 
  • Roll the ground ingredients into a ball and serve.
  • It's a perfect match for Kanji(rice gruel/porridge) or serve it along with Kerala Rose Matta Rice. 
  • Goes well with Dosa, Idli and Vellayappam too.

Notes :

  • Can also do this with coconut slices.  If using coconut slices, roast them first, as they will take a longer time to fry. Then add the rest of the ingredients one by one.
  • Adjust the amount of Red Chillies and Tamarind to your preference. 
  • Tamarind Paste serves best for the recipe.
  • If using normal tamarind, remove seeds and threads if any and shred it into small pieces and add it into the mix. Do not soak Tamarind in water for this recipe.
  • Traditionally all the ingredients are dry roasted over direct flame and finally, tamarind and salt is added along and ground to a thick paste.
  • This is a dry chammanthi, grinding it with mortar and pestle (Ammikkal) yields best results.
  • Can use a small blender(mixer-grinder) to grind this too, if needed can add few drops of water to the mixture.
  • Roll the ground ingredients into a ball and serve. 
  • If preferred, drizzle few drops of coconut oil over the Chammanthi.


Newer Posts Older Posts Home
Search Essence of Life - Food

I Me Myself

A vintage-style horizontal oval frame showcasing ornate silver spoons on a dark rustic surface

Essence of Life - Food is all about daily cooking with a simple sense of taste and health. It is all about food. Not a day goes by without eating for most of us, so what we eat matters on the whole. Food in the mode of goodness increases the duration of life, purifies one's existence, and gives strength, health, happiness, and satisfaction. Above all ingredients, the most vital one in my kitchen is love.

Sm @ Essence of Life - Food

Popular Posts

  • Kizhi Parotta: Kothu Parotta and Salna Wrapped in Banana Leaves
  • Kerala Sadhya Vibhavangal: Ultimate Guide to Traditional Onam & Vishu Sadhya
  • Nannari - Indian Sarsaparilla Roots
  • How to Make Kerala Kanji | Traditional Rice Porridge with Payar, Chammanthi & Achar
  • Brewing Authentic Malaysian Kopi: A Step-by-Step Guide to Mastering the Art of Kopi Making
Ebook - What I Cook - For Onam

Ebook - “What I Cook - For Onam”

Amazon.com/dp/B0CGPVY6J3

Indulge in Kerala’s Culinary Heritage: Traditional Onam Sadhya Recipes, with Expert Serving Tips! Celebrate Onam the authentic way! Discover 25 timeless Kerala Sadya recipes in my ebook. From avial to payasam, bring home the flavours of tradition. Available now on Amazon!

Essence of Life

Subscribe & Follow

© 2026 | Essence of Life - Food

  • Home
  • Ask First
    Please note that all rights for the photographs and texts on this blog, unless otherwise mentioned, rests with the author. Please do not use without permission.
  • Privacy Policy