Essence of Life - Food
  • Home
  • From My Kitchen
    • Heirloom Recipes
    • From God's Own Country
    • Sadhya
    • Kongu Cuisine
    • Chettinaad Cuisine
    • South East Asian
    • Around the World
  • Ebook
  • I Me Myself


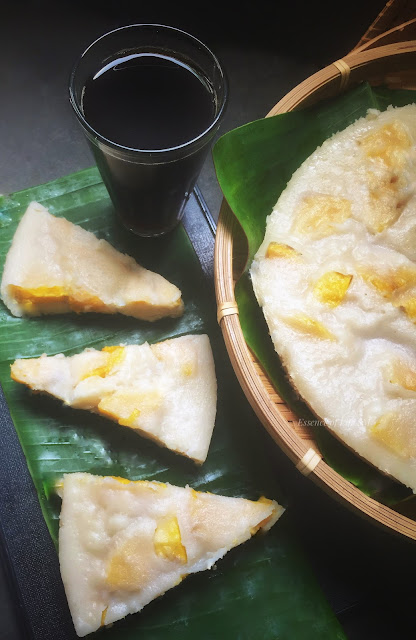
Steamed slices of Nendhra Pazha Appam placed on a banana leaf, served alongside a glass of black coffee in Kerala-style presentation.
Traditional Nendhra Pazha Appam

"Nendhra Pazham Appam: A Heart-Warming Snack from Our Family Recipe Book"

    Nendhra Pazham Appam is a traditional Nadan Palaharam (snack) that's deeply rooted in our family’s culinary treasure chest. This mildly sweet appam, made with rice flour, slices of Nendhra banana, ground coconut paste, coconut milk, sugar, and cardamom, is a treat that’s as comforting as it is simple. Perfect for tea time, this snack brings together the deliciousness of appams and the rich, distinctive flavour of Nendhra Pazham. If you're a fan of both, this snack is sure to delight your taste buds with its humble yet satisfying taste.

Why You’ll Love This Recipe

  • Quick & Easy: Uses basic ingredients and minimal preparation time.
  • Family Heirloom: A cherished recipe passed down through generations.
  • Customisable: Works with homemade or store-bought rice flour.


    Love Nendhra Pazhams a delightful banana variety, then explore a  few more Nendhra Pazham Recipes here... and don't miss the Pazham Pori Recipe too..


Perfect for Tea Time: Kerala’s Nalumani Palaharam

    In Kerala, tea time is more than just a break – it's a ritual. We call it Nalumani Palaharam, which translates to the "4 o'clock snacks." Every region has its own take on teatime snacks, but Kerala's wide variety of Nadan Palaharangal (local snacks) really stands out. While some of these snacks have made their way into local bakeries and stores, many still remain hidden in the kitchens of families, passed down through generations. This Nendhra Pazha Appam is one such gem.


If you are a fan of Kerala Nadan Palaharams, then please do try recipes like Kozhukatta, Unniyappam and Ela Ada


The Secret Ingredient: Love from My MIL’s Kitchen

    When you’ve got overripe Nendhra Pazham (plantains) lying around, this is the perfect recipe to use them up! It’s a snack my mother-in-law (MIL) often makes, and I’ve seen her whip it uptime and again. It's one of her specialities that I absolutely adore. Today, as a special tribute to her on her birthday, I’m sharing her Nendhra Pazha Appam recipe, just as it’s written on her handwritten recipe card.

    A big thank you to Amma for passing down this heirloom recipe to me. I'm thrilled to share it with you all today!


Handwritten recipe card for Nendhra Pazham Appam, passed down through generations, showcasing the original notes by my mother-in-law Omana Jacob.
à´¨േà´¨്à´¤്à´° പഴ à´…à´ª്à´ªം - Recipe Credit: @ ഓമന à´œേà´•്à´•à´¬്

Nendhra Pazham Appam: A Hidden Gem from Our Family Kitchen

    Every family has its own set of cherished recipes – those beloved snacks, sweets, and savouries that have been passed down through the years. These recipes might not be widely known, but they are always treasured family favourites. Nendhra Pazham Appam is one such recipe from our heirloom collection, and alongside it, we have our iconic Nadan Palaharam – the so-called “Ball.” Over time, I plan to share more of these hidden gems from our family kitchen and invite anyone reading this to share their own favourite family snacks. I’d love to try them and post about them here!


Explore a wide range of Traditional Kerala Snacks alias Kerala Nadan Palaharam Recipes here...


Nendhra Pazha Appam Recipe Overview

  • Cuisine - Kerala (India)
  • Recipe Type - Appam
  • Difficulty - Medium
  • Serves - 3-4
  • Author - SM

Time Estimate

  • Preparation Time - 15-25 Minutes
  • Cooking Time - 20 -30 Minutes


    Explore More! For more recipes from our Family Repertoire, click here.


How to Prepare Nendhra Pazha Appam: A Step-by-Step Guide

Triangular slices of Nendhra Pazha Appam neatly arranged on a banana leaf, with a bamboo steamer and appam in the background.
Nendhra Pazha Appam on Banana Leaf

Ingredients: The Simple Staples for Nendhra Pazha Appam

For Nendhra Pazham Appam Batter:

  • Rice Flour (Idiyappam/Appam Flour) – 2 Cups
  • Nendhra Pazham (Banana) – 1 Cup
  • Thick Coconut Milk – 1 Cup
  • Thin Coconut Milk – 3 Cups
  • Sugar – 3 Tablespoons
  • Cardamom Powder – 1/2 Teaspoon
  • Salt – a Pinch


    Protip: If you can’t find Nendhra Pazham, you can substitute it with regular ripe bananas for a similar texture and taste.


Method : Step-by-step Instructions 

Prepare the Coconut Milk (or Ground Coconut Paste)

  • For Coconut Milk: Extract thick and thin coconut milk and keep it aside. [Click here for a detailed step-by-step process on How to Make Coconut Milk]
  • For Ground Coconut Paste: If you're using ground coconut paste, grind 1 Cup of grated coconut along with cardamoms into a smooth, fine paste.


    Protip: Whether you're using coconut milk or ground coconut paste, the process is fairly straightforward. Use freshly grated coconut for the best flavour and texture in your appam.


    Tight close-up shot of Nendhra Pazha Appam slices, showcasing the soft texture, rice flour base, and banana pieces embedded within the appam.
    Close-Up of Nendhra Pazha Appam

Prepare the Nendhra Pazham

  • Wash and peel the Nendhra bananas. Cut them vertically into quarters and then slice them thinly.

Mix the Batter

  • In a large mixing bowl, combine the rice flour, thin coconut milk/water, sugar, cardamom powder, and a pinch of salt. Mix well until smooth.
  • Gradually add the thick coconut milk/ground coconut Paste, mixing until you get a thick batter, similar to idli batter consistency.
  • Gently fold in the sliced Nendhra bananas, being careful not to mash them. Quick, gentle movements will keep the banana slices intact.


    Protip: Gently mix the batter without exerting pressure to preserve the banana slices. Quick, light movements will keep the bananas intact and prevent them from mashing into the batter. We want those beautiful slices to shine in the appam!


How to Steam Cook the Nendhra Pazha Appam

Close-up of Nendhra Pazha Appam slices served on a banana leaf with black coffee, highlighting the appam’s soft texture and banana pieces.
Kerala-Style Nendhra Pazha Appam


    Now, let’s steam cook the batter into a delicious appam. You can choose between a traditional steamer or a pressure cooker.

Steaming in a Steamer:

  1. Fill the steamer with 1–2 cups of water and bring it to a boil.
  2. Grease your appam mould with coconut oil or ghee.
  3. Pour the batter into the mould, spreading it evenly.
  4. Place the mould in the steamer and cover it. Steam on medium heat for 20–30 minutes, or until the appam is cooked through.
  5. Check doneness by inserting a wooden skewer through the centre of the appam. If it comes out clean, the appam is ready.
  6. Let it cool for 5–10 minutes before gently removing it from the mould.


Steaming in a Pressure Cooker
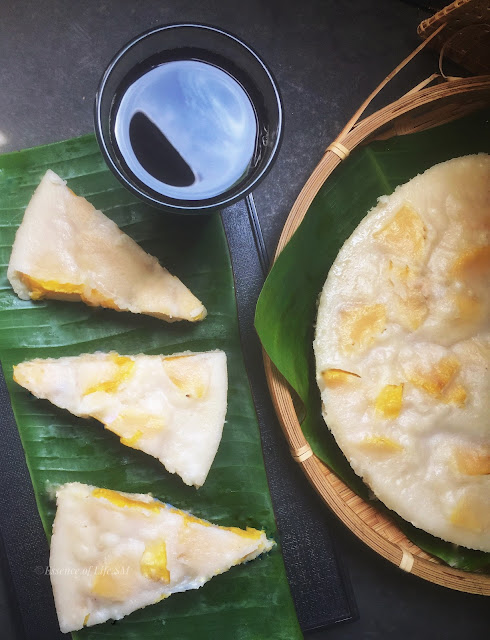
Close-up of Nendhra Pazha Appam slices served on a banana leaf with black coffee, highlighting the appam’s soft texture and banana pieces.
Kerala-Style Nendhra Pazha Appam from our Family Repertoire

Alternatively, Nendhra Pazha Appam can be steam cooked in a Pressure Cooker:

  1. Fill the pressure cooker with 1–2 cups of water and bring it to a boil.
  2. Grease your appam mould with coconut oil or ghee.
  3. Pour the batter into the mould, spreading it evenly.
  4. Place a grid inside the pressure cooker and place the mould on it.
  5. No need for a pressure regulator; simply steam the appam on medium heat for 20–30 minutes.
  6. Check the appam for doneness using a skewer, and once done, remove it from the cooker.
  7. Let it cool for 5–10 minutes before gently removing it from the mould.


    Protip: For an even, soft texture, keep the flame on medium throughout the steaming process.

Serving Suggestions

  • Nendhra Pazha Appam is best enjoyed as a Naalu Mani Palaharam (tea time snack) but also makes for a satisfying breakfast. 
  • Serve it hot, fresh, and ideally with a cup of strong Kerala-style Black Coffee - Kattan Kaapi or Black Tea - Kattan Chaya or Masala Chaya (Masal Tea) for the ultimate experience.


    Love Kerala Style Traditonal Appam Recipes, explore through a wide range of Appam Varieties here...
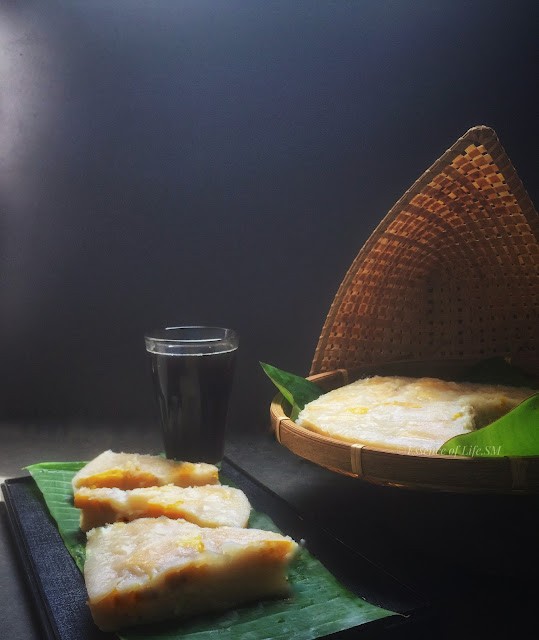
 

Close-up shot of Nendhra Pazha Appam and slices, showcasing the soft texture, rice flour base, and banana pieces embedded within the appam.
Nendhra Pazha Appam

Notes for a Perfect Nendhra Pazha Appam

  • I used ready-made Idiyappam Flour for convenience.
  • The batter should be slightly thicker than regular pancake batter (think idli batter consistency).
  • Adjust the coconut milk and water ratio based on the type of rice flour used. Some rice flours absorb more liquid than others.
  • Don’t rush the steaming process. A medium flame ensures even cooking without burning.
  • You can adjust the sugar based on your preferred level of sweetness.


    Pro Tip for Perfection: If you have leftover batter, store it in the fridge for up to 2 days. The appams will be just as delicious when steamed fresh!


Frequently Asked Questions (FAQ) for Nendhra Pazha Appam Recipe

Can I use other types of bananas for this recipe?

  • Yes! While Nendhra bananas are ideal for their firmness and sweetness, you can substitute them with other varieties like Poovan or regular bananas. Keep in mind that the texture and sweetness may vary.

Is this recipe vegan?

  • Absolutely! The recipe is naturally vegan as it uses coconut milk and does not include any dairy products. It’s perfect for a plant-based diet.

How can I adjust the sweetness of the appam?

  • For a sweeter version, increase the sugar quantity. For a less sweet appam, reduce the sugar or add a pinch of salt to balance the flavours.

Can I use jaggery instead of sugar in this recipe?

  • Definitely! You can replace sugar with jaggery for a more traditional and earthy flavour. Melt the jaggery in a little water, strain to remove impurities, and use it as a substitute in the same quantity as sugar.

Can I add other spices to enhance the flavour?

  • Certainly! While cardamom is the traditional spice used, you can experiment with cinnamon, dry ginger powder, or even a touch of nutmeg for a unique twist.

    This Nendhra Pazha Appam is a simple yet delicious recipe that captures the essence of Kerala's tea-time snacks. By incorporating ingredients that are both easy to find and rich in tradition, this recipe brings a touch of nostalgia and warmth to every bite. Perfect for family gatherings or a quiet tea break, this appam is sure to become a favourite in your kitchen too. 
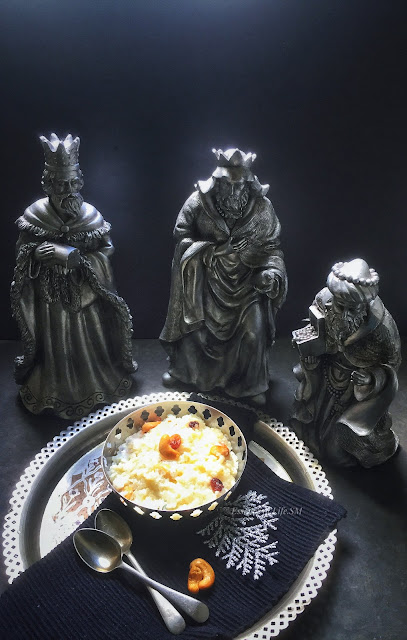


Moonu Raja Pongal - Three Kings & A Classic South Indian Dessert

Moonu Raja Pongal - Three Kings & A Karaikkal Classic South Indian Dessert

Discovering the Tradition of Moonu Raja Pongal for Epiphany: A South Indian Surprise


    I have to admit, I was a complete novice when it came to the tradition of making Pongal for Epiphany. A few years ago, I stumbled upon a television programme that shed light on the unique celebration of Epiphany by the people of Karaikkal and Pondicherry, the charming French town in India. To say I was intrigued would be an understatement! Imagine my surprise when I learned that there was a dish crafted specifically to mark the day—a recipe that was as traditional as it was uniquely South Indian. Who knew that humble ingredients like raw rice, coconut milk, and sugar could hold such significance?

      ↓ JUMP TO RECIPE  

wo glasses of homemade apple wine, glowing with a golden hue, set against a backdrop of fresh apples and a bottle of apple wine.
Homemade Apple Wine - A Golden Pour

Welcome the New Year with a Toast: Homemade Apple Wine Recipe

    As we step into another glorious year, let's raise a toast to new beginnings with my delicious homemade Apple Wine! There's something magical about crafting your own wine, and this year, my Apple Wine is ready to add a touch of warmth and cheer to your celebrations.

      ↓ JUMP TO RECIPE  


Traditional Kerala  Homemade Wine with Christmas Fruit Cake, Rich with Fruits and Spices
Christmas Bliss - Fruit Cake & Homemade Wine

Why Kerala is the Ultimate Destination for Christmas and New Year Celebrations

     If there's one place I always dream of visiting during the festive season, it’s Kerala — especially during Christmas or Onam. The charm of Kerala's celebrations is undeniable, and it truly feels like "home" no matter where I am in the world. After all the travel restrictions and the pandemic, I’ve found myself missing India more than ever. As my husband often says, “The true spirit of Christmas can only be felt once you step into God’s Own Country.”

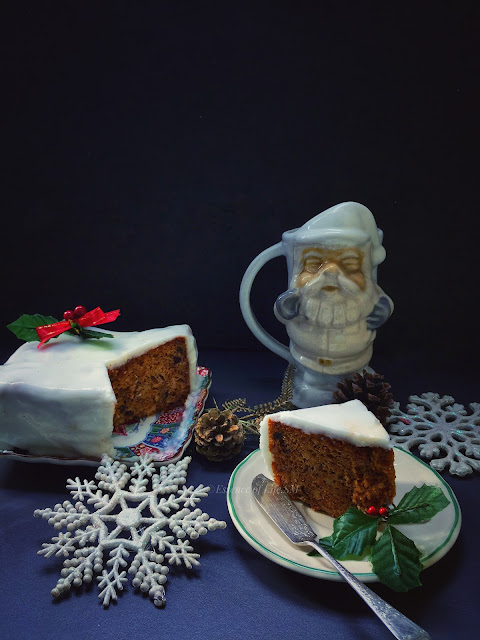
A Christmas fruit cake covered in royal icing, served with festive decorations like pinecones, holly leaves, snowflakes, and a Santa-themed mug in the background.
Festive Christmas Fruit Cake with Royal Icing

Christmas Fruit Cake | Kerala Plum Cake with Royal Icing - A Festive Delight You Can’t Miss!"

A Christmas Tradition Passed Through Generations

    The aroma of caramelised sugar and spices wafting through the house signals the arrival of Christmas. For my family, this isn’t just baking—it’s a legacy steeped in culture and tradition.  Making Christmas Fruit Cake, also known as Rich Fruit Cake or Kerala Plum Cake, is more than just a recipe in our household — it’s a heartfelt tradition. Married into a Christian family with roots in the culturally rich Cochin - Fort Cochin, influenced by Portuguese heritage, I embraced this legacy with open arms. Being a devoted daughter-in-law, I strive to perfect family recipes, ensuring they are preserved for the next generation. Many of these traditional recipes, featured on Essence of Life - Food, are my way of ensuring our family’s culinary traditions live on.

      ↓ JUMP TO RECIPE  

COOKIES
SUJI COOKIES

      School days & School bus hold quite a lot of memories to me.  Even my final year of schooling and the school bus holds a life-changing story. But this write-up is all about the memory of goodies or the so-called Bakery favourites, so synonymous to those days.

    Every evening after school, I used to come back home by School Bus.  The routine happened until I finished my Secondary School.  It was a routine that my brother & I followed which has loads of trailing nostalgic memories.  My mom meticulously walks all the way to the Bus stop(which was just a street away from our house) to pick us up. The highlight of this story is the Bakery(Krishna Bakery) in the Bus Stop. Most of the days she would cook some Snacks for us, but even then my Brother would ask whether he can buy something from the Bakery.  The time would be so apt that the Bakery would be stacking up with fresh & hot bakes(right from the oven) which would equally appeal to my mother.    

    Each day we would buy something like Puffs, Cakes, Coconut Bun, freshly baked hot Milk Bread etc.,  I have always loved their variety of Cookies(Butter Biscuit, Coconut Biscuit, Salt Biscuit etc., & etc.,).  When I started baking I had always wanted to replicate those cookies rather than anything else.  Mainly my favourite were those cube-shaped Butter Biscuits - white, soft with a melt-in-mouth texture.    

    But when I tasted a similar Cookie from a local Bakery in JB, I instantly fell in love with it.  And  they were sold in the name of Suji cookies. Suji Cookies with variations like Cashew Suji Cookies, Almond Suji Cookies and plain Suji Cookies.  Then my next step began by searching for the recipe.  To my dismay, I never found any Suji in the ingredient list/(Suji in Hindi means Semolina), which made me search and research to find a perfect recipe.  This recipe is adapted from a Singapore based Travel & Food Blog Miss Tham Chiak.  This Suji Cookies just nailed me down with its perfection. If the Cookie is prepared without any addition of Nuts, then it tasted quite similar to my favourite bakery-style Butter Biscuits. I have already published Cashew Suji Cookies, Almond Suji Cookies recipes earlier here in the blog.
     

COOKIES
SUJI COOKIES

    Suji Cookie is an easy make cookie recipe with simple ingredients. These Suji Cookies are an utter treat with a light, crumbly & melt-in-mouth texture.  And above all, it has a wonderful nutty aroma, which comes mainly from GHEE. Ghee makes a lot of difference in these cookies.  These are absolute festive favourites and also best suits to be served as a Tea Time Snack.  This is a remarkable cookie recipe - the one & only Suji Cookies, which is my benchmark when it comes to Bakery goodies. My ultimatum achieved in search of perfect Bakery style butter cookies alias Butter Biscuits.

     Please do read all the tips & tricks given under the "NOTES" section below for perfectly textured, round, white coloured Suji Cookies.


For more COOKIE RECIPES, Click here...

Recipe Type - Cookies, Snacks
Difficulty - Easy
Yields - 12 - 15 Cookies
Author - SM

Preparation Time - 10 -15 Minutes
Baking Time - 12- 15 Minutes for 1 Batch


HOW TO COOK SUJI COOKIES


COOKIES
SUJI COOKIES

INGREDIENTS:

For Suji Cookies:

All-purpose Flour - 220 Grams
Icing Sugar - 80 Grams
Salt - 1/4 Tspn
Unsalted Butter - 30 Grams
Ghee - 45 Grams

For a detailed Recipe on HOW TO MAKE GHEE, Click here...

For Toppings(Optional):

Cashew Nuts - 50 Grams(halved & toasted)
                         or
Glazed Cherries/Tutti Frutti - a few


METHOD:

For Suji Cookies:

  • Preheat the oven at 160° Celsius for about 10 minutes.
  • Sift the All-purpose Flour Sugar once & keep it aside.
  • The Butter should be Cold.
  • Let the Ghee be at room temperature.
  • Sift the Icing Sugar once & keep it aside.
  • Combine it with Butter & Ghee and beat it well in a hand mixer until creamy & combined.
  • Add the All-purpose Flour Mixture to the Ghee-Butter mix.
  • Gently mix it to form a soft dough.
  • The texture of the dough should be firm so that you can shape it into balls.
  • Otherwise, can leave it in the refrigerator for about an hour/freeze it for about 10-20 minutes, or until the dough is firm enough.
  • Meanwhile, line up a baking tray with baking sheet/parchment paper.
  • Scoop 1 Teaspoon of Suji Cookie Dough and shape it into a ball. 
  • Arrange them 2 cm apart on the tray.
  • Cookies will spread a little during baking but should retain the ball shape.
  • Bake at 160° Celsius for 15-20 minutes or until firm and just mildly start to colour but should be white in colour.
  • Allow Suji Cookies to cool completely.
  • Store the Suji Cookies in an airtight container.
  • Suji Cookies will stay fresh in an airtight container at room temperature for up to 2 weeks.
COOKIES
SUJI COOKIES

NOTES:

  • Use cold butter for the recipe.  Take it out from the refrigerator just before beating it.
  • Let the Ghee be at room temperature.
  • The texture of the dough should be firm so that you can shape it into balls.
  • The Climatic condition of the region you live also affects the firmness of the dough.
  • You can leave the dough in the refrigerator in between to get the desired firmness.
  • Otherwise, can leave it in the refrigerator for about an hour or freeze it for about 10-20 minutes or until the dough is firm enough. 
  • This will help prevent the cookies from spreading – they’ll bake up thick and retain the ball shape. 
  • If the dough is not firm enough the melted butter may turn the Cookies crunchy, which is not the needed texture of  these Suji Cookies.
  • Can use the same recipe and make Cashew Suji Cookies or Almond Suji Cookies.
  • If doing so, substitute 130 grams of All-purpose flour with Cashew Powder or Almond Powder.
  • Ghee adds a wonderful flavour and gives a beautiful texture to the Suji Cookies.
  • The Cookie dough should be soft and not crumbly.
  • Can shape the Suji Cookies into Balls or into cube-shaped, or flatten it up slightly and make imprints with a fork over it.
  • Can top it up with halved Cashew or glazed Cherries or Tutti Frutti pieces.
  • Baking time totally depends on the type of Oven used.  Adjust accordingly. 
  • Adjust the baking time  depending on the size of the Suji cookies.
  • These are Small Suji Cookies of 1cm Diameter(before baking) & it took just 15 minutes of baking.
  • Bake until firm and just mildly start to colour but should be white in colour.
  • And the most important fact - take it out from the Oven when it starts to become firm but yet slightly under cooked(soft to touch), if you prefer a melt in mouth Suji Cookies.


CRUMBLE RECIPE
APPLE CRUMBLE

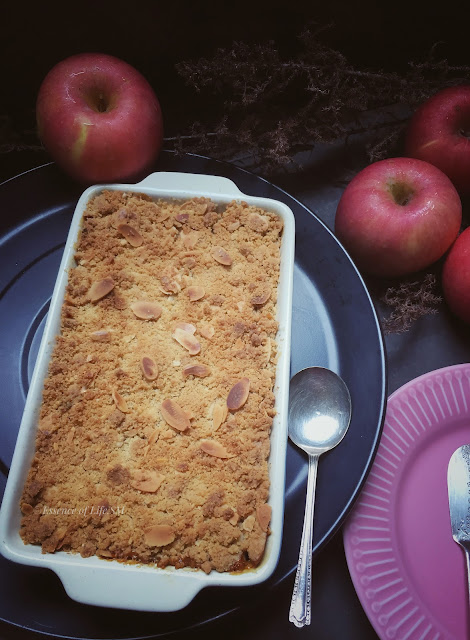
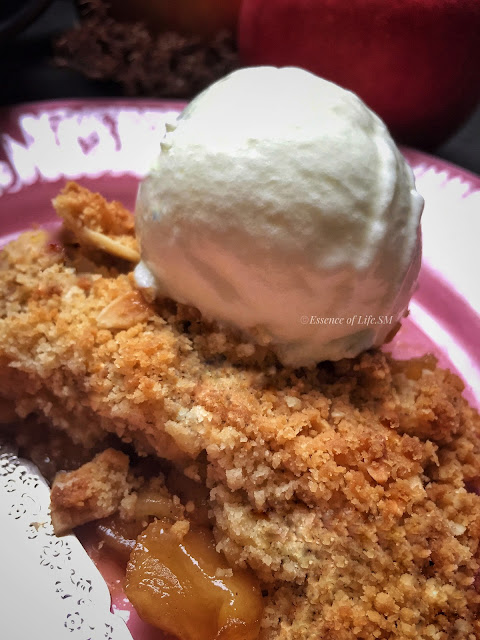
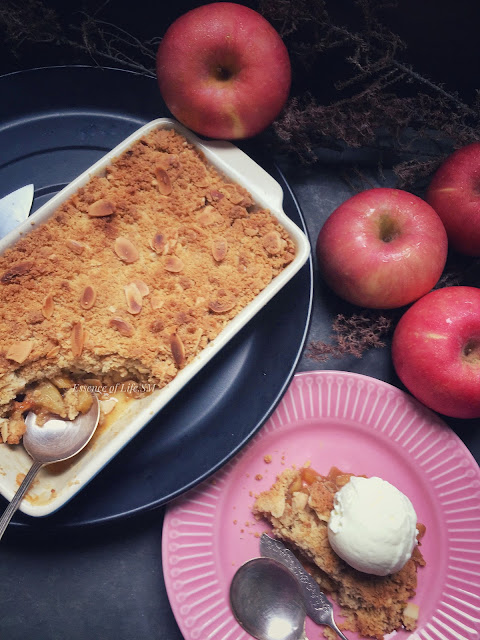
    Crumble Recipes following its suit this month. Wonderfully warm  and apt for the season.  Truly, I am yet not out from the Crumble hangover, I am making it back-to-back at home.  The reasons being I always have ready stock of Apples & Pears in my refrigerator and I need some way to fruitfully use-up the fruit.  Rather than just eating it or making juices out of it.  Yet another major reason is that a Crumble recipe is easy to make, a quick dessert and all the more you can never go wrong with a Crumble recipe. Warm Crumbles - Crunchy with hearty Apple fillings, topped with Vanilla Ice cream are indeed a treat to the senses.

APPLE CRUMBLE: 

CRUMBLE RECIPE
APPLE CRUMBLE

    While making an Apple Crumble.  The two main steps which has to be done while making a Crumble are:

  • Spiced Apple Filling

  • The Crumble Mixture


Apple Filling:  


    After all, this is Apple Crumble, so we require loads of Apples.  I had a few varieties of Apples lying in my refrigerator, Royal Gala & Granny Smith. I used both to get the complex flavour in each bite. Crunchiness and flavour all got together.


CRUMBLE
THE APPLE FILLING


Anyway, let's see what makes a great Apple Filling, 


  • Apple – Make sure to slice the Apples into uniform sizes. The amount of filling is as your heart desires. So use loads of Apples if you prefer a whole lot of Apples in your Apple Crumble.
  • Spices – The warmness of Spices is all about Apple Crumble. Some recipes call for Cinnamon, some add Nutmeg/Clove/Allspice. I love the aroma of Cinnamon & Nutmeg in a Crumble Recipe.
  • Lemon – Lemon prevents the Apples from oxidizing(browning). What you need is just a bit, which will help keep the flavours intact and also keeps the apple slices white.
  • Sugar – Sugar sweetens the Apple filling. I have used Brown Sugar. And have cooked it along with the Apples & Spices, until the apples are half cooked and all the sugar turns out into a caramel-like sauce along with the juices from the Apples.


The Crumble:


CRUMBLE
CRUMBLE MIXTURE


     Making Crumble is so easy & you may hardly go wrong.  It is too straight forward. I love to add some slivered and toasted Almonds along with flour for that nutty and crunchy Crumble topping.

Some recipes call for Oats flour or Oats instead of All-purpose flour.

    As I live in  Tropical regions, the weather is mostly humid.  So I always use COLD BUTTER. Cut butter into small cubes and keep it refrigerated until use.  I don't have a food processor, so I use my hands to make this crumble.  So, I suggest keeping your hands cold. While mixing the flour, sugar & butter, the heat may melt way the butter making the topping a bit of a dough like.   

       So using your fingertips rub the butter into the flour and sugar. You want the texture to be like streusel mixture or breadcrumbs. Then stir in those toasted almonds for extra crunchiness & texture.

     And when it comes to Sugar, I would recommend for Brown sugar or light Brown sugar, which gives the needed texture in a Crumble.  


CRUMBLE RECIPE
APPLE CRUMBLE

For more CHRISTMAS RECIPES, Click here...


Cuisine - Around the World

Recipe Type - Crumble

Difficulty - Medium

Serves - 6-8

Author - SM


Preparation Time - 30 - 45 Minutes

Cooking Time (Apple Filling) - 7-10 Minutes

Baking Time - 30-45 Minutes


For more BAKED GOODIES, Click here...


HOW TO MAKE APPLE CRUMBLE

CRUMBLE RECIPE
APPLE CRUMBLE

INGREDIENTS:

For Apple Filling:

Apples - 6 Nos.
Brown Sugar - 120 Grams
Lemon Juice - 1 Tablespoon
Cinnamon & Nutmeg Powder - 1/4 Teaspoon


For Crumble:

All-purpose flour - 100 Grams
Blanched & Toasted Almonds - 50 Grams
Brown Sugar - 75 Grams
Cold Unsalted Butter - 75 Grams
Cinnamon & Nutmeg Powder - 1/2 Teaspoon
Salt - To Taste


CRUMBLE RECIPE
APPLE CRUMBLE

METHOD:

For Apple Filling:


  • Wash, peel & core the Apples.
  • Cut them into small or chunky pieces of uniform size.
  • Immediately, add a drizzle of Lemon Juice and give a quick stir.
  • This is to avoid oxidization of the apples & prevents them from de-colouration. 
  • Sprinkle Brown Sugar, Cinnamon & Nutmeg Powder and give a good toss.
  • Cook this on a medium–low heat for  about 5–10 minutes or until the sugar has dissolved.
  • Cook until the apples are just starting to soften & all the sugar turns out into a caramel-like sauce along with the juices from the apples.
  • Boil it until the sauce thickens or until it the Apples are well coated with the Sauce.
  • Switch off the flame and leave this aside.
 

For the Crumble:


  • Blanch the Almonds, Sliver them into thin slices, and toast them on a low flame until crispy.
  • Chill the bowl in which you are going to prepare the crumble. 
  • Cut butter into cubes and leave it in the refrigerator until use.
  • In a bowl, combine All-purpose Flour, Almond Slivers, salt & brown sugar.
  • Mix until well combined.
  • Add chilled butter cubes to the flour. 
  • Gently toss it up with a fork until it crumbles. 
  • Alternatively use your fingertips, gently rub the butter into the flour until the mixture looks like breadcrumbs/streusel mixture. 
  • Make sure that your hand & finger are cold while doing this step. Can dip your hands in ice-cold water and wipe off any moistness before doing the process.
  • This is to avoid melting the butter, which will alter the texture of the crumble.
  • If you have a food processor, the job gets easier. I do not have one & did the step using my hands or simply toss-up the ingredients using a fork.
  • If using a food processor, place the flour, butter and process, using the pulse button, for 10-15 seconds until the mixture is crumbly.
  • Leave this in the refrigerator until use.


For Apple Crumble:


  • Preheat the oven to 180 °C.
  • Take an ovenproof dish, big enough to hold all the ingredients.
  • Grease the baking dish with a bit of butter.
  • Now, spread out the Apple Filling in the baking dish.
  • Pour in any sauce left in the pan & even it out with a spatula.
  • Now, sprinkle the crumble in an even layer over the top of the Apple Filling.
  • Place the dish on the middle rack in the Oven.


  • Bake for about 30 Minutes.  Then turn the baking dish around halfway through cooking.
  • The Crumble would be ready when the topping turns golden, and the juices starts to bubble out.
  • It took around 30-45 minutes for me to bake this Apple crumble.
  • Serve Apple Crumble warm, topped with  a hearty dollop of Vanilla Ice cream or Custard. 


CRUMBLE RECIPE
APPLE CRUMBLE

NOTES:

  • I have used slivered and toasted Almonds in the crumble mixture.
  • Can swap it with your preferred nuts.  
  • Can use Light Brown Sugar or Brown Sugar. Suit your preference.
  • Can make the same recipe with fruits like Apple, Pear, Peach, Plum, Apricot, Rhubarb, Berries etc.,

JUICES & DRINKS
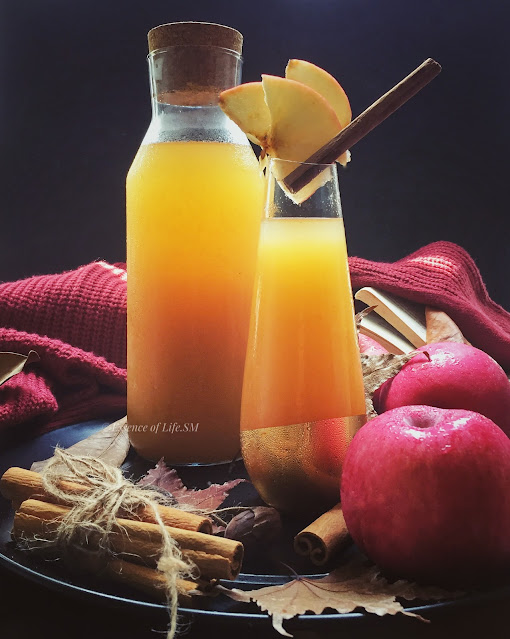
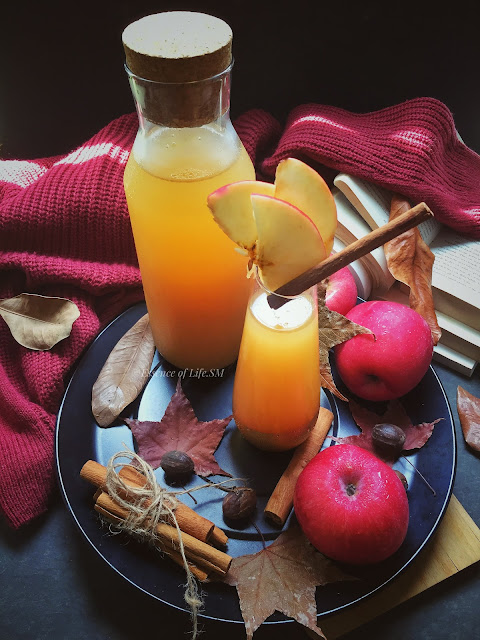
MULLED APPLE JUICE

    Christmas Season calls for traditional Christmas beverages.  Most of the households have their own favourites, and it comes out with regional specialities too. Mostly it is Mulled Wine, Christmas Sangria, Old fashioned Eggnog etc., & these traditional drinks can either be alcoholic or non-alcoholic.  The Season calls for a party and loads of food.  When it's a Party, to booze around is the new norm, may be an age-old tradition too.  

    When you always have some Apples lying out in the refrigerator, I am driven to think how to finish it off.  While I tried making quite a few recipes out of it along with simple Apple Shakes, this Mulled Apple Juice turned out to be versatile, and I was able to use it up in various other drinks & mocktails, and also it tasted good in a Spiced Apple Tea. Mulled Apple Juice was as tasty it was, and I happened to finish a whole big bottle of this Juice within a few days all on my own.  Benefits being, I was guilt free drinking this juice as it was less sweet, warm & aromatic with spices, and it had no additives & preservatives. 

JUICES & DRINKS
MULLED APPLE JUICE

    Apples are so synonymous to winter.  Though I have not lived in a country so depictive about these, but the brain somehow or the other recognizes apples in terms with Winter.  So a Mulled Apple Juice would be one wonderful addition to the list of recipes for this Christmas Season.  This delicious mulled apple juice is a quick and simple winter warmer, containing all the flavours of the festive season, and even an amateur cook can rustle it up in no time.  

    Mulled Apple Juice is a non-alcoholic alternative to mulled wine. Cinnamon, Nutmeg & Oranges mingle with warm apple juice in this astounding non-alcoholic alternative to classic Christmas spirits.  There would always be people like me who never prefer alcoholic drinks at a party and this Mulled Apple Juice can be for people like me & it can be served to the kids too.  Though don't just leave it off thinking it's not as good as any alcoholic beverage, it comes with all warmness with its sweet and spicy taste. 

For more JUICES, DRINKS & SMOOTHIES, Click here... 

Recipe Type - Juice
Difficulty - Medium
Yields - 1 - 11/2 Litres
Author - SM


Preparation Time - 10 -15 Minutes
Cooking Time - 50 Minutes - 1 Hour


HOW TO MAKE MULLED APPLE JUICE

JUICES & DRINKS
MULLED APPLE JUICE

INGREDIENTS:

To Cook Apples:

Apples -6-8 Nos.
Cinnamon - 1 stick
Nutmeg - 1/2 Teaspoon
Water - as required 


For Mulled Apple Juice:

Orange Juice - 1 Cup
Orange Peel - 4-5 Pieces
Brown Sugar - 5 Tablespoons
Vanilla Extract - 1/2 Teaspoon  


METHOD:

To Cook the Apples:

  • Wash, core, remove the seeds & then cut the apples into four pieces.
  • There is no need to peel the apples.
  • Add the apples to a pot, add enough water to just cover them.
  • Add Cinnamon sticks & Nutmeg Powder to the above and give a quick stir.
  • I cooked the apples in a pressure cooker, which was quicker.  Cooked for 2-3 Whistles.
  • Otherwise, boil the apples for about 25-30 minutes, or until the apples turn soft & cooked.
  • Using a Potato Masher, mash the cooked apples.
  • Now, strain the Apple juice through a fine meshed strainer or a cheese cloth.
  • Place the fine meshed strainer or a cheese cloth over a bowl.
  • Carefully ladle out the hot apple juice mixture into the strainer and gently mash the apples.
  • The juice will be filtered through the bottom into the bowl, and the apple mush will be left in the strainer.
  • Transfer the apple mush into a separate bowl and keep it aside.
  • Repeat until all the apple juice is strained through.
  • Collect the strained apple juice.
JUICES & DRINKS
MULLED APPLE JUICE

For Mulled Apple Juice:

  • Extract juice from the Oranges and keep it aside.  
  • We may need about 1 Cup of Orange Juice for this Mulled Apple Juice.
  • Save a few pieces of Orange peels too.
  • Now, add Brown Sugar and Vanilla extract to the apple juice.
  • Pour in the Orange Juice and add a few pieces of Orange Peels to the above and give a quick stir.
  • Stir in the Vanilla Extract.
  • Boil this on a low flame for about 15-20 minutes, or until the brown sugar is well dissolved.
  • Switch off the flame and strain the mulled Apple Juice.
  • Allow the Mulled Apple Juice to cool down before storing it in clean & dry glass bottles.
  • I have not added any preservatives in this Mulled Apple Juice.  So it can be stored for about 7-10 days.
  • Keep it refrigerated.


NOTES:

  • Can add spices like cloves, star anise etc., along with the listed spices.
  • This Mulled Apple Juice comes out to be a bit strong.  Dilute it with water to suit your preference.
  • Adjust the amount of brown sugar & spices to suit your preference.
  • Can substitute brown sugar with white sugar, too.  I have used light brown sugar in this recipe. 
  • The collected apple mush can easily be turned into apple sauce by puréeing and adding a smidgen of sugar & cinnamon to taste.   No wastages, whatsoever.
  • Keep in mind that, this mulled apple juice doesn’t have any preservatives, so be sure to keep it refrigerated and to use it within a week! 

Newer Posts Older Posts Home
Search Essence of Life - Food

I Me Myself

A vintage-style horizontal oval frame showcasing ornate silver spoons on a dark rustic surface

Essence of Life - Food is all about daily cooking with a simple sense of taste and health. It is all about food. Not a day goes by without eating for most of us, so what we eat matters on the whole. Food in the mode of goodness increases the duration of life, purifies one's existence, and gives strength, health, happiness, and satisfaction. Above all ingredients, the most vital one in my kitchen is love.

Sm @ Essence of Life - Food

Popular Posts

Ebook - What I Cook - For Onam

Ebook - “What I Cook - For Onam”

Amazon.com/dp/B0CGPVY6J3

Indulge in Kerala’s Culinary Heritage: Traditional Onam Sadhya Recipes, with Expert Serving Tips! Celebrate Onam the authentic way! Discover 25 timeless Kerala Sadya recipes in my ebook. From avial to payasam, bring home the flavours of tradition. Available now on Amazon!

Essence of Life

Subscribe & Follow

© 2026 | Essence of Life - Food

  • Home
  • Ask First
    Please note that all rights for the photographs and texts on this blog, unless otherwise mentioned, rests with the author. Please do not use without permission.
  • Privacy Policy