Essence of Life - Food
  • Home
  • From My Kitchen
    • Heirloom Recipes
    • From God's Own Country
    • Sadhya
    • Kongu Cuisine
    • Chettinaad Cuisine
    • South East Asian
    • Around the World
  • Ebook
  • I Me Myself
CAKE
 EGGLESS MARBLE CAKE

     
    I am totally biased when it comes to certain recipes, and when it comes to baking a cake I have always felt the usage of All-purpose Flour, Butter & Eggs are a must for soft, moist and fluffy cakes.  At the least, my brain doesn't accept cakes without these ingredients and I feel that something is missing in the recipe.  When I came across with this Marble Cake recipe with NO EGGS, NO BUTTER & NO MILK, I was as usual skeptical.  Though impressed by the recipe and had jotted it down in my recipe book I was totally procrastinating the idea of making this Cake.    
    I had always wanted to try a Cake Recipe which would be suitable for Vegetarians and for people who are sensitive to Eggs. So finally went along with the recipe.  A quick fix cake recipe with very simple ingredients and not much of preparations.  No Eggs & No Butter and above all it is No Fuss & No Mess.  When you have a sudden craving for a good cake and you open the fridge to see that you do not have Eggs or Butter, then this Marble Cake recipe would come out be handy. You could never tell that it’s eggless, and the best part is it stays moist even after 3 or 4 days! i.e if at all, if there is any left!!!
    As skeptical as I was, I mixed the batter with not much of sieving, beating and fluffing it up processes. Until I baked I was not sure how the cake would turn out.  Curiously I was glancing into my oven quite frequently to see whether the Cake was rising enough, Ya, to my astonishment it did and baked precisely as I wanted it - Clean out!!!  Yet not satisfied I waited until the cake was perfect to be sliced and there I went for my final trial test - the tasting.  Was it moist, soft, fluffy and tasty... So many questions in my mind.  Yes, it was moist, soft, fluffy and all the tastier too. Amazingly, it was approved by all the other 3 at home - my husband & kids.
     This Moist Marble Cake is the easiest cake I’ve ever come across.  A soft, moist, sinfully-delicious Marble cake, which is Eggless and Butterless!  Use two bowls, a wire whisk and a wooden spoon to make this easy Marble Cake. You don't even need any fancy kitchen gadgets. You can make it with simple, affordable pantry staples! No Eggs, No Milk & No Butter needed for this Marble Cake.  It is an absolutely easy, tasty and a mildly sweet Cake, that it can be eaten as a teatime snack or for breakfast.
    So a final word, Cakes turn out to be soft, fluffy & moist even without EGGS & BUTTER. So now a question - Am I still biased with cakes which do not use Egg & Butter?  No... No... No... And wait. more Eggless & Butterless Cakes coming on its way...

Let's talk about the Ingredients in this Marble Cake:

  • All-purpose Flour - You can either use All-purpose Flour (standard) or gluten-free all-purpose flour.
  • Sugar - White Sugar or a mix of White Sugar & Brown Sugar is best. I wouldn’t recommend using all brown sugar, as I always find the flavour overpowering.
  • Baking Soda - Baking Soda gives the Marble Cake some ‘lift’, but also leavens the cake. 
  • Salt - Salt brings out the sweetness. According to me, it is a must for any cake, muffin or brownie! 
  • Curd/Yogurt - This is what replaces the Eggs and also gives stability to the Cake. That is the stability which avoids the cake from sinking!. Use fresh(not sour) Curd/Yogurt for the purpose.
  • Sunflower/Canola oil - Any standard oil is fine for this recipe preferably which has no overwhelming flavour/smell. I have used Sunflower Oil, as it is what I had.  You can get easy with any type of Vegetable Oil, Coconut Oil, Canola Oil, etc. 
  • Vanilla Extract - A MUST for any baked good especially for Cakes.  Helps to bring out an aroma unique to baked goods.
  • Water - To mix everything together!

For more CAKE Recipes, Click here...

Recipe Type - Cake, Dessert
Difficulty - Medium
Yields - 1 Medium Sized Cake
Author - SM

Preparation Time - 20 - 30 Minutes
Cooking Time - 45-50 Minutes


HOW TO BAKE EGGLESS MARBLE CAKE -

 NO EGG NO BUTTER MARBLE CAKE


CAKES
 EGGLESS MARBLE CAKE


*Please do read all the instructions for a perfectly textured Cake.
 

MEASURING THE INGREDIENTS(Updated as on 7th October 2020):

    My friend recently made this Cake and said the cake became dense. She had scooped out the flour and didn't level it off. So the quantity of Flour ended up to be more than necessary for the recipe making the cake dense.
    So, I am updating few tips for you to get perfect Cakes.  Make sure to measure the ingredients perfectly.  I have given both Cups & Grams measurement for your convenience.  Grams measurements works perfect, but if you do not have a weighing scale use Cup measurements.
     
    While measure the ingredients using a Cup make sure to follow these basic instructions for every ingredients. 

  • FLOUR - Use Spoon & Level Method.  Do not scoop out the floor from the container.  Instead spoon in the flour into the Cup. Do not pack the flour in the Cup and Do not tap the cup for the flour to settle down.  All these can alter the final texture of a Cake. After you have spooned in the Flour into the Cup use the back of a Knife or a spoon to level off the top of the measuring Cup.
  • COCOA POWDER - Follow the same method as for the Flour. And do not forget to sift it. 
  • BAKING SODA & BAKING POWDER - Both these ingredients can settle down in the containers in due course.  Shake it before scooping out with a spoon and then level the top with the back of a spoon or a knife.
  • SUGAR - Sugar is heavier then flour. So it is unlikely to settle down in the measuring cup. Scoop it out from the container with a spoon and then finally level it off with the back of a knife or a spoon.
  • BROWN SUGAR - Follow the same method as for Sugar.
  • LIQUIDS - Liquids such as Oil, Milk/Yogurt/Buttermilk, Fruit Juice & Water should be measured at the eye level. It would be advisable to use a liquid measuring Cup. Bend down to the eye level and make sure the measuring requirement is perfect.


INGREDIENTS:

For Vanilla Cake Batter:

Curd/Yogurt - 1/2 Cup(135 Gms)
Sugar - 1/2 Cup(120 Gms)
Vegetable Oil - 1/4 Cup(55 Gms)
Vanilla Extract - 1 Tspn
All-purpose Flour - 1 Cup(170 Gms)
Baking Soda - a Pinch
Baking Powder - 1/2 Tspn
Salt - a Pinch
Water - 2 Tbspn

For Chocolate Cake Batter:

Curd/Yogurt - 1/2 Cup(135 Gms)
Sugar - 1/2 Cup(120 Gms)
Vegetable Oil - 1/4 Cup(55 Gms)
Vanilla Extract - 1 Tspn
All-purpose Flour - 3/4 Cup(120 Gms)
Cocoa Powder - 1/4 Cup(50 Gms)
Baking Soda - a Pinch
Baking Powder - 1/2 Tspn
Salt - a Pinch
Water - 2 Tbspn

METHOD:

For Vanilla Cake Batter:

  • Sieve All-purpose Flour along with Baking Soda, Baking Powder & Salt once and keep it aside.
  • In a large bowl, combine Curd/Yogurt, Sugar & Oil.
  • Whisk it using a hand beater or a wire whisk until Sugar dissolves.
  • Just beat until the sugar dissolves, do not overbeat.
  • Now add the Flour mixture to the above and gently fold it up using a spatula.
  • Fold all the ingredients until well combined.
  • Pour in 2 Tbspns of Water and fold it again until well combined.
  • Keep the batter aside.

For Chocolate Cake Batter:

  • Sieve All-purpose Flour along with Cocoa Powder, Baking Soda, Baking Powder & Salt once and keep it aside.
  • In a large bowl, combine Curd/Yogurt, Sugar & Oil.
  • Whisk it using a hand beater or a wire whisk until Sugar dissolves.
  • Just beat until the sugar dissolves, do not overbeat.
  • Now add the Flour mixture to the above and gently fold it up using a spatula.
  • Fold all the ingredients until well combined.
  • Pour in 2 Tbspns of Water and fold it again until well combined.
  • Keep the batter aside.

For Eggless Marble Cake:

  • Preheat the oven at 180 Degree Celsius for about 10-15 Minutes.
  • Grease the Cake Tin and dust them up with the Flour. 
  • Line the greased Cake Tin with Baking/Parchment Paper.
  • Scoop out 2 Tbsps of Vanilla Cake Batter and pour it into the cake tin.
  • Take about 2 Tbspns of Chocolate Cake Batter in another scooper/ladle and pour it on top of the Vanilla Cake batter.
  • Follow the suit alternating between Vanilla Cake Batter & the Chocolate Cake Batter.
  • Let the Cake batter spread-out naturally.
  • Once all the batter is poured into the Cake Tin, gently hit the Cake Tin to settle(even-up) the batter.
  • Now, using the back of a spoon or a chopstick, make a Zig-Zag swirl through the batter once.
  • Gently move the back of a Spoon/chopstick once through the batter to get a marble-like design.
  • Care should be taken not to overdo it.
  • Bake the cakes in the preheated at the centre rack of the oven at 180 Degree Celsius for about 45 -50 Minutes or until the skewers come out clean.
  • Let the Marble Cake cool in the Cake Tin on a rack.
  • Remove the Marble Cake from the pan carefully and peel off the baking paper.
  • Cut the marble Cake into the desired shape and store it in an airtight box.
  • When stored properly it stays good for up to 3 days @ room temperature.

For Longer Shelf Life :

  • Wrap it in plastic wrap and refrigerate the Cake.  Can be refrigerated up to a week.
  • Before serving remove them from the plastic wrap and serve once it reaches the room temperature.


CAKE
 EGGLESS MARBLE CAKE

NOTES:

  • For easy removal, ensure there is an inch of baking paper (parchment paper) overhanging the edge of the baking pan.
  • For the best tasting vanilla cake, stick to flavourless vegetable oil. According to me, Sunflower Oil/Canola Oil works best.
  • This is a mildly sweet cake.  Adjust the amount of Sugar to suit your preference.
  • Be careful not to over mix the batter, otherwise, the cake will be dense and heavy.
  • For a marble-like swirl design, gently make a zig-zag movement through the layered batter with a thin stick/Chopstick or with the back of a thin spoon.
  • Do not overdo it which may mix up the layered battered.
  • Do not over-bake the cake, as it continues to cook in the pan as it cools.
  • Adjust the baking time according to your oven settings.


      When we saw the Web Series 'Queen' based on the life of late Tamil Nadu Chief Minister J. Jayalalitha, what caught along with the series was one recipe which came along a few times in the series. A Potato Curry which instantly caught my daughter's attention and there she wanted a similar-looking Potato Curry, I can say similar-looking & not tasting. If I had to make a justified version of the same Potato Curry which came in the series, or at least the one Ms. Jayalalitha liked.  I should have surely dined along with her, sharing the food send from another legendary Politician and Actor, Dr. M.G.R's house.  Or at the least, I should have been lucky enough to get the recipe from the cook.   
     No choice... As I was not lucky enough for such instances.  As usual, I tried along with my instincts to justify with a similar-looking Potato Curry and ah, mainly my only concern was to appease my daughter's taste buds.  So there came along and still coming along some new versions of Dry Potato Curries in my kitchen.  Even my son went along to try his own version of the same.  Whatever it is, a dish with Potatoes & my daughter goes head over heels for it.  She is always like,"I have never met a Potato, I didn't like..."   
     So here comes a simple Potato Recipe in a typical South Indian Style - "Urulai Kizhangu Varuval". Potatoes cooked, tempered and sautéed along with simple spices.  Quick and easy to make and suits well to be served along with both Roti & Rice or simply serve it as a side dish to go along with Rice, Sambar/Rasam/Curd.

For more Recipes with POTATOES, Click here...

Cuisine - South Indian
Course - Side Dish
Spice Level - Spicy
Difficulty - Medium
Serves - 3-4
Author - SM

Preparation Time - 5- 10 Minutes
Cooking Time - 10 - 15 Minutes


HOW TO MAKE URULAI KIZHANGU VARUVAL - DRY POTATO CURRY

INGREDIENTS :

To Cook Potatoes:

Potato - 4 Nos.
Turmeric Powder - 1/4 Tspn
Salt - To Taste

For Urulai Kizhangu Varuval:

Oil - 3 Tablespoons
Mustard Seeds - 1/2 Teaspoon
Curry Leaves - a Sprig
Onion - 1 No.
Garlic - 3–4 Cloves
Red Chilli Powder - 2 Teaspoons
*Fennel Powder - 1 Teaspoon
Curry Masala Powder- 1 Teaspoon
Salt - To Taste

METHOD:

To Cook the Potatoes:

  • Wash, clean & peel the Potatoes.  Cut them into medium-sized cubes.
  • Add enough water & Cook Potatoes along with Turmeric Powder and a dash of Salt.
  • Cook until Potatoes turn soft & cooked.
  • If there is any excess water, drain the Potatoes and keep it aside.

For Urulai Kizhangu Varuval:

  • Heat oil in a Pan, splutter Mustard seeds.
  • Immediately add Curry Leaves and give a quick stir.
  • Add finely chopped Onions & Garlic cloves to the above and sauté until onions turn translucent.
  • Now add Red Chilli Powder, Fennel Powder and Curry Masala Powder and fry this on a low flame until the raw flavour goes.
  • Add Cooked Potatoes and gently mix it until all the pieces are well coated with the Masalas.
  • Cook this on a low flame for about 5–7 minutes until the Potatoes are roasted well with the Masalas.
  • Stir the ingredients occasionally.
  • Care should be taken while stirring the Potatoes, make sure not to break or mash the Potatoes.
  • Switch off the flame and serve Urulai Kizhangu Varuval hot as a side dish.
  • This Urulai Kizhangu Varuval goes well with both Roti & Rice.


NOTES:

  • I have used 4 Big Potatoes in the recipe.
  • Can cook the same recipe with Baby Potatoes.
  • Do not overcook the Potatoes.
  • Adjust the amount of Spices to suit your spice level.
  • Can Substitute Curry Masala Powder with Garam Masala Powder/Mutton Masala Powder/Chicken Masala Powder.

*FENNEL POWDER:

     I usually use freshly roasted and ground Fennel Powder if I am using it in my recipes. Freshly roasted and ground Fennel Powder gives out a wonderful aroma and adds flavour to the dish it is added into.  You can get easy with ready-made Fennel powder, too.  If you are making fresh Fennel Powder, then
  • Dry roast the Fennel Seeds on a low flame until it splutters & turns fragrant.
  • Care should be taken not to burn the Fennel seeds, which would totally spoil the taste and flavour of the dish.
  • Once cooled, grind the Fennel Seeds into a fine powder and keep it aside.
  • I use my mortar and pestle to grind the roasted Fennel Seeds, as I normally use only a small amount in my recipes.
  • If you want to make a big batch and store it for further usage, can dry roast a big batch and grind it in a small blender jar or Coffee grinder.


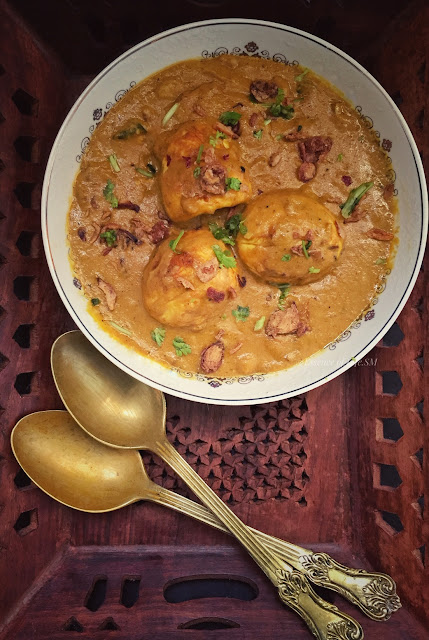
A bowl of Royal Nawabi Egg Korma, a creamy and rich Awadhi curry garnished with fried onions and fresh coriander.

Royal Nawabi Egg Korma - Rich Awadhi Delight


Discover the Rich Flavours of Nawabi Egg Korma: A Royal Indian Delight

    When it comes to the quintessential curries of India, the Korma stands out as a regal choice. This indulgent dish, with its velvety texture and aromatic spices, is a true feast for the senses. Let’s dive into the world of Nawabi Egg Korma, a rich and creamy curry from Awadhi cuisine that is deeply rooted in Mughal culinary traditions. 

↓ JUMP TO RECIPE


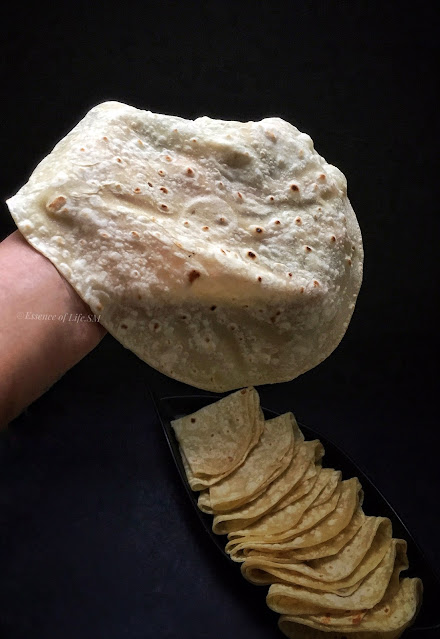
Close-up of a hand holding a fluffy, thin chapati made with Maida (all-purpose flour), showing its light texture and golden brown spots.

Fluffy Maida Chapati- All Purpose Flour Chapati


Perfect Maida Chapati Recipe: Thin, Soft, and Delicious

    Discover one of the most popular recipes on my blog, "Essence of Life - Food." This Maida Chapati recipe is a personal favourite and a hit among guests. Made perfectly thin and soft, these chapatis are a delightful twist on traditional Indian flatbread.

↓ JUMP TO RECIPE


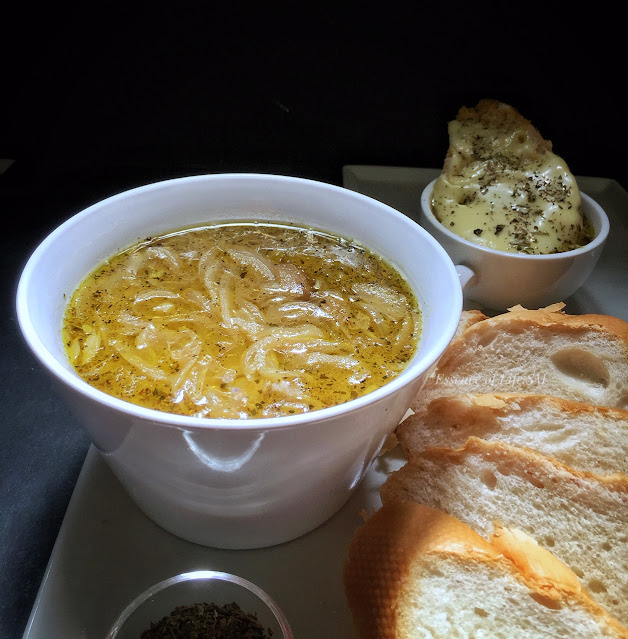
A bowl of golden French Onion Soup with caramelized onions, served with slices of French baguette and a small bowl of cheese topped crouton.

Rich and Aromatic French Onion Soup


French Onion Soup: A Classic French Bistro Favourite

    French cuisine is celebrated worldwide for its finesse and flavour, and French Onion Soup (Soupe à l’oignon) is a quintessential dish that embodies this tradition. This traditional French soup is made from simple ingredients—onions and beef broth—yet delivers a complex, comforting taste. Typically served with croutons or toasted baguettes topped with melted cheese, French Onion Soup has a history dating back to Roman times. Although originally considered a peasant’s dish, the modern version of this soup has been refined since the 18th century.

      ↓ JUMP TO RECIPE  


     Onions - an age-old vegetable cultivated since ancient times.  It is one vegetable most commonly used around the world. Onions belong to Allium genus of flowering plants that also includes Garlic, Shallots, Leeks & Chives. Onions vary in size, shape, colour & flavour. The most common types are red, yellow & white onions. The taste of this vegetable can range from sweet and juicy to sharp, spicy, and pungent, often depending on the season in which people grow and consume them.
Onions contain various Vitamins, Minerals and plant compounds that prove beneficial in promoting the health in many ways. The medicinal properties of Onions have been recognized since ancient times when they were used to treat ailments like headaches, heart disease and mouth sores. Even Ayurveda which does not suggest excessive usage of Onions as the vegetable is Tamasic in nature which makes people irritable and also produces excess heat in the body.  However, Ayurveda recognizes Onions as Blood Purifiers and removes toxins from the body.  It has Anti-bacterial, Anti-fungal and Anti-viral properties, Onion is known to reduce inflammation and lower high blood pressure. It also helps to lose weight. Onions help to stabilize digestion and are excellent to treat cold and cough.


ONIONS - NUTRITIONAL VALUE:

      Onions are rich in nutrients, low in calories but high in Vitamins, Minerals and Fiber.  Onion is a good source of Vitamin C, which helps in regulating immune health, collagen production, tissue repair and iron absorption. Vitamin C also acts as a powerful antioxidant in your body, protecting your cells against damage caused by unstable molecules called free radicals. Onions are also rich in Vitamins B - Folate (B9) & Pyridoxine (B6). These Vitamins play key roles in increasing Metabolism, Red Blood Cell production and Nerve function. Onions are also a good source of Potassium.


HEALTH BENEFITS OF ONIONS


     The health benefits related to onions are quite impressive. Onions contain powerful compounds that may decrease the risk of heart disease and type of certain Cancers. Onions have antibacterial properties and promote digestive health and also helps to improve immunity. Adding Onions into your daily diet will benefit overall health and the vegetable is so versatile that it adds flavour to the dish it is added into.


Healthy Heart

Onions contain antioxidants and compounds that fight inflammation, decrease triglycerides and reduce cholesterol levels.  All of which may help to lower the risk of heart diseases. Onions have a high concentration of a potent Antioxidant flavonoid called Quercetin which facilitates anti-inflammatory properties. This helps to reduce High Blood Pressure & also protect against Blood Clots. Onions have also been shown to decrease cholesterol levels.


Loaded With Antioxidants

     Onions are an excellent source of antioxidants. that inhibits oxidation which leads to cellular damage. Red Onions contain Anthocyanin a flavonoid which gives the red colour. Antioxidants and Anthocyanins present in Onions help fight against diseases like Cancer, Diabetes and Heart Diseases.


Prevents Cancer

     Eating Onions lower the risk of certain Cancers like Stomach & Colorectal Cancers.  Onion is a vegetable which belongs to the Allium genus, the Sulfur compounds, flavonoids & antioxidants found in Onions is believed to decrease tumour development and slow the spread of ovarian and lung cancer.


Control Blood Sugar

     Quercitin & Sulfur compounds present in Onions has Antidiabetic effects.  This has proven beneficial for people with Diabetes. Quercetin also interacts with cells in the small intestine, pancreas, skeletal muscle, fat tissue and liver which help to regulate the overall Blood Sugar level in the body.


Boost Bone Density

     Onions help reduce oxidative stress, boost antioxidant levels and decrease bone loss, which may prevent osteoporosis and boost bone density.  Adding Onions in your daily diet is believed to boost bone health.


Antibacterial Properties

     Quercetin present in Onions has the ability to fight against Bacterial growth. Onions can fight potentially dangerous bacteria, such as Escherichia Coli(E.Coli), Pseudomonas Aeruginosa, Staphylococcus Aureus & Bacillus Cereus. Onions also help to inhibit the growth of Vibrio Cholerae.


Boost Digestive Health

Onions are a rich source of fibre and prebiotics, which are necessary for optimal gut health. Prebiotics are non-digestible types of fibre that are broken down by beneficial gut bacteria. Gut bacteria feed on prebiotics and create short-chain fatty acids. Onions are particularly rich in the Prebiotics -  Inulin and Fructooligosaccharides. These help increase the number of friendly bacteria in your gut, help boost digestive health and also benefit your immune system.


Healthy Skin & Hair

Onions are a good source of Vitamin C, onions may support the building and maintenance of Collagen which provides structure to skin and hair. Applying freshly squeezed Onions Juice promotes hair growth and also helps to get rid of any scalp infections.  Adding Onions while making Hair Oil is a common practice in Indian households. Rubbing a slice of an Onion on the balding area is believed to induce hair growth.


HOW TO USE ONIONS IN DAILY COOKING:

     Onion is one common ingredient in most of the Cuisine around the World. A staple in most of the kitchens around the world.  It can be easily added into your diet and it can be enjoyed Raw or Cooked.  Onions give a wonderful flavour to savoury dishes.  Regular intake of Onions can boost Vitamins, Minerals & Fiber.
  • Raw Onions can be added to kick the flavour in Salads & Raithas.
  • Can blend raw Onions with fresh herbs, vinegar and olive oil for a tasty homemade salad dressing.
  • Serve slices of Raw Onions along with deep-fried Non-Vegetarian dishes like Chicken 65, Beef 65 or along with Gobi 65, Vegetable or Chicken Cutlets etc.,
  • Use raw onions to add a kick of flavour in Indian Street foods & Chaat items like Bhel Puri, Pani Puri, Pav Bhaji etc.,
  • Add finely chopped Onions to Egg Dishes such as Omelettes, Scrambled Eggs, Frittatas or Quiches.
  • Top Crispy Dosas or Uthappam, Adai etc., with finely chopped raw Onions for a flavourful Dosa variety like Onion Dosa, Onion Uthappam.
  • Add Onions into Indian snacks like Vadais, Pakodas, Bhajjis, Samosas, Kachoris etc.,
  • Onions can be used as a base for Stocks & Soups.
  • Can prepare a hearty French Onion Soup or a Vegetable Soup with Onions.
  • Can make Pickled Onions.
  • Make homemade Salsa with Onions, Tomatoes and Cilantro.
  • Onions are commonly used while stir-frying Vegetables.
  • Onions are commonly used in most of the Indian Curries and Gravies.
  • Caramelized Onions add a wonderful taste to Baked Goods.
  • Caramelized Onions are served along with Rice Dishes like Biriyani, Ghee Rice, Mujadara etc.,

HOW TO BUY & STORE:

  • When selecting onions, make sure the Onions are dry and firm.
  • Onions shouldn't be wet and smelly.
  • Store Onions at room temperature in a clean, dry place.
  • Keep Onions in an open container in a well-ventilated room.
  • Store them whole with the peels.
  • Peeled onions can be stored in the refrigerator for 10–14 days. 
  • Sliced or cut Onions can be refrigerated for not more than 7–10 days.

________________________________________________________________________________

TRIVIA - A SMALL FACT

Why does chopping Onions cause tears?

     Recently I saw a video... A teacher asking the students to name a vegetable which would make you cry.  Most of them answered Onions, some Peppers and so on.  One student out of blues answered Coconuts and then came the hilarious part of the Video.  Anyway...   
     Onions have a reputation for making people cry during the cutting or chopping process. This is due to the presence of a gas called syn-Propanethial-S-oxide. This chemical is a compound liquid that acts as a lachrymatory agent, meaning that it causes tears or stings the eyes.
     There are even weird suggestions like chewing a Bubble Gum or holding your tongue on the roof of your mouth or holding a piece of bread in your mouth while chopping Onions. But to my experience, none works.
      To reduce tears during chopping, chill the Onions for about 30 minutes, then cut off its top. First, peel the outer layer of the onion and leave the root intact, as this part has the highest concentration of lachrymatory agents. And using a very-very sharp knife and cutting the Onions fastly(so that the work(shedding tears) gets over soon), also can reduce tears while chopping Onions.
      Place Onions in Cold Water can help you to an extent in reducing tears while cutting Onions.
      Overall I feel that we have all got used to the fact that Cutting Onions can make you CRY. Slowly & in due course, I feel that I have left all these ideas behind and got adapted!!! 


_______________________________________________________________________________

DISCLAIMER:

Please remember these treatments options are only meant as guidelines and in no way replace the advice or treatment provided by your medical practitioner. It is always good to seek the advice of your physician, homoeopath, naturopath, or herbalist for professional advice in any matter related to your health. This article is for information purposes only.


SNACKS & SAVOURIES
KUNUKKU


     The recent lockdown due to COVID-19 brought forth a few new recipes into our household and this Kunukku recipe was one among them.  My husband came up with a YouTube video of this Kunukku recipe by Santha Paati(Santha Paati Samayal).  Kunukku is a traditional teatime snack prepared with Rice & Dhal. Small gooseberry sized balls made with coarsely ground batter, deep-fried until golden yellow in colour with a crispy outer layer. The way she explained the recipe in her Brahmin slang and how she elegantly prepared it impressed me to the core. The same day I prepared the recipe for an evening snack.  I made two batches one without the add-ons and another with Onions, green chillies & coriander leaves.  Both tasted good, but we liked the ones without the add-ons.  I paired it up with Coconut Chutney.  Hot Kunukku with hot-hot Coffee/Tea is truly an indulgence to experience.
     Frankly, I have never heard about this Kunukku or tasted it before. Though the name sounded somewhere acquainted least had an idea what it was. Traditional recipe with Rice & dhals sounded nutritious and while preparing the snack I felt it was more or less like Adai. After making this Kunukku I literally was impressed by the snack that I taught my Mother & my MIL with detailed explanation and precise measurement as Santha Paati had suggested in her recipe.  She said that this Kunukku is also catered as a Naivedhyam during Navratri Festival.
      This Kunukku has become the recent addition into my recipe log with repetitive trials. Even I served it for lunch as a side dish to go along with Rasam.    Every time, this snack comes out to be so perfect, crispy and tasty.  It is truly a wonderful Teatime snack. 


Recipe Type - Snacks & Savouries
Difficulty - Easy
Yields - 35 - 40 Kunukku
Author - SM

Preparation Time - 15 -20 Minutes
Soaking Time - 3 - 31/2 Hours.
Cooking Time - 5 - 7 Minutes for 1 Batch


HOW TO COOK KUNUKKU


SNACKS & SAVOURIES
KUNUKKU


INGREDIENTS:

To Soak & Grind:

Bengal Gram Dhal - 100 Gms
Tuvar Dhal - 100 Gms
Black Gram Dhal/Urad Dhal - 1 Tspn
Par-boiled Rice - 200 Gms
Dry Red Chillies - 4 Nos
Green Chillies - 4 Nos
Asafoetida - 1 Tspn
Salt - To Taste

Additional Ingredients:

Coconut - 1 Cup
Curry Leaves - a Sprig

Optional Ingredients:

Onion - 1/2 No.
Carrots - Few
Coriander Leaves - few

For Deep Frying:

Oil

METHOD:

  • Soak the Dhal & Par-boiled Rice along with Dry Chillies for about 3-31/2 Hours.
  • Once soaked drain the ingredients.
  • Add the soaked ingredients & Green Chillies into a blender jar and grind it into a coarse mix.
  • Finally, add Asafoetida and a dash of Salt to the above and grind it briefly.
  • Do not add Water while grinding the ingredients.
  • Collect the coarsely ground mix in a bowl and add Grated Coconut and Curry leaves into it & mix well.
  • Meanwhile heat Oil in a pan on a high flame.
  • Allow the Oil to smoke off.
  • Reduce the flame to medium-high.
  • Dip your hands in a bowl of Water and take a handful of Kunukku Mix.
  • Roughly make small Gooseberry sized balls out of the Kunukku Batter and carefully drop them into the hot oil.
  • Fry few pieces at a time so that the Oil doesn't cool down.
  • Make sure not to overcrowd the pan while frying.
  • Turn & fry the Kunukku so that it browns evenly.
  • Remove the Kunukku from the oil when it is cooked through and it turns into golden yellow in colour.
  • Drain them on a paper towel.
  • Serve Kunukku hot with your choice of Chutneys or Sauces.
  • Kunukku serves to be a wonderful Teatime snack. Pair it up with hot-hot Coffee or Tea.


SNACKS & SAVOURIES
KUNUKKU


NOTES:

  • Drain the soaked ingredients and make sure there is no water while grinding the ingredients.
  • Grind it into a coarse mix.
  • Commonly this Kunukku recipe is prepared with left-over Adai Batter.
  • I made this Kunukku recipe without adding Onions or any vegetables or coriander leaves.
  • You can add your preferred add-ons into the batter and make this Kunukku.
  • Roughly make small Gooseberry sized balls out of the Kunukku Batter and carefully drop them into the hot oil.
  • Make sure not to overcrowd the pan with kunukku while frying.
  • Which may cool down the oil which would not yield you with crispy Kunukku and also it may stick to each other which will be difficult to handle.
  • Fry evenly until the Kunukku becomes Golden Yellow in colour.
  • Leftover Batter can be (diluted) used to make Adai.


COOKIES
KARACHI BISCUITS - HYDERABADI TUTTI FRUTTI BISCUITS

      Karachi Biscuits are popular Tea Time Cookies loaded with Tutti Frutti & Cashew Nuts. These cookies are made without Eggs and it is named after the famous Karachi Bakery in Hyderabad. I have never been to Hyderabad or never ever had a chance of tasting these Karachi Biscuits from the famous Karachi Bakery. But when the recipe said it is loaded with Tutti Frutti and Cashew Nuts then I had no second thought.  I wanted to make it for sure.
      I love Cookies, Biscuits, Ice Creams etc., with loads of Nuts and least to mention my love for Tutti Frutti. Tutti Frutti is basically Candied Raw Papaya and is very commonly used in India in baked goods, Pastries, Ice Creams, Puddings & Desserts. Least to mention their unavoidable role in Christmas Fruit Cakes. When I made Tutti Frutti at home for Christmas Fruit Cake, I had quite a few left that I had few other recipes with Tutti Frutti in mind and these cookies were one among them.
      These Karachi Biscuits are eggless cookies filled with Tutti Frutti, Cashew Nuts and flavoured with Cardamom or Rose Essence which gives a unique flavour to these Cookies.  Once baked these Karachi Biscuits turn out to be Soft & Crumbly with a wonderful Desi note of Cardamoms.  This recipe is pretty simple and straight forward and does not use any leavening agent or egg.
     You have to make a soft dough with Butter, Powdered Sugar, All-Purpose Flour and Custard Powder.  Custard Powder is basically Corn flour flavoured with Vanilla, which helps you yield soft and crumbly Cookies. You can flavour these Karachi Biscuits with Rose Essence or Cardamom Powder.  Even some recipes call for adding Pineapple Essence.  I have used homemade Tutti Frutti in this recipe can also add few Candied Orange Peels or Orange Zest if you like a citrusy note in these Biscuits. I have added Cashewnuts in these Biscuits can substitute it with Almonds or Pistachios.
      These Karachi Biscuits are little soft when baked but crisp up as they cool down. First time when I baked these Biscuits I waited for a little longer as I felt these biscuits to be undercooked.  Which happened to be a big mistake.  It turned out to be hard when it cooled.  So remove the Biscuits from the oven when it is still soft and also the colour shouldn't change.
     If you are in the mood for a simple & foolproof Cookies then this Karachi Biscuits would surely fall under that category.  And above all, if you love Tutti Frutti & Nuts then these Cookies are sure to fascinate your taste buds. Enjoy them with a cup of hot-hot Coffee or Tea!!!


For more COOKIES RECIPES, Click here...


Recipe Type - Cookies, Snacks
Difficulty - Easy
Yields - 25 - 30 Cookies
Author - SM

Preparation Time - 15 -20 Minutes
Baking Time - 15 - 20 Minutes for 1 Batch

For a detailed Recipe on HOW TO MAKE TUTTI FRUTTI, Click here...


HOW TO BAKE KARACHI BISCUITS

COOKIES
KARACHI BISCUITS - HYDERABADI TUTTI FRUTTI BISCUITS

INGREDIENTS:

Unsalted Butter - 1/2 Cup
Powdered Sugar - 1 Cup
All-Purpose Flour - 11/2 Cups
Custard Powder -1/2 Cup
Baking Powder - 1 Tspn
Salt - a Pinch
Cashew Nuts - 4 Tbspn
Tutti Frutti - 4 Tbspn
Cardamom Powder - 1/4 Tspn(Optional)
Rose Essence - few Drops(Optional)
Milk - 1/4 Cup

METHOD:

  • Preheat the oven at 180° Celsius for about 10 minutes.
  • Finely chop the Cashew Nuts and keep it aside.
  • Powder one Cup of Sugar and keep it aside. 
  • Combine All-purpose Flour, Custard Powder, Baking Powder, Salt and sift it once & keep it aside.
  • Let the Butter be at room temperature.
  • In a bowl soften the Butter using a hand mixer.
  • Once the butter is softened, add the Powdered Sugar and whisk it using a hand mixer.
  • Mix it in medium speed until both the ingredients are well combined and soft. 
  • Add the sifted flour mixture to the Butter-Sugar Mix and give a quick stir using a rubber spatula.
  • Add the chopped Cashew Nuts & Tutti Frutti to the above mixture and mix well.
  • Pour in 1/4 Cup of Milk.
  • Gently mix it to form a soft dough using your hands.


  • Roll it out into cylindrical shape and make it into a rectangular shape patting on the side.
  • Divide the dough into 2 equal parts and make logs out of it.
  • Wrap the logs with a cling sheet tightly and refrigerate for about 2-3 hours or until you bake them.


  • Remove it from the refrigerator and slice it just before baking.
  • Take out the dough logs after they have chilled and gently cut it into 1/4 inch thick Cookies.
  • Meanwhile, Line up a Baking tray with baking sheet/parchment paper.
  • Arrange the Cookies 2cm apart on the tray.
  • Cookies will spread a little during baking.
  • Bake at 160° Celsius for 15-20 minutes or until firm and just mildly start to colour but should retain the original colour(it shouldn't brown).
  • Allow Karachi Biscuits to cool completely.
  • Store it in an airtight container.
  • Karachi Biscuits will stay fresh in an airtight container at room temperature for up to 2 weeks.

NOTES :

  • Use Butter at room temperature, it should not be melted. 
  • Use your preferred flavouring agent - Cardamom/Rose Essence/Pineapple Essence.
  • I have used Homemade Tutti Frutti(just the red coloured ones) in these Biscuits.
  • Can add your preferred coloured Tutti Frutties and also can add few Candied Orange Peels if you prefer a mild citrusy note in these Cookies.
  • Can substituting Cashew nuts with Almonds.
  • The Cookie dough should be soft and not crumbly.
  • The texture of the cookie dough should be firm so that you can get the desired shape.
  • Leave it in the refrigerator for about 2-3 hour or freeze it for about 10-20 minutes or until the dough is firm enough.
  • The Climatic condition of the region you live also affects the firmness of the dough.
  • You can leave the dough in the refrigerator until you bake the cookies to get the desired firmness.
  • This will help prevent the cookies from spreading – they’ll bake up thick and retain the shape. 
  • If the dough is not firm enough the butter in the dough would melt & may turn the Cookies crunchy, which is not the needed texture of these Karachi Biscuits.
  • Baking time totally depends on the type of Oven used.  Adjust accordingly. 
  • And the most important fact - take it out from the Oven when it starts to become firm but yet slightly undercooked(soft to touch), if you prefer a soft & crumbly Karachi Biscuits.


PAYASAM, PEADHAMAN, KHEER
CHAK HAO AMUBI - MANIPURI BLACK RICE KHEER
     
    Even while writing this post I am totally abashed by the fact that though being an Indian, I rarely know much about the North-Eastern parts of India.  Though other parts of India and its cuisines are well propagated around, North Eastern Cuisine is yet to be explored.  So my venture into North-East Indian Cuisine has taken its first step with this Black Rice Kheer.  Recently my daughter asked me to cook this Kheer with Thai Black Glutinous Rice(Pulut Hitam) variety which is locally available. I usually make Bubur Pulut Hitam a mildly sweetened traditional Malaysian Dessert which is one of the most popular desserts in the South East Asian region.
      This Black Rice or The Forbidden Rice earned its name because it was once reserved for the Chinese Emperor, for whom it was meant to ensure health and longevity. Forbidden Rice is a medium-grain, non-glutinous/glutinous heirloom rice with a deep purple hue and a nutty, slightly sweet flavour. Varieties include Indonesian Black Rice and Thai Jasmine Black Rice.
     Although Black Rice or the Forbidden Rice is cultivated in the other parts of North East India, Manipur produces the best Black Rice variety.  Rich & fertile Manipur soil and unadulterated Himalayan streams facilitate the growth of Black Rice in abundance in this region. The Black Rice is yet another gem from the Land of Jewels - Manipur(which literally means bejewelled land). This fragrant  & sticky variety of rice is a staple of the state and the Kheer made from it is a must in every Manipuri celebration.
     Manipur is an Indian State in the North-Eastern region which has its south-east part bordered with Myanmar. I have always been fascinated by the places, people & cuisines of North-Eastern India. Apart from its beautiful valleys and lush forests, sprawling grasslands and caves, the region has a rich cultural heritage too. Black rice is known as Chak Hao Amubi in Manipuri where Chakhao means delicious and Amubi means Black. Desserts made from Black Rice is generally served on special occasions. major feasts and festive events. Black rice is a source of Iron, Vitamin E, and rich in Antioxidants. The bran hull (outermost layer) of Black Rice contains the highest levels of Anthocyanins found in food. The grain has a similar amount of fibre to brown rice and like brown rice, has a mild, nutty taste.
     The traditional Chak Hao Amubi- Manipuri Black Rice Kheer is reflective of the State’s culinary trail –  made with minimal ingredients & slow cooked until the nutty flavour of the Black Rice seeps through.  Black Rice Kheer is a simple straight forward Dessert, easy to make with very few ingredients yet delicious & nutritious.


RICE VARIETY
BLACK RICE
     Once cooked this Black Rice transforms this dessert with its beautiful purple colour.  It turns into a bright purplish burgundy colour adding uniqueness to the Kheer.  I have used Black Sticky(Glutinous) Rice and I usually soak the rice overnight or at least for 6-8 hours before cooking.  But it can also be cooked without soaking the rice beforehand, but it takes a longer time and an extra amount of water/milk to cook. And the cooked rice doesn't yield a perfect texture. The Rice should be cooked until soft for this Kheer.  You can also get easy with the type of Sweetener for this Kheer, I have used White Sugar which can be substituted with Palm Sugar /Jaggery.

For more DESSERTS, Click here...


Cuisine - North-Eastern India(Manipur)
Course - Dessert
Difficulty - Easy
Serves - 2-3
Author - SM


Preparation Time - 10 - 15 Minutes
Soaking Time - 6-8 Hours/Overnight
Cooking Time - 30-45 Minutes


HOW TO COOK CHAK HAO AMUBI - MANIPURI BLACK RICE KHEER

PAYASAM, PRADHAMAN, KHEER
CHAK HAO AMUBI - MANIPURI BLACK RICE KHEER


INGREDIENTS:

Black Rice - 1/3 Cups
Milk - 4 Cups
Sugar - 1/2 Cup
Cardamom - 2-3 Pods

To Garnish:

Ghee - 1 Tbpsn
Cashewnuts - 8 Nos.
Almonds - 8 Nos.

METHOD:

To Soak & Cook the Black Rice Kheer:

  • Clean, Wash the Black Sticky Rice 2-3 times or until water runs clear.
  • Soak the Black Sticky Rice in water for about 8-10 hours/Overnight.
  • Once soaked, drain and discard the water used for soaking.
  • Grind the Cardamom Pods into a fine powder and keep it aside.
  • Meanwhile, boil the Milk on a heavy-bottomed pan or a pressure cooker.
  • When the Milk boils, lower the flame and carefully add the soaked Black Rice to the Milk and mix well.
  • Cook the Black Rice on a low flame until the rice turns soft for about 25-30 Minutes, stirring it occasionally.
  • Make sure that the ingredients don't get scorched at the bottom which will totally spoil the taste of the Kheer.
  • When the Black Rice turns soft & cooked add the Sugar and mix well.
  • Sprinkle the Cardamom Powder and give a quick stir.
  • Let it cook on a low flame until Sugar dissolves and the Kheer reaches the desired consistency.

For Garnishing:

  • Heat Ghee in a pan, let the flame be at a low.
  • Add slivered Cashew Nuts & Almonds and fry for few minutes until the nuts turn into golden yellow colour.
  • Pour in the Ghee & the fried nuts to the Black Rice Kheer and mix well.
  • Serve Chak Hao Amubi - Black Rice Kheer @room temperature or chilled.

NOTES :

  • Black Rice is a tougher variety which takes longer time to cook.
  • So make sure to soak it for at least 8-10 hours or overnight.
  • Read the package instruction whether it needs soaking and for rice water ratio to get the Rice Al dente.
  • I have used locally(Malaysia) available Black Glutinous Rice in the recipe which needed soaking.
  • The Rice should be soft once cooked.  Can increase the amount of Milk if required.
  • Can use Palm Sugar instead of White Sugar in the recipe.
  • Adjust the amount of sweetener to suit your Sweet Tooth.
  • If you feel the Black Rice Kheer is thick, add more Milk.
  • Adjust the consistency of the Kheer to suit your preference.
  • Authentic Chak Hao Amubi is cooked with just the Black Rice, Milk & Sugar.
  • Adding Cardamom Powder and the garnishes are truly optional.
  • Serve the Black Sticky Rice Dessert warm or cold.


Newer Posts Older Posts Home
Search Essence of Life - Food

I Me Myself

A vintage-style horizontal oval frame showcasing ornate silver spoons on a dark rustic surface

Essence of Life - Food is all about daily cooking with a simple sense of taste and health. It is all about food. Not a day goes by without eating for most of us, so what we eat matters on the whole. Food in the mode of goodness increases the duration of life, purifies one's existence, and gives strength, health, happiness, and satisfaction. Above all ingredients, the most vital one in my kitchen is love.

Sm @ Essence of Life - Food

Popular Posts

  • Kizhi Parotta: Kothu Parotta and Salna Wrapped in Banana Leaves
  • Kerala Sadhya Vibhavangal: Ultimate Guide to Traditional Onam & Vishu Sadhya
  • Nannari - Indian Sarsaparilla Roots
  • How to Make Kerala Kanji | Traditional Rice Porridge with Payar, Chammanthi & Achar
  • Brewing Authentic Malaysian Kopi: A Step-by-Step Guide to Mastering the Art of Kopi Making
Ebook - What I Cook - For Onam

Ebook - “What I Cook - For Onam”

Amazon.com/dp/B0CGPVY6J3

Indulge in Kerala’s Culinary Heritage: Traditional Onam Sadhya Recipes, with Expert Serving Tips! Celebrate Onam the authentic way! Discover 25 timeless Kerala Sadya recipes in my ebook. From avial to payasam, bring home the flavours of tradition. Available now on Amazon!

Essence of Life

Subscribe & Follow

© 2026 | Essence of Life - Food

  • Home
  • Ask First
    Please note that all rights for the photographs and texts on this blog, unless otherwise mentioned, rests with the author. Please do not use without permission.
  • Privacy Policy