Essence of Life - Food
  • Home
  • From My Kitchen
    • Heirloom Recipes
    • From God's Own Country
    • Sadhya
    • Kongu Cuisine
    • Chettinaad Cuisine
    • South East Asian
    • Around the World
  • Ebook
  • I Me Myself
DIWALI/DEEPAVALI
DIWALI - THE FESTIVAL OF LIGHTS


     Light up this festive season with some of these wonderful recipes. What's a festival without food and when it comes to Diwali what tops the list is always home-made Sweets, Savouries & Desserts. Indian Kitchen light up their stoves even long before the Festive mood begins.  Every  household will have their own list of preferred Sweets & Snacks for the festive season along with easy additions to enhance the list of so-called Diwali Bakshanam. Then comes the Menu for the Day and last but not the least finishing off the heavy-fed day with Diwali Lehyam(a home-made digestive aid).

    When it comes to Diwali Bakshanam and Diwali a long-forgotten Painting pops up into my mind - a family preparing Diwali Sweets and Snacks, while ransacking through the net with various search results I was able to find it out.  The painting had left a deep remark in my mind.


    I have seen Women folks take meticulous measures to prepare Diwali Sweets & Snacks in our neighbourhood.  Right from buying the ingredients, cleaning, soaking, drying, their long walks to the nearby Flour Mills, least to mention the never ending queue there along with Power Cuts.  Even I have heard discussions which oil would be perfect for deep frying, that doesn't bubble up frothing out through the wok, if it happens adding a marble of tamarind to cut it down etc., & etc., Random & scary anecdotes stating splattered oils while frying murukkus/seedai. Once my classmate Vijayalakshmi came with a puffed up & scalded hand after Diwali.

     Recently, I saw an Instagram post from Jeyashri's Kitchen stating that they even make a Pillayar with the dough they used to make snacks.  So as to ensure that, what begins for a goodness should reach to all with pureness. So much of mind work for simple preparation of Snacks & Sweets.  May be a tradition, a generation to come would brush it off or may not even be aware of.

     In midst of new clothes, crackers, least to mention the Diwali Bonus etc., I’ve always found the food to be a fascinating aspect in every festival. It’s not that I’m a hard core foodie, but the involvement and ideas every household incorporates to brighten up the festive mood always fascinates me. Diwali day comes along with platters of Sweets & Savouries from the neighbourhood. Though Murukku would be a default/must have savoury item of every household, followed by Athirasam, I’ve always loved to have Shanthi aunty’s Coconut Burfi & Boondi Ladoo,  Lenin’s mother’s special Gothumai Halwa. Sharadha Shenoy aunty's White and perfectly shaped Chaklis, Jayashree aunty who was a working women would incorporate a large spread on Diwali Day and what I remember the most having at her home are Vermicelli Payasam and Malpua. To the latest, my local friend Santhini sends her tasty, soft & crispy Murukkus prepared with Instant Murukku Flours, every Diwali.

      But the real mood of a Festival comes along with all these anticipations, preparations and nostalgia related to it.  I have tried to add 70+ Diwali Recipes for this Festive Season - Sweets, Savouries and Desserts.  Click on to the individual pictures for Recipes and Stories.
 
     Cook some of the Classic Indian Sweet & Savouries this Festive Season.   Or if you are in short of time there a a few recipes which can be incorporated even at the last time - Instant versions of Sweets & Savouries & Desserts.  Enjoy Food and Happy Diwali!!!
 

For more DIWALI RECIPES, Click here...

DIWALI SWEETS


     Celebrate Diwali with the taste of sweetness, a collection of simple and easy sweet recipes can be a quick addition to your Mittai/Sweet Platter.  Most of the recipes here are less time consuming too.

Boondi Ladoo
Mysorepak
Bengali Langcha
Gulab Jamun Chum Chum
DIWALI RECIPES
Gulab Jamun with Khoya & Paneer
DIWALI RECIPES
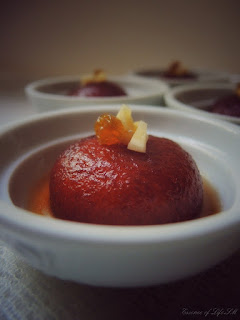
Gulab Jamun
DIWALI RECIPES
Makkan Peda
DIWALI RECIPES
Gulab Jamun in Rabri

DIWALI RECIPES
Badusha
DIWALI RECIPES
Rava Laddu
DIWALI RECIPES
Badam/Almond Halwa
DIWALI RECIPES
Kasi/Poosanikai Halwa

Palkova
Shrikandh
Mishti Doi
Coconut Burfi
DIWALI RECIPES
Rasagulla
DIWALI RECIPES
Ras Malai with Readymade Rasagullas
DIWALI RECIPES
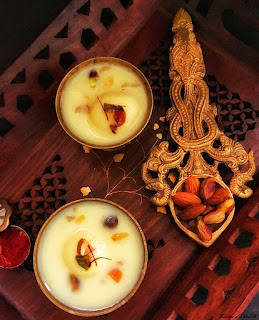
Ras Malai
DIWALI RECIPES
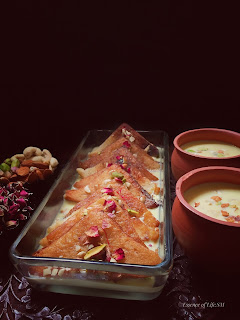
Shahi Tukda/Double ka Meeta

Pear Halwa
Apple Halwa
Karachi Halwa
Rose Sago Dessert
DIWALI RECIPES
Sweet Mixture
DIWALI RECIPES
Carrot/Gajar Halwa
DIWALI RECIPES
Kala Kala/Diamond Biscuit
DIWALI RECIPES
Then Mittai/Honey Candy

Milk Kesari
Pineapple Kesari
Rava Kesari
Aval/Poha Kesari


SNACKS & SAVOURIES

 
     Murukku is a default Savoury in South India, when it comes to Diwali followed by South Indian Mixture/Chivda and few quick savouries like fried Nuts can simply spice up the Diwali Platter.  I have added few simple Murukku recipes prepared with ready-made Murukku Flour & Idiyappam Flour in this collection.


MURUKKU:

Coconut Milk Murukku
Pottukadalai Murukku
Tapioca Murukku
Garlic Murukku
Instant Murukku with Radymade Murukku Mix
Urad Dhal Murukku
Maida Murukku
Potato Murukku
 
 
SAVOURIES:
South Indian Mixture
Oma Podi
Kara Boondi
Sev
Aloo Bhujia
Namak Pare
Moong Dhal Namkeen
Boondhi
Roasted Cashewnuts
Masala Peanuts
Banana Chips


DESSERTS:

     Though a large spread of dishes along with Sweets & Savouries felicitate the festival, a meal is incomplete without a Dessert.  Dessert serve as a delectable delight to food lovers.  Complete your meal with wonderful Indian Desserts.  Serve rich and Creamy Rabri/Basundi or keep it simple with Lassi or Ice creams.  Go regional with desserts like Kesaribhath/Kulfi or traditonal with Kheers/Payasams.  Treat your Sweet Tooth and indulge in festive mood.


More Recipes FOR A SWEET TOOTH, Click here...


DIWALI RECIPES
Rabri/Rabdi
DIWALI RECIPES
Basundi
DIWALI RECIPES
Badam/Almond Kheer
DIWALI RECIPES
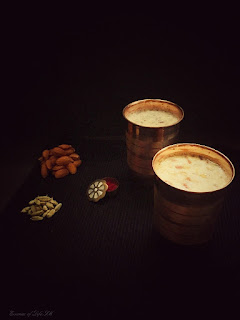
Badam/Almond Milk


DIWALI RECIPES
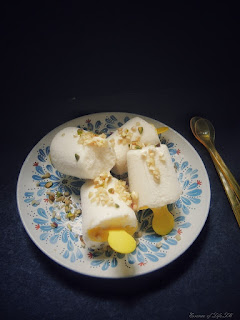
Kulfi
DIWALI RECIPES
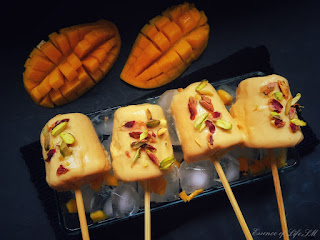
Mango Kulfi
DIWALI RECIPES
Rose Kulfi
DIWALI RECIPES
Tutti Frutti Ice Cream


DIWALI RECIPES
Semiya/Vermicelli Payasam
DIWALI RECIPES
Sago/Javvarisi Payasam
DIWALI RECIPES
Firni
DIWALI RECIPES
Carrot Kheer

Rice Kheer
Apple Sago Kheer
Chak Hao Amubi/Black Rice Kheer
Ponsa Gharai/Jackfruit & Rice Payasam
Gulab Firni
Sweet Punjabi Lassi
Mango Lassi
Rose Milk


Enjoy the Food & Wishing you all a Happy Diwali !!!

SM


SNACKS & SAVOURIES
MOONG DAL NAMKEEN/HALDIRAM MOONG DAL/FRIED MOONG DAL


      Moong Dal Namkeen, most commonly found as Haldiram Brands Moong Dal Namkeen in the market is a tasty snack.  Crunchy yet a softness of this snack with a hint of Chat Masala and Salt is an absolute treat as a snacking dish. Moong Dal Namkeen serves as a wonderful Cocktail or Teatime Snack.
     Fried Moong Dal is a popular snack among Indians, this simple-sounding recipe is prepared by soaking Moong Dal so that if fluffs up & turns soft.  Soaked Moong Dal is fried until it turns into a golden yellow colour.  Sprinkle the deep fried Moong Dal with Salt and there you go with a tasty and crunchy snack, for more flavour and taste season it up with Chat Masala/Red Chilli Powder.  As we all love spicy snacks at home I have seasoned it with both of the above Masalas.
     In midst of posting a few of quick-fix Sweet & Savouries recipes which can be easily prepared for this festive season, I thought this Moong Dal Namkeen/Haldiram Moong Dal/Fried Moong Dal would be an easy last minute addition.  It is less time-consuming,  a very simple & straightforward recipe which can even be prepared by beginners.

For more SNACKS & SAVOURIES Recipes, Click here...


Cuisine - Indian
Recipe Type - Snacks & Savouries
Spice Level - Low
Difficulty -Easy
Yields - Approx 2 Cups
Author - SM

Preparation Time - 5 -10 Minutes
Soaking Time - 4-5 Hours.
Drying Time - 1 Hour
Cooking Time - 5 -10 Minutes

HOW TO MAKE MOONG DAL NAMKEEN/HALDIRAM MOONG DAL/FRIED MOONG DAL


SNACKS & SAVOURIES
MOONG DAL NAMKEEN/HALDIRAM MOONG DAL/FRIED MOONG DAL


INGREDIENTS:

Yellow Moong Dal - 2 Cups
Red Chilli Powder - 1/4 Tspn(Optional)
Chat Masala Powder - 1/4 Tspn
Salt to taste
Oil - For Deep Frying


METHOD :

  • Clean and Wash the Yellow Moong Dal 2-3 times or until water runs clear.
  • Soak the Moong Dal with ample water for 4-5 hours.
  • Once soaked, drain and discard the water used for soaking Moong Dal.
  • Spread the drained Moong Dal on a clean Kitchen towel for at least 30 Minutes - 1 Hour.
  • Pat dry the Moong Dal until it is totally moisture free.
  • Heat Oil in a deep pan on a high flame.
  • Once the oil starts to fume, lower the flame and allow the oil to smoke off.
  • Deep fry the soaked and dried Moong Dal until they turn into golden brown in colour.
  • Fry until the sizzling stops of a medium flame.
  • Can place the Moong Dals in a small slotted ladle and directly immerse it into the hot oil.
  • Gently toss it up inside the slotted spoon using another long-handled spoon, so that the Moong Dals are evenly cooked.
  • Drain the deep fried Moong Dals on a clean paper towel.
  • Allow it to cool down before seasoning the Moong Dal Namkeen.
  • Sprinkle Red Chilli Powder, Chat Masala Powder and Salt to the deep fried Moong Dals. 
  • Gently toss it up until all the ingredients are well combined.
  • Store Moong Dal Namkeen/Fried Moong Dal in an airtight container.
  • Serve Moong Dal Namkeen/Fried Moong Dal as a Teatime/Cocktail Snack.


SNACKS & SAVOURIES
MOONG DAL NAMKEEN/HALDIRAM MOONG DAL/FRIED MOONG DAL


NOTES :

  • Soak the Moong Dal for 4-5 Hours.
  • Drain and allow it to dry on a Kitchen Towel, and pat it dry until the soaked Moong Dal is moisture free, before deep frying it for the snack.
  • Deep fry the Moong Dals on a medium flame.
  • Season it with Salt or add Chat Masala/Red Chilli Powder/Asafoetida to add an extra note fo taste & flavour to Fried Moong Dhal Namkeen.
A traditional Indian Sweet Mixture made of deep-fried grated potatoes, almonds, cashews, groundnuts, and raisins, tossed with powdered sugar and cardamom powder, served in a hanging brass plate
Sweet Mixture Recipe - Indian Snack with Almonds, Cashews, and Potatoes

"Irresistible Sweet Mixture Recipe: A Perfect Festive Snack"

    Sweet Mixture is a delicious and exotic snack that blends the richness of nuts with the crunch of crispy deep-fried potatoes. Perfect for festivals like Diwali, this Sweet Mixture brings together the finest deep-fried ingredients, including finely grated potatoes, cashew nuts, almonds, groundnuts, and raisins, all tossed in powdered sugar and aromatic cardamom. While savoury mixtures are popular in South India, this sweet version stands out as a unique festive treat.

A Childhood Memory That Turned Into a Delightful Snack

    As a child, I was sceptical of Sweet Mixture, but the ‘NUTS’ always drew me in. For the longest time, I thought the white strands in this recipe were beaten rice (poha). Imagine my surprise when I discovered they were actually deep-fried grated potatoes! I still remember the day a colleague gifted me a packet of Sweet Mixture, and the taste has stayed with me ever since. The perfect combination of crunchy potatoes, rich nuts, and sweet powdered sugar made this snack irresistible.

Why You’ll Love This Sweet Mixture Recipe   

This Sweet Mixture recipe is an absolute treat during festivals like Diwali. Its crispy texture and sweet, melt-in-your-mouth flavour make it perfect for sharing with family and friends.  The best part? It stays crispy for 2–3 days when stored properly, making it an ideal addition to your festive spread.


For More Diwali Recipes: Click Here!  Looking to create more festive treats this season? Explore a wide range of Diwali Sweets and Savouries from my blog! Make this Diwali extra special with  these delicious, easy-to-follow recipes!


Recipe Overview: Sweet Mixture Recipe

Cuisine: Indian
Recipe Type: Snacks & Savouries
Spice Level: Low
Difficulty: Medium
Yields: Approx 2 Cups
Author: SM


Total Time:

Preparation Time: 5–10 Minutes
Cooking Time: 5–10 Minutes


For More Indian Sweets Recipes: Click Here!  Craving more delicious Indian sweets? Check out my collection of traditional Indian Sweets Recipes perfect for any occasion, especially festivals like Diwali!  Make this Diwali extra special with  these delicious, easy-to-follow recipes from my blog!


Step-by-Step Instructions for Making the Perfect Sweet Mixture

A close-up of an Indian Sweet Mixture with deep-fried grated potatoes, almonds, cashews, groundnuts, and raisins, all coated in powdered sugar and cardamom, served in a brass plate.
Sweet Mixture Snack Recipe - Indian Festive Treat with Nuts and Potatoes


    This traditional sweet mixture is an easy-to-make, quick-fix recipe, perfect for festive occasions like Diwali. Whether you're looking for a Diwali potato mixture or a delightful snack to share with loved ones, this recipe brings together the best of flavours and textures in just a few simple steps.

Ingredients for Sweet Mixture

  • Potatoes: 2 large
  • Almonds: 8-10
  • Cashew Nuts: 8-10
  • Groundnuts (Peanuts): 3 tablespoons
  • Raisins: 3 tablespoons
  • Cardamom Pods: 2
  • Sugar: 2–3 tablespoons


Method - Step-by-Step Guide for Sweet Mixture Recipe

Prepare the Potatoes:

  • Peel and grate the potatoes finely.
  • Wash the grated potatoes 3–4 times to remove excess starch.
  • Soak the grated potatoes in cold water with ice cubes to prevent discolouration and remove starch. Keep them soaked until frying.


    *Pro Tip: Soaking the potatoes keeps them crispy when fried.


Fry the Grated Potatoes:

  • Drain the soaked potatoes and spread them over a clean kitchen towel to dry.
  • Deep fry the grated potatoes in batches until golden and crispy. Be careful not to over-fry or darken them.
  • Drain on paper towels to remove excess oil.


    *Pro Tip: Ensure the potatoes are fully dried before frying to avoid sogginess.


Deep Fry the Nuts:

  • Heat oil in a deep pan over a high flame.
  • Once the oil starts smoking, reduce the flame.
  • Deep fry almonds, cashew nuts, and groundnuts until golden brown.
  • Fry raisins briefly until they fluff up.
  • Drain on paper towels.

Toss and Combine:

  • Once all the ingredients are cool, toss the fried potatoes, nuts, and raisins together in a large bowl.

Add the Sweetness:

  • Powder the sugar along with cardamom pods.
  • Once everything has cooled completely, sprinkle the powdered sugar mixture over the fried ingredients.
  • Gently toss until well combined.
 

*Pro Tip: Allow all the ingredients to cool down completely before adding the powdered sugar. If the mixture is warm, it will absorb the sugar, making the mixture soggy.

 
Storage Tips
  • Store the Sweet Mixture in an airtight container at room temperature for up to 2–3 days.
  • For longer shelf life, refrigerate the mixture.


Notes and Tips for Perfect Sweet Mixture:

  • Use large potatoes for better texture and volume.
  • Ghee can be used instead of oil for deep-frying if you prefer a richer flavour.
  • Always let the ingredients cool down completely before adding powdered sugar to prevent the mixture from becoming soggy.
  • Adjust the sugar to your taste; some prefer it sweeter, while others enjoy a subtle sweetness.
  • Keep grated potatoes soaked in cold water until frying to ensure they stay crispy.

Cooling is Key: Ensure that all deep-fried ingredients have cooled down before tossing in powdered sugar. This step is essential to maintain the crispiness of the mixture. If the ingredients are warm, the sweet mixture can turn soggy.Toss the mixture only when the ingredients have cooled down fully to avoid sogginess.


Final Thoughts

    This Sweet Mixture recipe is not only a festive favourite, but also an excellent snack to enjoy any time of the year. The combination of crispy potatoes, crunchy nuts, and a light coating of powdered sugar makes it irresistible for everyone in the family. Make sure to add this recipe to your Diwali snack list or prepare it for any festive celebration.


Related Recipes You Might Enjoy:

  • Masala Mixture Recipes
  • Traditional South Indian Mixture
  • Bombay Mixture Recipe


SNACKS & SAVOURIES
POTTUKADALAI MURUKKU(SPICY VERSION)
     Pottukadalai Murukku/Murukku prepared with Rice flour and Roasted Gram Dhal is my MIL's speciality.  She soaks, grinds the Rice and prepares this recipe.  Me as usual, with my lethargy and lazy attitude towards long & meticulous preparations of any snack as a matter of fact, yet haven't pondered into the length and breadth of such chores.
    Anyway, what we want is a similar snack which can be incorporated quickly without compromising to the TASTE.  This Pottukadalai Murukku is a cheat version of the same, prepared with ready-made Idiyappam Flour.  If you readily have these 3 main ingredients - Idiyappam Flour, Pottukadalai/Roasted Gram Dhal & Butter then you can easily make this Pottukadalai Murukku within no time. Spice it up with Dry Red Chillies and Cumin Seeds/Sesame Seeds/Ajwain, if you prefer a spicy version of the same recipe.  This can be one easy addition to your 'DIWALI BAKSHANAM' list.  Try your hand with this easy Pottukadalai Murukku Recipe for this festive season.
      Whenever I make this Pottukadalai Murukku or any other Murukku Recipe, I prefer to make it in two batches, one batch would be plain and the other one would be spicy.  For the Plain Pottukadalai Murukku Version, just avoid adding Dry Red Chillies, rest of the ingredients and method of preparation remains the same. Can add Ajwain/Cumin Seeds to the Murukku Mix this will help impart a wonderful aroma to the Murukkus and also helps in digestion.

For more recipes on SNACKS & SAVOURIES, Click here...

Cuisine - Indian
Recipe Type - Snacks
Spice Level - Medium
Difficulty - Medium
Yields -  40-45 Medium sized Murukkus
Author - SM

Preparation Time - 25-30 Minutes
Cooking Time - 30 -45 Minutes


For more MURUKKU RECIPES, Click here

HOW TO MAKE POTTUKADALAI MURUKKU WITH IDIYAPPAM FLOUR


SNACKS & SAVOURIES
POTTUKADALAI MURUKKU


INGREDIENTS :

Idiyappam Rice Flour - 3 Cups
Pottukadalai/Roasted Gram Dhal Powder - 3/4 Cup
Butter - 3 Tbspn
Dry Red Chillies - 6-8 Nos.(Optional)
Ajwain/Cumin Seeds - 1 Tspn
Asafoetida - 1/4 Tspn
Salt - To Taste
Boiling Water - 1 Cup(Approximately)
Oil - To Deep Fry

METHOD :

For Pottukadalai Murukku :

  • Soak Dry Red Chillies in hot water for about 10-15 minutes.
  • Drain and discard the water used for soaking Dry Chillies or use it to knead the dough.
  • Powder the Roasted Gram Dhal/Pottukadalai into a fine powder
  • Measure 3/4 Cup of finely powdered Roasted Gram Dhal/Pottukadalai, sieve it once and keep it aside.
  • Grind the Soaked Dry Red Chillies in a blender or a small mixer-grinder jar.
  • Grind this into a fine paste. Alternatively can add a Tspn of Red Chilli Powder too.
  • Soften the Butter and keep it aside.
  • Mix Dry Red Chilli paste along with Rice Flour, Pottukadalai Powder, Butter, Ajwain/Cumin seeds, Asafoetida and Salt to Taste.
  • Pour in the Boiling Water to the above mix, little at a time and knead it into a smooth & soft dough.
  • The dough should be pliable and kneaded without any cracks.


To Fry Murukku :

  • Heat Oil in a deep pan.
  • Place some dough into the Murukku Mould and press the dough through it. 
  • Make a few swirls onto the reverse surface of a slotted spoon or directly press the Murukkus into the oil.
  • Drop the shaped murukkus gently into the hot oil, fry the Pottukadalai Murukku until it turns into golden brown in colour and the sizzling sound stops. 
  • Drain the Pottukadalai Murukkus on a Paper Towel.
  • Follow the suit for rest of the dough.
  • Allow the Pottukadalai Murukkus to cool down completely before storing.
  • Store the Pottukadalai Murukkus in airtight jars.

NOTES :

  • The dough should be of a correct consistency. It should not be sticky or too hard and without any cracks.
  • Do not substitute Butter with Ghee or Margarine.
  • Butter should be at room temperature before mixing it into the flour.
  • Butter is one main ingredient for crispy and soft murukkus.
  • While using Idiyappam flour for Murukku recipe, use boiled-hot water to knead the dough.
  • Adding dry chillies to the recipe is totally optional. 
  • Powder the Roasted Gram Dhal/Pottukadalai into a fine powder and sieve it once.
  • You can press the Pottukadalai Murukkus directly into the oil. 
  • If stored properly, it stays good for a Week up to 10 days.

Delicious homemade Rava Ladoo garnished with roasted cashews, perfect for Diwali and other festive celebrations. Learn how to make this traditional Indian sweet with our simple recipe.
Homemade Rava Ladoo - Perfect for Diwali Celebrations!


“Easy Rava Ladoo Recipe: Quick Indian Sweet for Diwali.”

Rava Ladoo - A Quick fix Sweet Treat:


    Looking for a quick and easy sweet treat this Diwali? Rava Ladoo, also known as Semolina Ladoo, is a delightful Indian sweet made from roasted semolina, cashew nuts, raisins, and a touch of aromatic cardamom. Not just for festive occasions, it’s the perfect sweet to whip up when that sweet tooth hits! With just a few simple ingredients and minimal time, you can indulge in these delicious ladoos anytime. Follow this foolproof recipe to prepare a batch of Rava Ladoo that will melt in your mouth and add sweetness to your celebrations.


Click the link for a variety of Classic Indian Sweets perfect for Diwali Celebration!


Why Rava Ladoo is the Perfect Festive Treat

    The rich flavour of roasted semolina combined with the crunch of cashew nuts and the sweetness of raisins makes Rava Ladoo a crowd-pleaser. This traditional sweet is ideal for festive occasions like Diwali, where time is precious and homemade sweets add a personal touch to the celebrations. With just a few careful steps, you can whip up these delicious laddoos, perfect for sharing with family and friends.

Effortless Diwali Delights: Quick & Easy Sweet and Savoury Recipes

     This Diwali, I’m sharing a collection of Quick and Easy Indian Sweets & Savoury recipes that are perfect for festive celebrations. These recipes are less time-consuming, require minimal ingredients, and include options that can be made with ready-made powders—ideal for those last-minute preparations. If you’re looking to make your own homemade festive treats without the hassle, these simple and delicious recipes will be just what you need. When you’re short on time but still want to enjoy traditional Indian sweets, Rava Ladoo is a must-try recipe that’s both convenient and delightful and perfect for your Diwali Sweets Platter.

If you're short on time, don’t worry! There are also instant versions of Easy Indian Sweets and Savories you can whip up quickly for last-minute celebrations.


Enjoy Food and Wishing you all a Happy Diwali!!!


Rava Ladoo Recipe Overview

  • Cuisine - Indian
  • Recipe - Sweet; Dessert
  • Difficulty - Easy
  • Yields - 10–12 Rava Ladoos
  • Author - SM

Time Estimate

  • Preparation Time - 5 - 10 Minutes
  • Cooking Time - 20 - 30 Minutes


"Step-by-Step Guide for perfect Melt in Mouth Rava Ladoo"

Traditional Rava Ladoo stacked on a green glass plate, featuring roasted cashews and a hint of cardamom flavour. Ideal for Diwali celebrations and easy to prepare at home.
Traditional Rava Ladoo - A Must-try Indian Festive Sweet


Ingredients for Rava Ladoo

  • 1 cup White Rava (Semolina)
  • 1/2 – 3/4 cup Sugar (adjust to taste)
  • 3 tablespoons Ghee (clarified butter)
  • 3 tablespoons Milk (warm)
  • 20 – 25 Cashew nuts
  • 20 – 25 Raisins
  • 3 – 4 Cardamom Pods (powdered)


Method: 

Prepare the Ingredients:

  • Powder the sugar along with the cardamom pods. Set aside.
  • Heat 1 tablespoon of ghee in a pan and roast the cashew nuts until they turn golden brown. Remove and keep aside.
  • In the same pan, roast the raisins over a low flame until they fluff up. Remove and set aside.


    Pro Tip: For an even richer flavour, add a pinch of saffron strands while roasting the cashew nuts and raisins. This will give your Rava Ladoo a delightful aroma and a subtle golden hue.


Roast the Rava (Semolina):

  • Add the remaining 2 tablespoons of ghee to the pan. 
  • Roast the white rava over a low flame for 5–7 minutes until it turns fragrant and changes to a light golden colour. Make sure to stir continuously to avoid burning.


    Pro Tip: Roasting the rava slowly over a low flame is essential for the best texture. Proper roasting ensures that the ladoos stay soft and flavourful for longer without becoming grainy.


Mix the Ingredients:

  • Switch off the flame and add the powdered sugar to the roasted rava. 
  • Mix well until the sugar is evenly distributed.
  • Transfer the mixture to a wide bowl or plate. Add the roasted cashew nuts and raisins. Spread the mixture out and allow it to cool slightly.


    Pro Tip: Allow the rava mixture to cool just enough to handle comfortably. If it's too hot, the sugar may melt, making it difficult to shape the ladoos properly.


Shape the Ladoos:

  • Gradually add warm milk, one tablespoon at a time, to one side of the mixture. 
  • Take a small portion and shape it into a ball (ladoo). 
  • Repeat the process by adding a little more milk and shaping the mixture into ladoos until the entire batch is used. 
  • You may need about 2 1/2 to 2 3/4 tablespoons of milk in total.


    Pro Tip: If the mixture starts to dry out while shaping the ladoos, add a few drops of warm milk and mix again. This helps keep the ladoos moist and easy to shape.


Store the Rava Ladoos:

  • Let the shaped ladoos rest for a while before storing them in an airtight container. They can stay fresh for up to a week.


Pro Tips for Perfect Rava Ladoo

  • Sweetness Level: I used 1/2 cup of sugar for a mild sweetness. If you prefer it sweeter, increase the quantity to 3/4 cup.
  • Cardamom Powder: Grinding the cardamom along with the sugar helps achieve a fine powder. Alternatively, pulse the roasted rava with sugar to evenly incorporate the ingredients.
  • Ghee Consistency: Make sure the ghee is at room temperature or slightly melted before adding to the rava.
  • Shaping the Ladoos: Pour the milk gradually and shape the ladoos immediately while the mixture is still warm. If the mixture is too dry, add a bit more warm milk.


Celebrate with Delightful Rava Ladoos!

    Rava Ladoos are a classic Indian sweet that infuses every celebration, particularly Diwali, with a touch of magic. Crafted from roasted semolina, ghee, and aromatic cardamom, these delightful treats are a feast for the senses. Perfect for family gatherings or as thoughtful gifts, Rava Ladoos deliver warmth and sweetness in every bite.

    These ladoos are not just a festive delicacy; they embody a cherished tradition that unites loved ones during joyful occasions. Their melt-in-your-mouth texture and the satisfying crunch of cashews makes them irresistible. Feel free to experiment with the ingredients to put your own spin on this recipe! I’d love to hear your thoughts and any unique twists you try—please share them in the comments below. Happy cooking, and may your Diwali be filled with joy!

    The secret to achieving perfect Rava Ladoos lies in roasting the rava to a light golden hue and using just the right amount of milk to bind the mixture. With roasted cashews and raisins, each ladoo captures the authentic taste of homemade Indian sweets.

So, get your ingredients ready, follow this recipe, and create a little bit of Diwali magic in your kitchen!


For more sweet inspirations, check out our collection of Traditional Indian Sweets and South Indian Veg Lunch Menu to complete your festive feast.


Make Your Diwali Celebrations Sweeter!

    Explore more traditional sweets like Kasi Halwa/Poosanikkai Halwa and a full range of Diwali Recipes to make your celebrations truly special.

Love this recipe? Share it with your loved ones, or bookmark it for your next festive cooking session!


VEGGIES
CABBAGE CARROT BEANS THORAN/PORIYAL     

       Thoran/Upperi/Poriyal is a simple stir-fry prepared with finely chopped Vegetables. Thoran/Poriyal is generally mildly spiced & seasoned and finished with a sprinkle of grated Coconuts.  This particular Thoran/Upperi/Poriyal is prepared with a combination of vegetables - Cabbage, Carrot and French Beans.  I love this combination of vegetables and the colour of this Thoran/Upperi/Poriyal looks wonderful.
       While preparing for a Sadhya/Virundhu or just to brighten up your lunch menu with colours and combinations this Cabbage, Carrot & Beans Thoran/Poriyal turns out to be one of the best choices.  Some recipes even call for fresh green peas instead of French Beans.  Cabbage, Carrot & Beans Thoran/Poriyal is one of the most frequented dishes at home and I love to have it as such or along with a cup of thick Curd/Yoghurt.  Cabbage, Carrot & Beans Thoran/Poriyal goes well as a side dish for Sambar/Rasam/Curd or any other Curry of your choice.


For more recipes on SADHYA, click here...


Cuisine - Kerala (South India)
Course - Side dish
Spice Level - Moderate
Difficulty  - Easy
Serves - 4
Author - SM


Preparation Time - 10 Minutes
Cooking Time - 5 - 7 Minutes

HOW TO MAKE CABBAGE CARROT BEANS THORAN/PORIYAL


INGREDIENTS:

For Cabbage, Caroot & Beans Thoran:

Cabbage - 1 Cup
Carrot - 1/2 Cup
Beans - 1/2 Cup
Shallots - 4–5 Nos.
Ginger - a Small Piece (Optional)
Garlic - 1–2 Cloves
Green Chillies - 2 Nos.
Coconut - 2–3 Tablespoons
Salt - To Taste
Sugar - a Pinch

For Seasoning:

Mustard Seeds - 1 Teaspoon
Bengal Gram/Urad Dhal - 1 Teaspoon
Curry Leaves - 1 Sprig
Cumin Seeds - a Pinch.
Coconut Oil - 1 Tablespoon

METHOD :

  • Clean, shred and finely chop the Cabbage.
  • Peel and finely chop the Carrots and Beans.
  • Finely chop Shallots, Green Chillies, Garlic & Ginger.
  • Heat Oil in a pan, splutter Mustard Seeds, Bengal Gram/Urad Dhal and Curry leaves.
  • Add finely chopped Shallots, Green Chillies, Garlic, Ginger and saute until shallots turn translucent.
  • Add a pinch of Cumin seeds followed with finely chopped Cabbage, Carrots and Beans.
  • Add a dash of Salt & a pinch of Sugar and give a quick stir.
  • Cover and cook briefly.
  • Add in grated Coconut and mix well.
  • Cook for a while on a low flame.
  • Serve Cabbage, Carrot & Beans Thoran/Poriyal as a side dish for any Curry of your choice/Sambar/Rasam/Curd.

NOTES :

  • Can add a pinch of Turmeric if preferred.
  • Some do not add Onions & Garlic while cooking for a Sadhya/Virundhu.
  • Adding Garlic & Ginger is truly optional.
  • Adding Sugar is purely optional.


HOW TO...
HOW TO COOK PARBOILED RICE


      Parboiled Rice or Partially Boiled Rice doesn't literally mean that it is pre-cooked.  The process of making a Par-boiled Rice starts right from the time of harvesting the paddy. The rice along with the hull/husk is soaked, steam-cooked and then dried. Once the Paddy is dried the hull/husk is removed.  The steaming enables the rice to absorb nutrients and changes the starch so that it cooks into a firmer, less sticky dish of rice than regular white rice. The steaming does not precook the rice, so it still needs to be cooked.
     The rice undergoes a process resulting in a dull coloured rice compared to white rice. This allows the rice to absorb the nutrients in the hull and bran, and it gives the rice a firmer texture.  Parboiled Rice is a better source of Fibre, Calcium, Potassium and Vitamin B6.  All the more, it has low Glycaemic Index compared to White Rice/ Raw Rice. Parboiled Rice once cooked is less sticky and has a fluffier consistency.  It can be converted into various recipes.
     Parboiled Rice is called as Puzhungal Arisi in Tamil and Puzhungal Ari in Malayalam.  This type of rice is used to make Idli/Dosa Batter.  Parboiled Rice is also used to make snacks like Arimurukku/Kai murukku/Chakli.  Most of the people in South India prefer eating Puzhungal Arisi (Parboiled Rice) as it is easily digestible, less starchy and rich in fibre. Cooked Parboiled Rice can be converted into a variety of Flavoured Rice Dishes like Coconut Rice, Lemon Rice, Tamarind Rice, Tomato Rice, Curd/Yoghurt Rice and can also be used to prepared Arisi Paruppu Sadham, Venpongal etc.,  Though these recipes are generally cooked using Raw Rice/Pacharisi, Parboiled Rice stays firmer and is less mushy, it becomes a better, tastier and healthier alternative to Raw Rice. It can also be used while making Porridges/Kanji/Soups etc., Parboiled Rice goes well with any Vegetarian/Non-Vegetarian Curries, Rasam, Moru/Yogurt Curries etc., A scoop of thick Curd/Yoghurt & warm parboiled rice is a delicious combination.
HOW TO COOK PARBOILED RICE
PARBOILED RICE

     What's a deal, cooking a Par-boiled Rice?  Maybe that is the first thing which can pop up into our mind. Cooking rice is a daily chore done without a second thought.  It can be any type/variety of rice -Raw Rice, Par-boiled Rice, Kerala Rose Matta Rice, Glutinous Rice, Fragrant/Jasmine Rice, Basmati Rice, Brown Rice,  Sushi Rice, Risotto Rice, Calrose Rice etc., & etc., 
     In general, any variety or type of Rice is cooked in pretty much the same way. They just sometimes vary in the ratio of water and the length of time to cook. You can easily adjust the texture of your rice to your liking by adding more or limiting water. My technique to get perfectly cooked rice is 'Trial and Error Method'. Any variety or type of Rice it can be, cooking with your instincts and mainly to suit your preference is the only foolproof method.  Few trial and errors don't matter in the long run of cooking, and it is the only way to perfect yourself and find a suitable method of your own which perfectly suits your cooking style.
     Parboiled Rice/Puzhungal Arisi/Puzhungal Ari/Ponni Arisi is a common rice variety used next to Raw Rice/Pacha Arisi in South India.  Rinsing the Rice well before using, soaking(not a must) and traditionally cooking the Rice in a Saucepan or an earthen Pot with a lot of water and then draining off the extra starch is one best method to cook Parboiled Rice.  This old-school method is followed by most of the yesteryear people, even my Mom follows this method. My Dad prefers eating rice cooked in the above way. This method removes any extra starch from the Rice, making it healthier.
     Hectic lifestyle has brought forth easy and less time-consuming methods like cooking the rice in Rice Cooker/Pressure Cooker.  I have tried to give few easy methods to perfectly cook Parboiled Rice, generally I cook parboiled rice in a Rice Cooker or in a Pressure cooker. The other methods are also tried and tested.


HOW TO BUY AND STORE PARBOILED RICE:

HOW TO COOK PARBOILED RICE
PARBOILED RICE


  • A good quality Older Rice would last longer.
  • Buy a long grained Parboiled Rice (make sure the pack doesn't contain too many broken pieces).
  • Make sure the Rice is free from bugs(Weevils).
  • Store it in a clean and dry place in an airtight container free from moist.


HOW TO PERFECTLY COOK PARBOILED RICE

HOW TO...
HOW TO COOK PARBOILED RICE


Three main factors to remember before cooking Parboiled Rice is to 
         

Rinse, Soak and Cook

RINSE:

  • Rinse the rice at least 3- 4 times, moving your fingers through the rice every time you wash them or until the water runs clear.
  • Drain the water.

SOAK (PURELY OPTIONAL):

  • Pour enough water to cover the rice.
  • Soak the rice for 20- 30 minutes, if time permits.
  • Soaking makes a lot of difference to the texture of the rice. Soaking expands the rice and also helps to absorb the gravies and curries added into it once cooked.
  • Once soaked, drain the water and cook accordingly.
  • Soaking also reduces the cooking time.

COOK:

  • Some Varieties of Parboiled Rice needs more/less water compared to others.
  • Choose a cooking method suitable and comfortable for you.
  • Adjust the Rice Water Ratio to suit your Variety/Quality of Rice.
  • Follow the instructions in the label, if available.


FOR PERFECTLY COOKED PARBOILED RICE

HOW TO COOK PARBOILED RICE IN A SAUCEPAN 

METHOD 1 - (Rice Water Ratio 1: 3 Cups)

  • Boil 3 Cups of Water in a saucepan big enough to hold the rice and water.
  • Once the water begins to boil, lower the flame.
  • Carefully add the Parboiled Rice into the Boiling Water.
  • Increase the flame, keeping the saucepan uncovered, bring the Parboiled Rice to a boil.
  • Cover the pot and cook the rice on a low flame for about 25-30 minutes, until all the water is absorbed by the rice.
  • Once the rice is cooked, remove from fire and keep it aside for at least 10 minutes to cool down.
  • Fluff up the rice with a fork or a chopstick before serving.
  • (For 1 cup of Rice, I use just over 3 Cups of water). 

METHOD 2 - Cooking with more water and draining the Cooked Parboiled Rice:

  • Parboiled Rice can be cooked with more water. 
  • Can use about 5-6 Cups of Water for 1 Cup of Rice.
  • Once the rice is cooked, the remaining water can be drained by pouring the cooked rice along with water into a colander.
  • While following this method, check whether the rice is done in between.
  • If you are cooking for the first time, do not leave it unattended. The rice will stick to the bottom of the pan when it gets overcooked


HOW TO COOK PARBOILED RICE IN A PRESSURE COOKER

(Rice Water Ratio 1: 3 Cups)

  • Place 1 Cup of Rice in a bowl.
  • Add 3 Cups of Water.
  • Place the bowl inside the Pressure Cooker.
  • Fix the gasket inside the lid and cover the pressure cooker.
  • Begin cooking under pressure over high heat for 3 Whistles
  • Then lower the flame and cook for 2-3 more whistles.
  • Switch off the flame and wait for the pressure to release.
  • Once the pressure is totally released, open the lid and remove the bowl with cooked rice from the pressure cooker.
  • Allow it to cool for a few minutes.
  • Fluff up the rice with a fork or a chopstick before serving.


HOW TO COOK PARBOILED RICE IN A RICE COOKER

(Rice Water Ratio 1:21/2-3 Cups)

  • Place 1 Cup of Rice in the rice cooker
  • Add 21/2 - 3 Cups of Water.
  • Cover the Rice Cooker and turn it on.
  • Cook until it automatically turns off.
  • Leave it in warm mode for another 5-10 minutes.
  • Allow it to cool for a few minutes.
  • Fluff up the rice with a fork or a chopstick before serving.


HOW TO COOK PARBOILED RICE IN A MICROWAVE

  (Rice Water Ratio 1:21/2-3 Cups)

  • Place 1 Cup of Rice in a microwave safe bowl with cover.
  • Add 21/2 - 3 Cups of Boiling Water.
  • Cover the bowl and cook on Micro power High for 10-12 minutes.
  • Remove the bowl from the Oven, stir the contents and leave it back into the Microwave.
  • Can add some water if necessary.
  • Once again, cover and cook on Micro power High for another 10-15 minutes, or until the rice is well cooked.
  • Remove from the Microwave and leave it aside for a few minutes to cool down.
  • Fluff up the rice with a fork or a chopstick before serving.

*In above two methods - Rice Cooker & Microwave - can add extra 1/2 a Cup of Water if you prefer slightly softer rice.

NOTES :

  • While cooking Parboiled Rice for flavoured rice dishes like Lemon Rice/Coconut Rice/Tamarind Rice/Tomato Rice, cook the rice along with a drizzle of Oil.
  • Add a blob of Butter or drizzle a few drops of oil to water used for cooking the rice.
  • But it is purely optional
  • Can also add a dash of salt while cooking Parboiled Rice.
  • While cooking Parboiled Rice to be eaten with Curries/ Gravies, can avoid adding Oil/Butter and Salt.
  • While using Parboiled Rice for Venpongal use enough water needed to cook Parboiled Rice, unlike Raw Rice.


Newer Posts Older Posts Home
Search Essence of Life - Food

I Me Myself

A vintage-style horizontal oval frame showcasing ornate silver spoons on a dark rustic surface

Essence of Life - Food is all about daily cooking with a simple sense of taste and health. It is all about food. Not a day goes by without eating for most of us, so what we eat matters on the whole. Food in the mode of goodness increases the duration of life, purifies one's existence, and gives strength, health, happiness, and satisfaction. Above all ingredients, the most vital one in my kitchen is love.

Sm @ Essence of Life - Food

Popular Posts

  • Kizhi Parotta: Kothu Parotta and Salna Wrapped in Banana Leaves
  • Kerala Sadhya Vibhavangal: Ultimate Guide to Traditional Onam & Vishu Sadhya
  • Nannari - Indian Sarsaparilla Roots
  • How to Make Kerala Kanji | Traditional Rice Porridge with Payar, Chammanthi & Achar
  • Brewing Authentic Malaysian Kopi: A Step-by-Step Guide to Mastering the Art of Kopi Making
Ebook - What I Cook - For Onam

Ebook - “What I Cook - For Onam”

Amazon.com/dp/B0CGPVY6J3

Indulge in Kerala’s Culinary Heritage: Traditional Onam Sadhya Recipes, with Expert Serving Tips! Celebrate Onam the authentic way! Discover 25 timeless Kerala Sadya recipes in my ebook. From avial to payasam, bring home the flavours of tradition. Available now on Amazon!

Essence of Life

Subscribe & Follow

© 2026 | Essence of Life - Food

  • Home
  • Ask First
    Please note that all rights for the photographs and texts on this blog, unless otherwise mentioned, rests with the author. Please do not use without permission.
  • Privacy Policy