Essence of Life - Food
  • Home
  • From My Kitchen
    • Heirloom Recipes
    • From God's Own Country
    • Sadhya
    • Kongu Cuisine
    • Chettinaad Cuisine
    • South East Asian
    • Around the World
  • Ebook
  • I Me Myself
THOKKU/PICKLE
NELLIKKAI THOKKU - GOOSEBERRY THOKKU

 
     I do not get Gooseberries in the place where I live.  There are trees around the city, but I cannot see Gooseberries sold in the market. During our first trip of Malacca, one of the Malaysian city I always love to travel, which holds quite a lot of reminiscence of Fort Cochin.  A city which struck strong with culture and history.  I noticed that the banks of the Malacca River were lined with Gooseberry trees.  Even I noticed that in one of the galleries in Malacca Palace Museum, there was a depiction of a popular legendry -  King Parameswara was resting under a tree near a river during a hunt when one of his dogs cornered a mouse deer. In self-defence, the mouse deer pushed the dog into the river. Impressed by the courage of the deer, and taking it as a propitious omen of the weak overcoming the powerful, Parameswara decided then and there to build an empire on that very spot. He named it 'Malacca' after the tree where he had just taken shelter at. The Malacca tree, which is nothing but a Gooseberry Tree.
 
    Well, this batch of Nellikkai/Gooseberry Thokku comes from the Gooseberries I collected near the St. Paul's Church during our recent trip to Malacca.  When I called my Mom and said I was in Malacca, coincidentally she asked me whether I plucked Gooseberries and I said yes.  It was just minutes I did that feat and my husband was enthusiastic enough to help me pluck those Gooseberries.  I was overwhelmed when my Mom asked about it and was even happier that she remembered all the places in Malacca, she had visited 10 years back when she was in Malaysia.  If you are a fan of Pickles like me, then this Gooseberry Pickle or Nellikkai Thokku is for you. 
 
THOKKU/PICKLE
NELLIKKAI THOKKU - GOOSEBERRY THOKKU


    I am so fascinated myself to try out different types of Pickles & anything in the name of Pickles. This is a spicy, tangy pickle prepared with grated Gooseberries. Alternatively you can steam the Gooseberries and mash is coarsely and make this Pickle.  If you are using raw grated Gooseberries then make sure to sauté it in oil for a long time until the moistness is totally removed.  This way the pickle can be stored for a long time.    Gooseberries with its mild bitterness, sourness and a tinge of sweetness suit best to be prepared into a Thokku style Pickle.  
 
    Gooseberry/Nellikkai Thokku is sure to tantalize your taste buds with its spiciness, tanginess.  Combine it up with Curd Rice for an utter delicacy. Or simply serve a smidgen of this Gooseberry/Nellikkai Thokku to go along with Plain Rice, Sambar/Curry/Rasam of your choice for a simple lunch or serve it in an elaborate Vazhayila Virundhu/Sadhya to add a tinge of uniqueness.  Gooseberry/Nellikkai Thokku recipe is quite similar to Mango Thokku recipe.  I have just replaced Gooseberries for Raw Mangoes.  Even I have Thokku recipes made with Apples too in my pantry.

For more PICKLE Recipes, Click here...


Cuisine - Tamil Nadu (Indian)
Recipe Type - Pickle
Spice Level  - High
Difficulty - Easy
Yields - 21/ 2-3Cups
Author - SM

Preparation Time - 15 - 30 Minutes
Steaming Time - 15-20 Minutes(Optional)
Cooking Time - 8-10 Minutes
Maturing Time - Immediate


For THOKKU STYLE PICKLES, Click here... 


HOW TO MAKE  NELLIKKAI THOKKU - GOOSEBERRY THOKKU

THOKKU/PICKLE
NELLIKKAI THOKKU - GOOSEBERRY THOKKU

INGREDIENTS:

For Nellikkai/Gooseberry Thokku:

Gooseberries - 3 Cups(grated)
Gingelly Oil - 1/2 Cup
Mustard Seeds - 1/2 Tspn
Curry Leaves - a Sprig
Turmeric Powder - 1/2 Tspn
Red Chilli Powder - 2-3 Tbspn
Asafoetida - 3/4 Tspn
Tamarind Paste - 1 Tspn
Salt - To Taste
Jaggery - a small Piece

To Dry Roast & Grind:

Fenugreek Seeds - 1/2 Tspn. 

METHOD:

  • Dry roast the Fenugreek Seeds on a very low flame until it splutters.
  • Cool and powder it.
  • Wash, Pat dry and grate the Gooseberries and keep it aside.
  • Alternatively can steam the gooseberries in a steamer for about 20-30 minutes or until Gooseberries turn soft and cooked.
  • Allow it to cool & then deseed and separate the Gooseberries into Cloves.
  • Then mash it up or grind it in a mixer jar briefly (it should be coarse).
  • Heat the Sesame Oil in a pan.
  • Splutter the Mustard Seeds, lower the flame, then add Asafoetida Powder and Curry Leaves.
  • Immediately add the grated Gooseberries and sauté it on a low flame until it becomes soft & translucent.
  • The cooking time can be reduced if you are using steamed and then mashed Gooseberries.
  • Add Salt, Turmeric Powder, Red Chilli Powder, roasted Fenugreek Powder, to the above and mix well.
  • Add Tamarind Paste & Jaggery to the above and give a quick stir.
  • Cook this is on a low flame until oil separates from the pickle.
  • Switch off the flame and allow Nellikkai/Gooseberry Thokku to cool down.
  • Store it in clean & dry airtight bottles.


THOKKU/PICKLE
NELLIKKAI THOKKU - GOOSEBERRY THOKKU


NOTES:

  • Adjust the amount of Salt and Chilli powder as per your taste preference.
  • Pour some extra oil if you feel Nellikkai Thokku is dry.
  • More oil, more storage period.
  • Steam cook the Gooseberries for about 20-30 Minutes or until Gooseberries turn soft and cooked.
  • Allow it to cool.
  • Deseed and separate the Gooseberries into Cloves and keep it aside.
  • Dry roasting the fenugreek seeds helps to preserve the pickle as well as gives a nice flavour.
  • Jaggery gives a slight sweetness to the pickle and also balances the sourness. (adding it is truly optional).
  • Avoid using steel/aluminium/copper containers for storing the pickles, as they tend to react with the acidic nature of salt and the Tamarind in the Pickle.
  • Store the Nellikkai/GooseberryThokku in clean and dry Porcelain/Glass/Ceramic Jars.
  • Always use clean & dry spoons(preferably wooden spoons) for the pickle.
  • Wet Jars/spoons can spoil the pickles, as the moisture in them helps in the growth of Fungus.
  • If you feel that extra oil should be added, once the pickle is made, Heat the Sesame Oil, cool it and then pour it over the pickle.
  • Allow it to cool completely before storing it into sterilized bottles. 
  • Refrigerate the Nellikkai/Gooseberry Thokku.  It can stay good even with less oil and preservatives. 
  • If stored properly, Nellikkai/Gooseberry Thokku can last for about 2-3 Months.


SOUTH INDIAN STYLE LIVER FRY
CHICKEN LIVER FRY


    Chicken Liver Fry is a simple recipe cooked with Chicken Livers along with freshly ground Peppercorns and Spices. The same recipe can be prepared with Mutton Liver too. The ingredients are quite minimal, and the method is one of the simplest and quick to incorporate. Marinated Chicken Livers are roasted with spices and ample of Curry leaves. Very few ingredients are used in this recipe and freshly ground Peppercorns gives a magical touch and a wonderful flavour to this Chicken Liver Fry. This Chicken Liver Fry can be served as a Starter/Appetizer or as a side dish for Parotta/Roti and Chapatis.  Steaming hot Rice and Rasam paired up with this Chicken Liver Fry, is one best combo I personally prefer.


      Chicken Liver or Lamb Liver as a matter of fact may not be liked by many.  But it is one Offal used widely in cooking.  Cleaning the Chicken Liver is quite tricky, and we should make sure it doesn't turn out to be 'BITTER.'  I never encountered with this problem when I was in India.  The Butcher caters fresh Chicken Livers and would have a separate batch of Chicken Livers which we can buy.  I started cooking Chicken Livers after watching Chef Damu's cooking show to which we were an ardent fan while we were in India.  Immediately after the show, my husband and I would go out shopping for the ingredients, and this is one such recipe from that time. 

    But here in Malaysia, I find it hard to get well cleaned Chicken Livers. Sometimes the whole batch of cooked Chicken Livers turn out to be bitter and would go down the drain.  So make sure to remove any greenish part in the Liver and soaking the liver in cold water & then marinating the Liver also helps to get rid of the bitterness to an extent.

    Why does Chicken Livers turn Bitter once cooked?  This usually happens when the gall bladder attached to the liver, sometimes breaks when it is removed, and some liquid runs into the liver and makes it yellowish-green. So make sure to remove any greenish part of the liver, that is what makes it very bitter.
     

Tips to prevent the Chicken Livers from tasting bitter

  • Clean them perfectly before cooking
  • Remove any connective tissue and cut off any greenish parts from the Liver  
  • Soak the Livers for about 20-30 minutes in cold water(not ice water)  just colder than room temperature.
  • Then discard the water and pat dry the liver pieces.
  • Wipe off any extra blood from the Chicken Liver with a paper towel.
  • Marinate the Chicken Liver with Salt, Turmeric Powder and Lemon Juice for about 10-15 minutes.
  • Cook properly.


For more CHICKEN Recipes, Click here...

Cuisine - South Indian Course - Side Dish
Spicy Level  - Medium-Spicy
Difficulty - Low
Serves - 3- 4
Author - SM


Preparation Time - 15-20 Minutes
Soaking Time - 20-30 Minutes
Marination Time - 10-15 Minutes
Cooking Time - 15 -20 Minutes


HOW TO MAKE CHICKEN LIVER FRY

 
SOUTN INDIAN STYLE LIVER FRY
CHICKEN LIVER FRY

INGREDIENTS:

To Marinate the Chicken Liver:

Chicken Liver - 500 Grams
Lemon Juice - 1 Tbspn
Turmeric Powder - 1/2 Tspn
Salt - To Taste


For  Masala Powder:

Coriander Seeds - 1 Tablespoon
Dry Red Chillies - 4 - 5 Nos.
Peppercorns - 1 Tablespoon

Cumin Seeds - 1/2 Teaspoon
Curry Leaves - 2 Sprigs


For Chicken Liver Fry:

Oil  - 2-3 Tablespoon
Fennel Seeds/Sombu  -  1 Teaspoon
Curry Leaves  -  2 Sprigs
Green Chillies - 4 Nos.
Ginger-Garlic Paste - 2 Tspn
Shallots  -  15 Nos.
Masala Powder - all the above ground spices
Pepper Powder  -  1 Tablespoon(Optional).
Salt  -  To Taste


For Garnishing:

Coriander Leaves -  a Handful


METHOD:

To Marinate the Chicken Liver:

  • Clean, wash & cut the Chicken Liver into small cubes.
  • Remove any connective tissue and cut off any greenish parts from the Liver  
  • Soak the Livers for about 20-30 minutes in cold water(not ice water)  just colder than room temperature.
  • Then discard the water and pat dry the liver pieces.
  • Wipe any extra blood off the Chicken Liver with a paper towel.
  • Marinate the Chicken Liver with Salt, Turmeric Powder and Lemon Juice for about 10-15 minutes.


For Masala Powder:

  • Heat a pan & dry roast the ingredients mentioned under 'Masala Powder'.
  • First add Coriander Seeds & dry roast it on a very low flame until fragrant.
  • Then add Dry Red Chillies and dry roast until the Chillies fluff up.
  • Immediately add Cumin seeds, Peppercorns & Curry leaves and dry roast it on a low flame for few minutes.
  • Allow the spices to cool.
  • Then grind the Spices into a fine powder & keep it aside. 


For Chicken Liver Fry:

  • Heat Oil in a pan.
  • Splutter Fennel Seeds and Curry Leaves.
  • Sauté finely chopped Shallots, Green Chillies (slit into two) & sauté until shallots turn translucent.
  • Add Ginger Garlic Paste & sauté until oil separates from the mix & until it turns fragrant.
  • Now sprinkle the freshly ground Masala Powder & mix well.
  • Cook this on a very low flame until the raw flavour goes & it turns fragrant.
  • Now add the marinated Chicken Liver pieces. It tends to ooze out some water.
  • Cook until the water is totally absorbed.
  • Cook this on a low flame until the Chicken Liver pieces are well cooked with the Masala.
  • Sprinkle some Pepper Powder over it, if you prefer Chicken Liver fry to be spicy.
  • Garnish Chicken Liver Fry with finely chopped Coriander Leaves.
  • Goes well as a side dish with Rasam, Sambar or any Curry.
  • Or simply serve it with Yogurt/Curd and Steamed Rice.
  • Chicken Liver Fry goes well with Biriyanis, Pulaos,  Ghee Rice/Nei Choru or just simply serve it with steamed white rice or Basmati Rice.
  • Chicken Liver pairs well with Naan, Kulcha, Parotta/Roti and Chapatis.


NOTES:

  • Clean the Liver pieces well before cooking.
  • Dry roast the spices for the Masala on a very low flame.  Care should be taken not to burn the ingredients.
  • Use ample of Curry Leaves, which will give out a wonderful aroma to Chicken Liver Fry.
  • Sprinkle pepper powder generously, if you prefer the dish to be spicy.
  • Adjust the spices to suit your preference.


BIRIYANI & PULAO
SOYA CHUNKS BIRIYANI - MEAL MAKER BIRIYANI


    "Soya Chunks Biriyani/Meal Maker Biriyani" is a twist given to a Tamil Nadu style Biriyani with a simple addition of marinated and soaked Soya Chunks.  As far as I remember, Soya Chunks, hit the Indian market in the early 80's, & was marketed in the name of Meal Maker. My Mom got so obsessed about it that she started to frequent dishes made with it.  She also went along to grind it along with Wheat flour(for making Chapatis) saying that it is loaded with Protein.  Ya, it's true,  Soya is rich in protein.  Soya Chunks are the byproducts left after extracting soybean oil and have a rough texture when left dry.
     
    When you are in a mood for a twist while making Biriyani and if you are into a Vegetarian Version, then Soya chunks does total justification in a Biriyani.  As my kids say there is nothing called a Vegetable Biriyani... they say it is some version of a compromise when it comes to Biriyani.  But Vegetarian or Non-vegetarian, Biriyani is always a Biriyani.  And for all veggie lovers, this Soya Chunks Biriyani can turn out into a delectable version of Biriyani.

    Soya Chunks Biriyani is an easy Biriyani recipe which can be prepared as a one-pot meal in a pressure cooker or in a rice cooker.  The method of making this Soya Chunks Biriyani is very simple and can be cooked within 30 minutes. I have marinated the soaked Soya Chunks before adding it into the Biriyani and I have used Coconut Milk along with water to cook this Meal Maker Biriyani, which makes the dish more exotic & rich.
 
    Soya Chunks Biriyani is one simple recipe which can be quickly fixed up for a weekday Lunch Menu and also suits best to be packed for Lunch to School or Office.  Serve it along with Boiled Eggs and Curd-Onion Raitha for a simple yet complete meal.
 
For more  BIRIYANI RECIPES, Click here...


Cuisine - South Indian
Course - Main
Spice Level  - Medium
Difficulty - Medium
Serves - 3- 4
Author - SM

Preparation Time - 15-20 Minutes
Marination Time - 20-30 Minutes
Soaking Time - 20 - 30 Minutes.
Cooking Time - 20 - 30 Minutes


HOW TO COOK SOYA CHUNKS BIRIYANI/MEAL MAKER BIRIYANI

BIRIYANI & PULAO
SOYA CHUNKS BIRIYANI - MEAL MAKER BIRIYANI


INGREDIENTS:

To Soak the Soya Chunks: 

Soya Chunks - 1 Cup
Hot Water - 3-4 Cups
 

To Marinate the Soya Chunks:

Soaked Soya Chunks
Turmeric Powder - 1/2 Tspn
Red Chilli Powder - 1 -11/2 Tspn
Curd - 1 Tbspn
Salt - To Taste


For Soya Chunk/Meal Maker Biriyani:

Seeraga Samba Rice/ Basmati Rice - 2 Cups
Thick Coconut Milk - 1 Cup
Water - 11/2 Cups
Onion - 1 No.
Garlic - 4-5 Cloves
Green Chillies - 2-3 Nos.
Turmeric Powder - 1/2 Tspn
Red Chilli Powder - 1 Tspn
Tomato - 1 No.
Coriander Leaves - Few
Mint Leaves - Few
Curd - 1/2 Cup
Lemon Juice - 1 Tbspn
Ghee - 3 Tbspns

For Biriyani Masala Paste:

Shallots - 8-10 Nos.
Green Chillies - 2 Nos.
Garlic - 5-7 Cloves
Ginger - 1 Small Size
Bay Leaf - 1 Leaf
Cloves - 3 Nos.
Cinnamon (1") - 2 Sticks
Cardamom - 2-3 Nos.
Fennel Seeds - 1/2 Tspn

METHOD:

To Soak & Marinate the Soya Chunks: 

  • Take a Cup of Soya Chunks/Meal Maker, wash it for about 2-3 times.
  • Then pour in boiling hot water to the Soya Chunks.
  • Soak it for about 20-30 minutes.
  • It would have absorbed the water and would have doubled in size.
  • Once soaked, squeeze out the Soya Chunks.
  • Squeeze well to remove any excess water from the Soya Chunks.
  • Now add all the ingredients mentioned under "To marinate" to the soaked and squeezed out Soya Chunks.
  • Mix well until the soya chunks are well coated with the marinade.
  • Leave it aside for about 20-30 minutes.


For Soya Chunk/Meal Maker Biriyani:

  • Rinse the Rice once or twice, moving your fingers through the rice, wash it until the water runs clear.
  • Soak the washed rice for about 20 - 30 minutes.
  • Grind the ingredients mentioned under ' For Biriyani Masala' into a fine paste & keep it aside.
  • Heat Ghee & Oil in a heavy bottomed pan or in a Pressure cooker.
  • Sauté finely chopped Onions and saute until it turns translucent.
  • Add Garlic Cloves and Green Chillies slit into two and fry for a while.
  • Add the ground Biriyani Masala Paste to the above and sauté until fragrant.
  • Now add Turmeric Powder, Red Chilli Powder and fry it on a low flame for a few minutes. 
  • Add finely chopped Tomatoes and cook until it turns soft & oil separates from the masala.
  • Now add the marinated Soya Chunks and give a quick stir.
  • Pour 1 Cup of Curd/Yogurt to the Masala and mix well, leave this on a low flame until the Mix turns a bit dry.
  • Drain the soaked Rice and add it to the above Masala and mix well, fry this on a low flame for about 3-5 minutes.
  • Sprinkle a handful of Mints and Coriander Leaves.
  • Pour in the Thick Coconut Milk and cook this on a low flame for a few minutes.
  • Pour Lemon Juice along with Salt and Mix well.
  • In a separate pan, boil the 11/2 Cups of Water and pour it into the Soya Chunks Biriyani Mix. 
  • I have used 1:11/2 Cups of Rice: Water Ratio. So for 2 Cups of Rice 21/2 Cups of Water + 1/2 Cup of Curd.( I have substituted 1 Cup of Water with Thick Coconut Milk)
  • Cover the lid of the pressure cooker and cook for one full whistle.
  • Meanwhile, heat a Chapati Griddle on a high flame for a few minutes, or until the griddle is very hot.
  • While lowering the flame to cook biriyani, keep this preheated Chapati griddle below the pressure cooker to give a dhum effect.
  • Cook for another 15 - 20 minutes.
  • After 20 minutes, switch off the flame and leave the pressure cooker on the stovetop untouched, until the pressure is totally released.
  • Once cooked, add the remaining Ghee to the Soya Chunks/Meal Maker Biryani and fluff-up the rice gently.
  • Serve Soya Chunks/Meal Maker Biryani along with a boiled Egg, Curd-Onion Raitha for a simple yet complete Meal.
  • Or serve it along with Kathirikai Pachadi or any preferred vegetarian or non-vegetarian side dishes.
  
    BIRIYANI & PULAO
    SOYA CHUNKS BIRIYANI - MEAL MAKER BIRIYANI

NOTES:

  • Well-seasoned Basmati / Jeerakasamba Rice plays a vital role in the texture of Biryani. 
  • Soaking the rice helps in getting perfectly cooked rice.
  • Use the water ratio to suit the type of rice you are using.
  • Usually, 1:11/2 Cups of Rice Water Ratio is perfect for Basmati and Jeeraka Samba Rice.
  • If you like your Rice to be cooked 'Al dente' follow the instructions in the package.
  • For a softer version, add some extra water(1/2 Cup preferably).
  • Soak the Soya Chunks in boiling hot water and once soaked make sure to squeeze it out well before marinating it.
  • Marinating the Soya Chunks helps to add flavour and essence into it.  Otherwise, Soya Chunks may taste bland in the Biriyani.
  • Substitute 1 Cup of water for Curd.
  • Adjust the amount of Green Chillies to suit your spice level.
  • Adjust the amount of spices to your preference.
  • Use ample of Ghee while cooking Biriyanis, this plays a major role in the texture and gives an awesome aroma to the dish.
  • Adding lemon juice is to avoid rice from getting sticky.
  • The same recipe can be prepared with Mutton/Beef/Chicken or convert it into Vegetable Biriyani by adding your preferred Classic Vegetables in the Biriyani. 
  • Adjust the cooking time suitable for the meat used.
  • Can keep a hot Griddle/Tawa beneath the vessel while cooking the Biryanis in Dhum.
  • This is to avoid rice from getting scorched at the bottom of the vessel.


KALYANA RAVA KESARI
KALYANA KESARI

    Am I obsessed with Rava Kesari, I am not sure.  But you can find a few number of Kesari Recipes in the blog.  My benchmark when it comes to Rava Kesari is always melt-in-mouth Kesari as exactly as how Director/Actor Visu says in his Tamil Movie, 'Samsaram Athu Minsaram' -  Rava Kesari should be so soft that, Ghee should drip out of the sweet and smoothly slide into your stomach the moment you keep it in your mouth.  I have always loved to keep up my standards to the above dialogue whenever I make Rava Kesari. 

    From a simple Penn Parkkum Padalam(Bridegroom visiting the Grooms place - selection jury) to NIchayathartham(Engagement) to Kalyam(Wedding), Kesari place a special part in the menu.  Along with Bhajji, Sojji, Sweet-Kaaram(Savoury) & for a sweet, Kesari fits irretrievably into the place.  A call for a sudden guest or whenever you suddenly get hit by a sweet tooth, Rava Kesari comes for rescue with its utter simplicity in making and you can get it ready within minutes.  Easy recipe with very few ingredients and quick to make.  All these make Rava Kesari a wonderful recipe and a total favourite.

    Have you ever wondered how they make those rich melt-in-mouth Rava Kesari usually served in Kalyanams or Marriage banquets?   Even the ones they serve in Saravana Bhavan and Shree Annpoorna Gowrisankar match the suit.  Tasty, with overloaded Ghee and so soft in texture.  The secret behind this Kalyana Kesari is the proportion of Ghee and Sugar added in the recipe. It's obviously considered high according to the norms.  But if you really want similar Rava Kesari or the crowned Kalyana Kesari as those served in Wedding Banquets or in restaurants, then close your eyes and just stick to the measurements.

    There is no harm in reducing the amount of Ghee or substituting it with Oil, and also when it comes to the amount of Sugar, it is also a personal choice.  But when they serve Kalyana Kesari in a South Indian Wedding Banquet or in a restaurant, the amount served in the platter is just a scoop.  So the amount of Ghee and Sugar added goes along with the rich platter and also there it marks its uniqueness, making us remember the Kalyana Kesari in midst of various other dishes.

    So, if you are too worried about adding the mentioned amount of Ghee & Sugar, go along with your personal preference.  But the mentioned proportions yields you with a wonderfully textured soft and melt-in-mouth Rava Kesari alias the Kalyana Kesari.  Also, some recipes calls for a thin Sugar Syrup while making Kalyana Kesari.  But my method is simple & just as similar to any other Rava Kesari Recipes.


For more KESARI RECIPES, Click here...


Cuisine - Karnataka, South India
Recipe Type - Sweet
Difficulty - Easy
Serves - 3 - 4
Author - SM  

Preparation Time - 5-10 Minutes
Cooking Time - 20 - 30 Minutes

For more Recipes on INDIAN SWEETS, Click here...


HOW TO MAKE KALYANA RAVA KESARI

 
KALYANA RAVA KESARI
KALYANA KESARI

INGREDIENTS:

Melted Ghee - 1 Cup
Cashew Nuts - 15-20 Nos.
Raisins - 20 Nos.
Semolina/White Rava - 1 Cup
Hot Water - 2 Cups
Cardamom Powder - 1 Tspn
Orange/Yellow Food Colour - 1/4 Tspn 
Sugar - 2 Cups
Salt - a Pinch


METHOD:

  • Grind the Cardamom Pods with few teaspoons of Sugar into a fine powder and keep it aside.
  • Heat 1 Cup of Ghee in a Pan, roast Cashew nuts & Raisins on a very low flame until Cashew nuts turn into light Golden Brown in Colour.
  • Remove the Nuts and Raisins from the Ghee and keep it aside.
  • Now add White Rava/Semolina in to the Ghee & roast it on a very low flame.
  • Roast the White Rava/Semolina until it turns aromatic, it will take approximately 5-7 minutes.
  • Meanwhile, boil 2 Cups of Water in a separate Pan.
  • Gradually pour the hot water to the roasted White Rava/Semolina.
  • Stir continuously while pouring the hot water until the White Rava/Semolina absorbs the water and there are no lumps.
  • Add Orange/Yellow food colouring and mix well.
  • Cook this on a very low flame until White Rava/Semolina turns soft & cooked
  • Once the White Rava/Semolina is cooked, add 2 Cups of Sugar and mix well.
  • Cook this mixture on a very low flame, stirring continuously, until the Sugar is well dissolved.
  • Add Cardamom powder and a pinch of Salt to the Kalyana Rava Kesari and mix well.
  • Cook this on a very low flame until it reaches the desired consistency.
  • Stir the Kalayan Kesari and mix it well all along, until the mix starts to separate from the pan.
  • Finally, add the roasted Cashew Nuts & Raisins to the Kalyana Rava Kesari and give a quick stir.
  • Serve Kalyana Kesari hot or at room temperature.
  • Can serve it along with South Indian Breakfast items as a sweet, or simply serve it as a sweet or a dessert.
  • Kalyana Kesari serves best as a sweet in a South Indian Mini Tiffin platter.


KALYANA RAVA KESARI
KALYANA KESARI


NOTES:

  • Perfectly roasted Semolina yields perfectly textured Kalyana Kesari.
  • Even if the Semolina/Rava you buy mentions it to be roasted, make sure to roast it for a while to get the preferred texture.
  • Adjust the amount of Water to suit your preferred consistency.
  • Adding the given amount of Ghee gives a soft texture to the Kalyana Kesari.
  • Can substitute half the amount of Ghee with Oil.(Use flavourless oil for the purpose)
  • Adjust the amount of Sugar to suit your preference.
  • Adding artificial food colouring is truly optional.
  • Can be stored for up to 2-3 days in the refrigerator.  Reheat and serve. 
  • For perfect Kalyana Kesari stick to the measurements mentioned in the ingredient list.

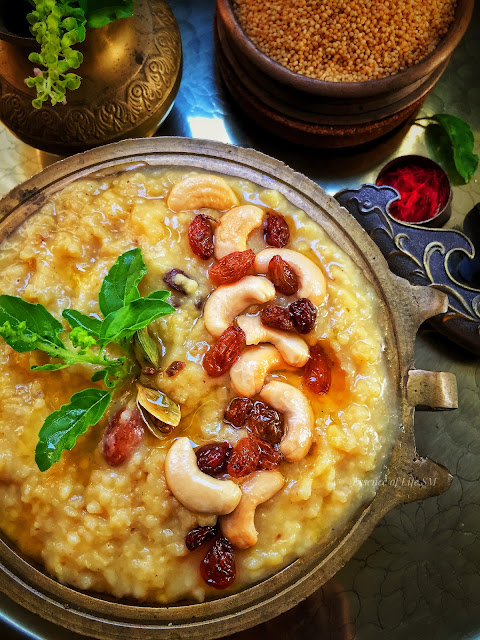
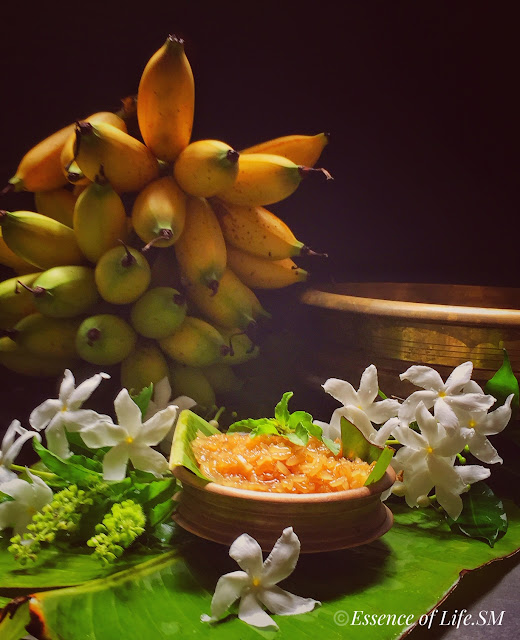
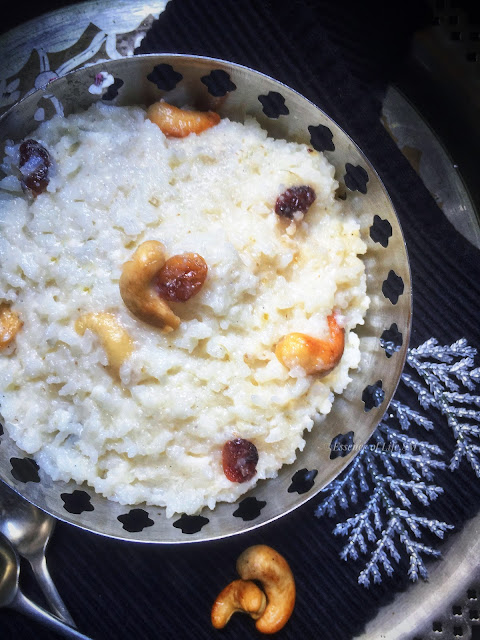
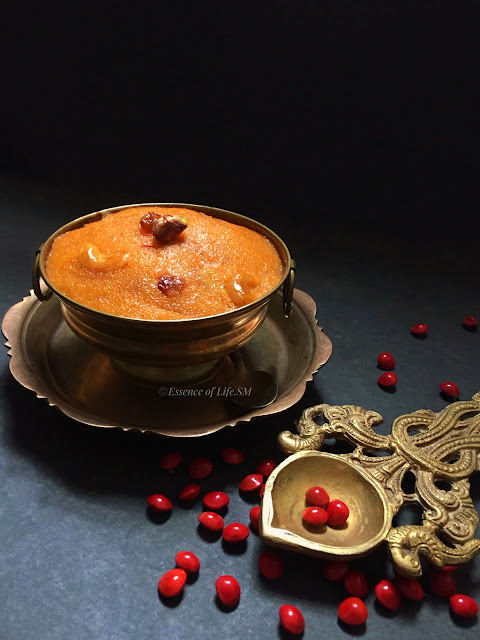
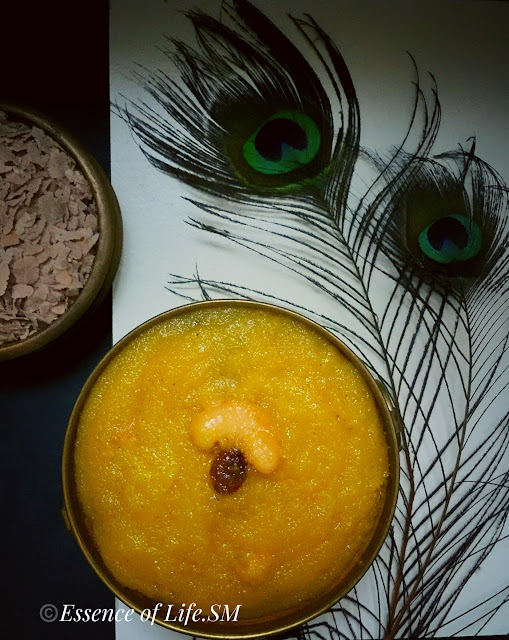
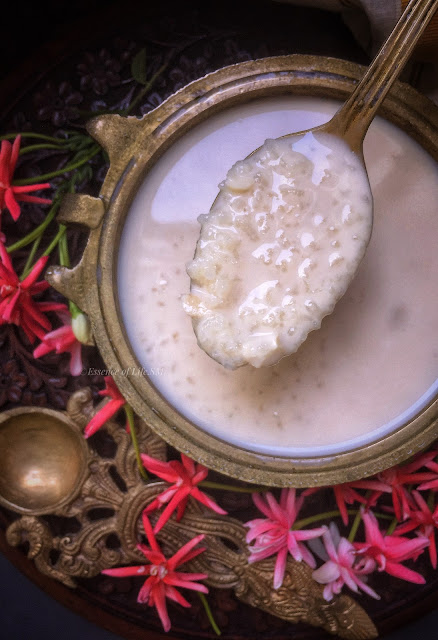
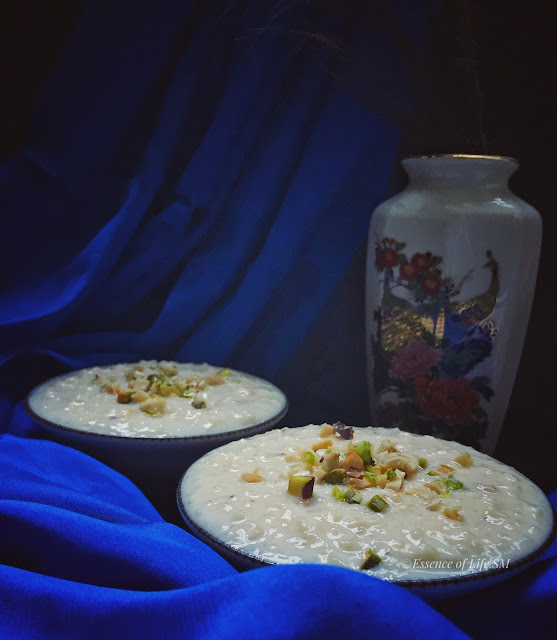
Collage showcasing a divine spread of Navratri naivedyam, featuring Sundals, Sweet Pongals, assorted sweets, and Panchamritham offerings.
Celebrate Navratri: A Delicious Spread of Sundals, Pongals, and More for the Gods


"Embracing the Spirit of Navratri Through Food and Memories"

Cherished Festival Memories

    While I may not actively celebrate Navratri, this festive season holds a special place in my heart, filled with cherished memories. Growing up in a vibrant neighbourhood, we embraced a rich tapestry of communal festivals, including Diwali, Pongal, Tamil and Malayalam New Year, Onam, and Karthigai. Our celebrations also extended to Eid, Bakrid, Christmas, Easter, and New Year. The joy of sharing delicious festive delicacies was a significant part of these celebrations, leaving a lasting imprint on my memory.

Newer Posts Older Posts Home
View mobile version
Search for a Recipe

I Me Myself

A vintage-style horizontal oval frame showcasing ornate silver spoons on a dark rustic surface

Essence of Life - Food is all about daily cooking with a simple sense of taste and health. It is all about food. Not a day goes by without eating for most of us, so what we eat matters on the whole. Food in the mode of goodness increases the duration of life, purifies one's existence, and gives strength, health, happiness, and satisfaction. Above all ingredients, the most vital one in my kitchen is love.

Sm

Popular Posts

  • How to Make Homemade Raisin Wine
  • How to Cook Parboiled Rice: 6 Foolproof Techniques
  • MOR MILAGAI RECIPE - SUN DRIED CHILLIES
  • Authentic Nasi Bunga Telang Recipe (How to Make Malaysian Blue Rice)
  • How to Make Kerala Kanji | Traditional Rice Porridge with Payar, Chammanthi & Achar
Ebook - What I Cook - For Onam

Ebook - “What I Cook - For Onam”

Amazon.com/dp/B0CGPVY6J3

Indulge in Kerala’s Culinary Heritage: Traditional Onam Sadhya Recipes, with Expert Serving Tips! Celebrate Onam the authentic way! Discover 25 timeless Kerala Sadya recipes in my ebook. From avial to payasam, bring home the flavours of tradition. Available now on Amazon!

Essence of Life

Subscribe & Follow

© 2026 | Essence of Life - Food

  • Home
  • Ask First
    Please note that all rights for the photographs and texts on this blog, unless otherwise mentioned, rests with the author. Please do not use without permission.
  • Privacy Policy