s
Essence of Life - Food. Powered by Blogger.

Essence of Life - Food

  • I Me Myself
  • From My Kitchen
    • Indian Recipes
    • Kongu Cuisine
    • From God's Own Country - Kerala
    • Sadhya
    • Lunch Menu
    • Tiffin Items
    • Indian Street Food
    • Diwali Recipes
    • Spice Powders
    • Pickles
  • Around the World
    • Malaysian Cuisine
    • Thai Cuisine
    • Indonesian Cuisine
    • South East Asian Cuisine
    • Japanese Cuisine
    • Chinese Cuisine
    • Christmas Recipes
    • Wines
  • For The Sweet Tooth
    • Desserts
    • Cakes
    • Payasam/Pradhaman/Kheer
    • Indian Sweets
    • Puddings
    • Ice Creams
  • Food As Medicine
    • Home Remedies
    • Juices/Drinks/Smoothies
  • Tips & Tricks
    • How To...
    • Homemade
  • Glossary
  • eBook


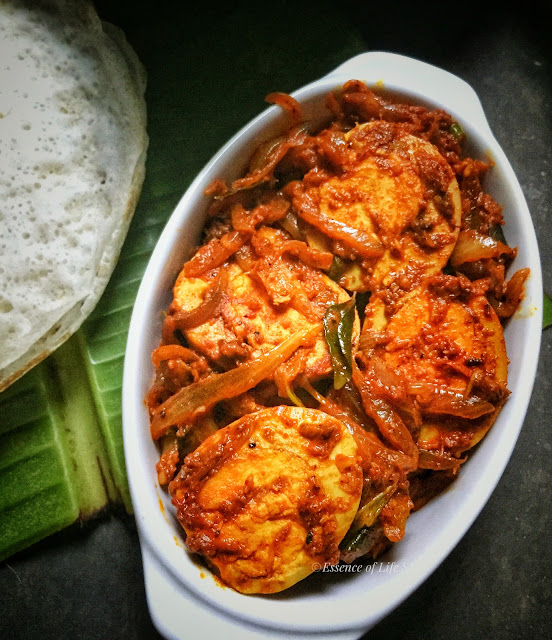
A bowl of Egg Drop Curry, radiating the warmth and tradition of Amma's Kitchen.

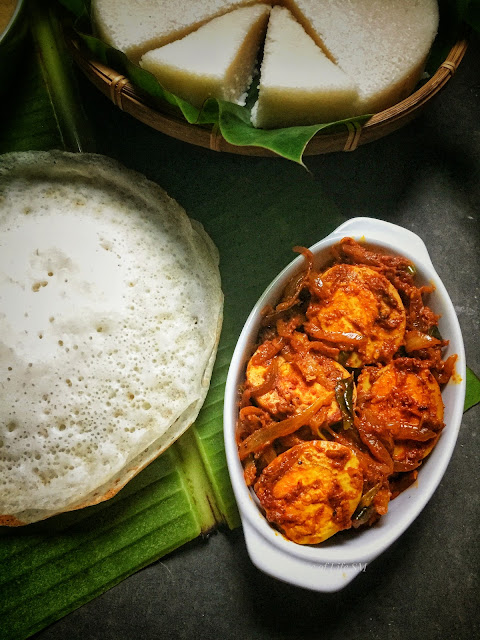
"Unlock the Secret: Egg Drop Curry - A Palakkad Delight from my Mom's kitchen".  

"Eggsquisite Memories: The Tale of Mom's Magical Egg Drop Curry"

    In the cosy kitchen of our modest home, a small room bursting with the aroma of spices and love, my mom orchestrated culinary magic. Our house, though compact, was the setting of countless memories and anecdotes from my childhood. It was a humble two-room haven where the drawing room seamlessly transformed into a dining room at mealtimes, a study when we pored over our books, and welcomed guests with open arms, only to become our bedroom as night fell. This versatile space, though limited in square footage, was boundless in warmth and memories, playing a pivotal role in our lives.

    Amidst this backdrop of constant transformation, my mom, a tailor by profession, adeptly juggled her responsibilities between the tailoring shop and our home. Despite the demands of her work, she always found a way to infuse love and nutrition into our meals, often turning to eggs as a convenient and versatile ingredient. Eggs became our rescue food item, a staple that graced our dinner table more nights than not, served alongside rice or bread. This tradition, born out of necessity and my mom's ingenuity, has stayed with us, a testament to the enduring role of eggs in our culinary heritage.

A bowl of Egg Drop Curry, radiating the warmth and tradition of Amma's Kitchen.

"Unlock the Secret: Egg Drop Curry - A Palakkad Delight from my Mom's kitchen"

     It was in this very kitchen that my mom introduced me to the Egg Drop Curry, a dish that epitomized comfort and love. As she deftly prepared the curry, the small space around us seemed to embrace and enhance the flavours she created. The ritual of toasting fenugreek seeds and curry leaves in coconut oil, the careful blending of spices with coconut and shallots to form a rich masala, and the gentle pouring of beaten eggs into the simmering curry - each step was a lesson in culinary artistry and a testament to my mom's ability to create something extraordinary from the simplest of ingredients.

    This curry was more than just a meal; it was a celebration of resourcefulness, a nod to our humble beginnings, and a symbol of my mom's love and dedication. The pinch of jaggery she added before serving was her signature, balancing the tanginess with a hint of sweetness - a reflection of the balance she maintained in our lives, ensuring we always felt the warmth of home, no matter how busy she was.

A bowl of Egg Drop Curry, radiating the warmth and tradition of Amma's Kitchen.

"Unlock the Secret: Egg Drop Curry - A Palakkad Delight from my Mom's kitchen"

     Now, as I recreate this dish, I'm transported back to our small, multifunctional home, to the kitchen where my mom turned everyday ingredients into extraordinary meals. Though I strive to capture the essence of her Egg Drop Curry, it's the memories of our time together in that cozy kitchen, the laughter and stories shared in our compact home, and the resilience and love of my mom that truly season the dish.

    The tradition of using eggs, a simple ingredient that carried us through many dinners, continues in my own kitchen, a homage to the past and a celebration of the flavours and memories that shaped my journey. The Egg Drop Curry is not just a recipe on my blog; it's a narrative woven with threads of love, tradition, and the enduring bond of family, a story that resonates with every bite.

For more Recipes from Palakkad Cuisine, Click here...

Cuisine - Palakkad, Kerala
Recipe Type - Curry
Course - Side Dish
Difficulty - Easy
Serves - 3-4
Author - SM

Preparation Time - 5–10 Minutes
Cooking Time - 15 -20 Minutes


For more Recipes with EGG, Click here...


Amma's Egg Drop Curry with Traditional Palakkad Flavours

A bowl of Egg Drop Curry, radiating the warmth and tradition of Amma's Kitchen.

"Unlock the Secret: Egg Drop Curry - A Palakkad Delight from my Mom's kitchen"

 Ingredients:

For Egg Drop Curry:

2–3 Eggs
1 Tablespoon Coconut Oil
1/4 Teaspoon Fenugreek Seeds
A Sprig of Curry Leaves
1/4 Teaspoon Turmeric Powder
1 Teaspoon Tamarind Paste 
A Pinch of Jaggery


For Grinding:

!st Mix - To Grind:

11/2 Teaspoon Red Chilli Powder
11/2 Teaspoon Coriander Powder 
2 -3 Shallots 

2nd Mix - To Grind: 

1/4 Cup Coconut
3–4 Shallots

Method:

  • Begin by grinding the 1st mix of shallots, red chilli powder, and coriander powder into a smooth paste. Set aside.
  • In a pan, heat coconut oil and lightly fry fenugreek seeds until they splutter.
  • Stir in curry leaves briefly.
  • Pour in the prepared masala paste to the pan, adding a touch of salt for taste & a sprinkle of turmeric powder.
  • Let the masala cook on a low heat until its raw smell vanishes.
  • Stir in tamarind paste and half a cup of water, continuing to simmer.
  • Meanwhile, grind the 2nd mix of Coconut and shallots into a fine paste.
  • Add this to the above curry and cook this on a very low flame until the raw flavour dissipates.
  • Whisk the eggs in a bowl, then gently pour into the curry, stirring lightly to form strands.
  • Cook until eggs are well-done, and the curry thickens to your liking.
  • Add a pinch of jaggery just before turning off the heat.

A bowl of Egg Drop Curry, radiating the warmth and tradition of Amma's Kitchen.

"Unlock the Secret: Egg Drop Curry - A Palakkad Delight from my Mom's kitchen"

Serving: Best enjoyed hot with rice.

Expert Tips for Perfect Egg Drop Curry:

  • If you are opting for whole dry red chillies and coriander seeds for an authentic taste. Dry Roast them gently in a very low flame until it turns fragrant. Care should be taken not to burn the spices. 
  • Grind the roasted spices with raw shallots.
  • My mother grinds the 1st batch of masala mix with the red dry chillies, coriander & shallots and then a second batch with coconuts & shallots for the masala.
  • Using tamarind paste adds convenience, but traditional tamarind soaked in warm water works wonderfully for extracting a more robust flavour.
  • Ensure a gentle simmer to fully incorporate flavours without any raw taste.
  • The egg can either be beaten and stirred in to form strands, or dropped in whole for a varied texture.
  • Adjust the consistency of the curry to your preference; a little jaggery enhances the overall flavour, balancing the tanginess.
  • This curry matures beautifully, often tasting even better the next day.

    Sharing this Egg Drop Curry recipe isn't just about passing along a method of cooking; it's an invitation into the heart of Palakkad's culinary heritage, a treasure trove of unique, familial recipes that have yet to be unveiled to the world. With each bite, we delve deeper into the rich tapestry of flavours and traditions that define this region's cooking, revealing the intricate balance of spices, tanginess, and textures that set it apart. This dish is more than a meal; it's a story of culture, tradition, and the enduring bonds that food creates, serving as a bridge between the past and the present, the known and the yet-to-be-discovered. It's a testament to the culinary wisdom passed down through generations, waiting to be savoured and celebrated by all who seek the authentic essence of Palakkad cuisine.  This revelation is not just a rediscovery of my mother's secret culinary prowess, but an awakening to the rich tapestry of flavours and techniques I had overlooked until now.


March 10, 2024 No comments


"Perfectly made Tamago Sando with creamy egg filling, nestled between two toasted slices of white bread."
"Tamago Sando - The Perfect Japanese Egg Sandwich"


"Tamago Sando: The Egg-squisite Japanese Delight"

    Konichiwa, fellow food enthusiasts! Let's dive into the delightful world of Japanese cuisine, and trust me, it's going to be egg-ceptional! 🥚 And one of the easiest Japanese recipes.

    While I haven't had the chance to explore Japan in person yet, my mind often wanders to the bustling streets of Tokyo. I imagine myself strolling along, and suddenly, an irresistible aroma wafts towards me - it's the alluring scent of Tamago Sando, the ultimate comfort food. But have you ever wondered about the intriguing story behind this delightful eggy sensation? Let's uncover it together!

"Perfectly made Tamago Sando with creamy egg filling, nestled between two toasted slices of white bread."
"Tamago Sando - The Perfect Japanese Egg Sandwich"


A Brief History:

    Tamago Sando, or Japanese Egg Sandwich, is the epitome of simplicity and taste. Its origins date back to the Japanese convenience stores, or "konbini." They're like treasure troves of mouthwatering goodies, and the Tamago Sando is their golden egg. It's proof that culinary magic can happen anywhere, even in a 24/7 convenience store.

    The Japanese have a knack for turning the ordinary into extraordinary, and this fluffy egg sandwich is no exception. It's all about the fluffiest, creamiest, and slightly sweet egg filling, nestled between two slices of perfectly toasted white bread. The result? Pure bliss.

Now, let's get cracking on the recipe!

How to make Tamago Sando- Japanese Egg Mayo Sandwich

"Perfectly made Tamago Sando with creamy egg filling, nestled between two toasted slices of white bread."
"Tamago Sando - The Perfect Japanese Egg Sandwich"


Ingredients:

  • 4 large Eggs
  • 2 tablespoons Mayonnaise
  • 1 teaspoon Sugar
  • 1/2 teaspoon Soy Sauce
  • Salt and Pepper to taste
  • 4 slices of fresh, soft White Bread

Method:

  • Perfectly Boiled Eggs: Start by boiling your eggs. To get them just right, let them simmer in boiling water for about 10 minutes. After boiling, immediately transfer them to an ice bath to stop the cooking process. This will help you achieve a creamy, not rubbery, texture.
  • Secret Sauce Whisking: While the eggs cool down, let's work on that secret sauce. Mix mayonnaise, sugar, soy sauce, a pinch of salt, and a dash of pepper in a bowl. Whisk it until it's smooth, creating a harmonious blend of flavors.
  • Fluff it Up:  Once your eggs are cooled and peeled, mash them up finely. Add the creamy egg clouds to your secret sauce mixture. This is where you create that cloud-like fluffiness. Gentle mixing is the key, so be kind to your eggs.
  • Toasting Technique:  Take your slices of bread and toast them to golden perfection. Here's a pro tip: lightly butter the bread before toasting. It adds a lovely richness to your sandwich, and it helps prevent it from becoming overly soggy.
"Perfectly made Tamago Sando with creamy egg filling, nestled between two toasted slices of white bread."
"Tamago Sando - The Perfect Japanese Egg Sandwich"


  • Generous Filling:  Spread your delightful egg mixture generously on one slice of bread. Pile it up because, trust me, you won't want to skimp on the filling. It's the heart and soul of Tamago Sando.
  • Trim the Crusts:  If you're feeling a tad fancy, you can trim the crusts. It not only makes the sandwich look neater, but also helps you focus on the creamy goodness within.
  • Slicing Savvy: Use a sharp knife to slice your sandwich into halves or quarters. A clean, quick cut will give you those beautifully even sections.
"Perfectly made Tamago Sando with creamy egg filling, nestled between two toasted slices of white bread."
"Tamago Sando - The Perfect Japanese Egg Sandwich"


      And there you have it, the Tamago Sando! By following these tips and tricks, your Japanese egg sandwich will be nothing short of egg-squisite. Enjoy your culinary adventure! 😊 Simple, yet oh-so-satisfying. The perfect snack, breakfast, or even a midnight craving fix - the utmost Japanese comfort food.


October 15, 2023 No comments

NADAN MUTTA ROAST
KERALA EGG ROAST - NADAN MUTTA ROAST

    Kerala Egg Roast is an authentic Kerala Style Egg Recipe cooked with spices is a hot & spicy gravy. Kerala's cuisine is a multitude of Vegetarian and Non-Vegetarian dishes, but Egg takes a special place along with its counterparts. This Egg Roast recipe is a simple recipe whatsoever. This is easy to incorporate and takes very less time to cook, and it can come as a rescue when you are in short of time.  

    Simply boil the Eggs, peel them, cut into halves, marinate it with a mix of Turmeric Powder, Red Chilli Powder & Salt, leave it aside for a few minutes and then shallow fry these Eggs on a very low flame. Then Sauté the Onions, Tomatoes & Spices and finish off this gravy laced with thick coconut milk for an extravagantly aromatic and tasty Egg Roast.

    This Nadan Egg Roast is a simple Egg recipe cooked in a hot and spicy masala.  It is prepared in a typical Kerala style with local spices and undoubtedly cooked in Coconut Oil, which gives an authentic touch to this Egg Roast. The finishing touch of this Egg Roast is undoubtedly the Coconut Milk, which elevates the taste and flavour of this Nadan Egg Roast.

NADAN MUTTA ROAST
KERALA EGG ROAST - NADAN MUTTA ROAST


    This Kerala Egg Roast is one best combination with Appam and Idiyappam.  And it can be added as one dish in your Christmas party Menu.  May be for breakfast along with Appam, Vattayappam, Idiyappam, Pathiri, Malabar Parotta or Chapati. It can also be served in your lunch menu as a side dish along with Rice Dishes, Biriyanis & Pulaos.

For more recipes from GODS OWN COUNTRY - KERALA, click here...


Cuisine - Kerala
Course - Side Dish
Spice Level - High
Difficulty - Medium
Serves - 2-3
Author - SM


Preparation Time - 20-30 Minutes
Cooking Time - 25-30 Minutes

For more Recipes with EGG, Click here...


HOW TO COOK KERALA EGG ROAST - NADAN MUTTA ROAST


NADAN MUTTA ROAST
KERALA EGG ROAST - NADAN MUTTA ROAST

INGREDIENTS: 

For Kerala Egg Roast - Nadan Mutta Roast:

Eggs - 4 Nos.
Onion - 2 Nos.
Tomato - 2 Nos.
Ginger Garlic Paste - 1 Tablespoon 
Turmeric Powder - 1/4 Teaspoon
Red Chilli Powder - 1 Tablespoon
Garam Masala - 1 Teaspoon
Pepper Powder - 1 Teaspoon
Roasted Fennel Powder - 1/2 Teaspoon
Lemon Juice - 1 Tablespoon (Optional)
Salt - to Taste
Sugar - a Pinch


For Shallow Frying:

Coconut Oil - 3 Tablespoons.
Curry Leaves - 2 Sprigs.

Other Ingredients:

Thick Coconut Milk - 1/4 Cup


To Garnish:

Coriander Leaves - Few


NADAN MUTTA ROAST
KERALA EGG ROAST - NADAN MUTTA ROAST

METHOD:

To Cook & Fry the Eggs:

  • Hard-boil the Eggs & then Peel it.
  • Cut it into halves.
  • Marinate the hard-boiled Eggs with Salt, Turmeric Powder, Red Chilli Powder and leave it aside for about 5-10 minutes.
  • Heat about 3 Tablespoons of Coconut Oil in a pan, add a sprig of Curry leaves and fry for a while.
  • Immediately add marinated hard-boiled Eggs and shallow fry them.
  • Fry them on a very low flame until the raw flavour of the masala goes & the surface of the Eggs becomes slightly crispy.
  • Once the Eggs turn into light golden brown in colour, remove them from the Oil and keep it aside.

For a detailed Recipe on 'HOW TO MAKE PERFECT HARD BOILED EGGS', Click here ...

NADAN MUTTA ROAST
KERALA EGG ROAST - NADAN MUTTA ROAST

For Kerala Egg Roast - Nadan Mutta Roast:

  • Dry Roast a teaspoon of Fennel on a very low flame until crisp and aromatic.  Then grind it into a fine powder and keep it aside.
  • Cut onions into thin slices, Purée the Tomatoes and keep them aside.
  • Heat Coconut Oil in a pan, sauté Ginger-Garlic Paste, Curry Leaves & Green Chillies and sauté it until aromatic.
  • Add Turmeric Powder, Red Chilli Powder, Pepper Powder, Fennel Powder and Garam Masala to the above and fry for a while until the raw flavour goes.
  • Can sprinkle a bit of water at this stage so that the masalas get cooked well.  
  • Care should be taken not to burn the masalas, which will alter the overall taste of the dish.
  • Pour in the puréed Tomatoes and sauté until oil separate from the mix.
  • Now add thinly sliced Onions and sauté it on a very low flame until it turns slightly soft.
  • Pour in the Lemon Juice and give a quick stir.
  • Add a dash of Salt, a pinch of Sugar and mix well.
  • Sprinkle some water, if necessary, and cook this on a low flame for about 5 minutes.
  • Add boiled Eggs into it and cook them on a low flame for a few more minutes.
  • Gently mix the masala and the eggs.
  • Finally, pour in Thick Coconut Milk and cook this on a very low flame for a few more minutes.
  • Let the Nadan Mutta Roast become slightly dry and aromatic.
  • Switch off the flame and garnish it with Coriander Leaves.
  • Serve hot Nadan Mutta Roast as an Appetizer.
  • It goes well with Steamed Rice or along with Vegetarian or Non-Vegetarian Curries, it can also be served as a side dish along with Rice Dishes, Biriyanis & Pulaos.
  • Goes well with Appam, Vattayappam, Idiyappam, Pathiri, Malabar Parotta or Chapati.


NADAN MUTTA ROAST
KERALA EGG ROAST - NADAN MUTTA ROAST

NOTES:

  • Adjust the amount of Spices to your taste preference.
  • Can add whole hard-boiled eggs or cut them into halves.
  • If adding full eggs, then cut small slits over the egg whites, so that the egg absorbs the flavour of the masala.
  • Shallow Fry the marinated Eggs on a very low flame until it turns aromatic and the surface of the Eggs becomes slightly crispy.
  • Can also finely chop the Tomatoes instead of Puréeing them.
  • Adding Sugar is totally optional. 
  • Using Coconut Oil gives the authentic taste to the dish. Can use any other cooking oil too.
  • Adding Coconut Milk is purely optional, but it gives an added taste and note of flavour to this Nadan Chemmeen Roast.
  • Curry Leaves gives an incredible flavour to the roast.
December 20, 2022 No comments
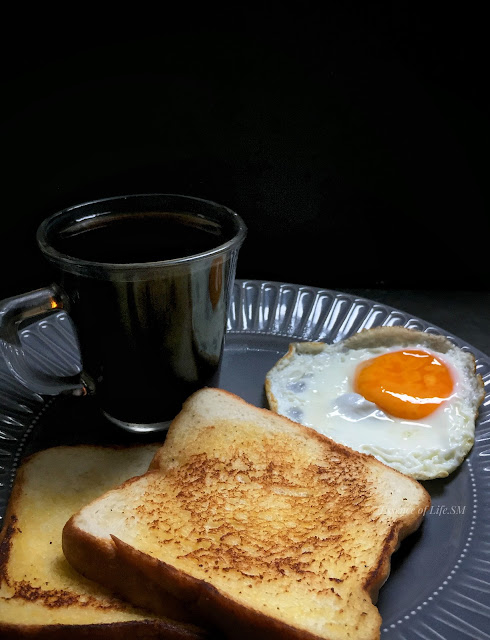
A plate with two slices of toasted bread, a sunny-side up egg, and a cup of black coffee, making a wholesome breakfast.
Perfect Breakfast Combo - Black Coffee, Toast & Sunny-Side Up

"The Perfect Breakfast Duo: Crispy Bread Toast and Sunny-Side Up Eggs"

A Break from Blogging and a Journey to Southern Italy

    Life has been a whirlwind lately, keeping me away from my blog. Amid personal commitments and a trip halfway across the globe, I found myself immersed in the picturesque southern region of Italy. Between planning and travelling with my daughter, my mind was constantly pulled in different directions. We spent days exploring the historical and cultural gems of Italy—mountains, beaches, and centuries-old architecture. Of course, there was the inevitable rant about missing good old rice and curry under the scorching Sicilian sun. But that’s the beauty of travel—it broadens your horizons and opens your heart to new experiences and cultures.

Discovering the Sweet Essence of an Italian Breakfast

    While the thrill of travel keeps me on my toes, let’s be honest: food steals the show. A typical Italian breakfast, or Colazione, introduced me to a world of sweetness—Cornettos (Croissants), Brioche, buns dripping with jam, and the iconic Sicilian Gelato served in a brioche bun. The delights didn’t end there. Sicily surprised me with its unique sweet treats like Cannoli, Sicilian almond cookies (pasticcini di mandorla), and the rich Cassata Siciliana. For someone used to savoury breakfasts, this was a sugar rush of epic proportions. Yet, the one constant was the coffee—whether it was a foamy cappuccino, creamy caffé latte, or the locals’ favourite, a strong shot of espresso (Café in their terms & Decoction in our terms).

Craving Familiar Comforts after Italian Indulgence

    Despite the Italian feast of pizzas, pastas, focaccias, and arancinis—capped off with a decadent slice of tiramisu—nothing beats the comfort of home-cooked meals. After soaking in the Sicilian summer, I found myself yearning for something simple, like Thayir Sadham (curd rice) and pickle. Returning home, there was nothing more satisfying than this meal to recover from the trip. Once settled, I turned to my favourite breakfast—a classic toast with sunny-side up eggs and a robust cup of coffee—to soothe my soul and set the stage for getting back into my blogging routine.


Pair it with Your Favourite Beverage: Don’t forget to check out delicious Beverages Recipes for the perfect coffee, tea, or chocolate drink to complement your breakfast!


Cuisine: Continental
Recipe Type: Breakfast
Servings: 1-2 servings
Yield: 2 slices of toasted bread with 1 sunny-side up egg
Author: SM

 
Preparation Time: 5 minutes
Cooking Time: 10 minutes


For a quick and nutritious breakfast option, try a wide range of Smoothies. They’re perfect for those busy mornings when you need a boost!


"Master the Perfect Sunny-Side Up Egg on Toast: A Step-by-Step Guide"

Classic breakfast of two toasted bread slices, a sunny-side up egg, and a glass cup of black coffee, arranged on a plate.
Morning Fuel - Black Coffee Paired with Toast & Egg

The Ultimate Breakfast Combo - A Quick and Easy Meal

    After returning home from my recent trip, I was greeted by a loaf of fresh bread, and instantly, my mind was set on creating this heartwarming combo. Knowing my obsession with this dish, my husband thoughtfully picked up a loaf, anticipating my craving for my all-time favourite breakfast combo: Toasted Bread with Sunny Side Up Eggs! This hearty dish transcends breakfast; it's a comforting anytime meal that warms the heart and satisfies the palate.


A perfectly cooked sunny-side up egg with a bright golden yolk, served on a white plate.
Golden Yolk Sunny-Side Up Egg - A Breakfast Classic

Toasting Techniques: Find Your Perfect Method

    When it comes to toasting bread, everyone has their preferred method to achieve that perfect crisp. Whether you choose a classic electric toaster or a convenient toaster oven, the goal is the same: golden-brown perfection.

The Art of Toasting Bread

    Toasting bread is a cherished culinary tradition that dates back to Ancient Egypt, where it was discovered as a way to rejuvenate stale bread. Today, bread toast remains one of the most versatile and delicious options for breakfast or as a side dish for any meal.

Versatile Toasting Methods

    The beauty of toast lies in its adaptability. You can create a delightful slice from virtually any type of bread, using a variety of methods. Whether you prefer a classic toaster, a conventional oven, an open flame, or a frying pan, there’s no shortage of ways to achieve that perfect golden-brown finish. Plus, the options for toppings are limitless, allowing you to tailor each slice to your taste preferences.


Toasting the Bread: A Timeless Tradition

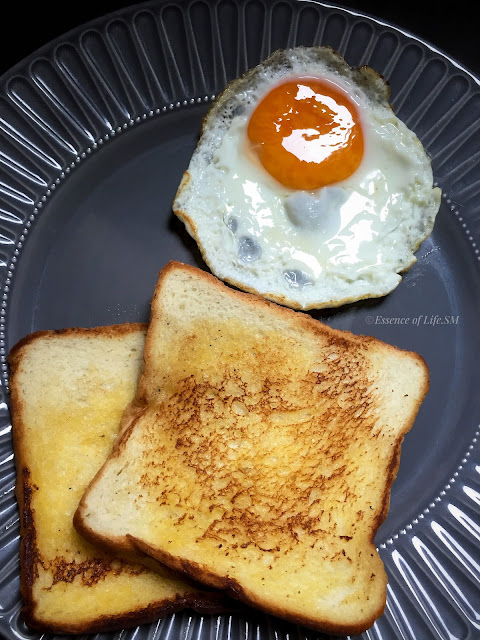
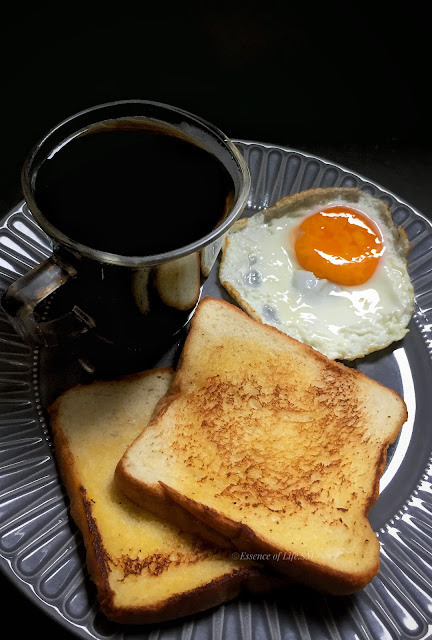
Two slices of golden toasted bread served with a sunny-side up egg on a grey plate.
Crispy Toast and Sunny-Side Up Egg - A Balanced Start

Choosing the Right Bread

    When it comes to selecting bread for toasting, there are plenty of options. White, wheat, rye, and multi-grain breads all work beautifully. Personally, I adore the traditional soft sandwich bread, which is always pre-sliced, ensuring a uniform toast that's ideal for making crunchy sandwiches or pairing with breakfast dishes.

Revitalise Stale Bread

    Have some stale bread lying around? Don’t toss it out! Toasting stale bread can bring it back to life, enhancing its flavour and texture. This revitalising technique is why toasting has stood the test of time!

Enhance Your Breakfast Experience

    To elevate your breakfast, consider adding fresh herbs or a sprinkle of your favourite seasoning to the eggs for an extra kick. This simple combo can be easily adapted to suit your taste buds, making it a versatile choice for any meal of the day.


Mastering the Art of Toasting: A Guide to Perfect Toast


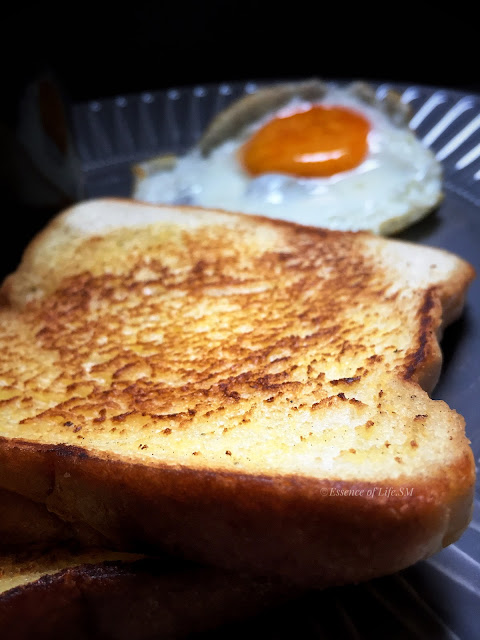
A close-up shot of two slices of crispy golden-brown toast on a plate, with the edge of a sunny-side up egg slightly blurred in the background.
Golden Crispy Toast with a Hint of Sunny-Side Up Egg

Key Factors for Toasting Bread

When it comes to achieving the perfect toast, two crucial factors come into play:  

  • Time &
  • Heat.

Finding Your Ideal Browning Level

    The longer you toast your bread, the darker and crispier it will become. To achieve your desired level of browning, it's essential to adjust both the heat and the cooking time. Whether you prefer a light golden hue or a deep, rich brown, fine-tuning these elements is key.

The Family Method: Pan Toasting

    Personally, I've cherished the traditional method I grew up with—my mum would toast bread on our trusty old chapati griddle or a Pan. This method allows for a simple, butter-free toast that beautifully enhances the bread's natural flavour.  This age-old method has been a staple in our kitchen for generations. Simply place your bread in a dry pan and let the heat work its magic.   For added richness, I recommend a light smear of butter. However, you can achieve excellent results even without butter or oil.

A Desi Twist: Toasting with Ghee - For a unique twist, I sometimes elevate my toast game by using ghee—a traditional Indian clarified butter. This adds a delicious depth of flavour that complements the toast perfectly.

* Trivia: What is Texas Toast?

    Did you know that frying toast with a bit of butter or oil is often referred to as "Texas Toast"? This method not only creates a crisp texture but also results in a golden crust that’s irresistibly delicious.


Perfect Toasted Bread Recipe: A Simple Guide


A plate with two slices of toasted bread, a sunny-side up egg, and a cup of black coffee, making a wholesome breakfast.
Perfect Breakfast Combo - Black Coffee, Toast & Sunny-Side Up

Ingredients for Delicious Toast

To make the perfect toasted bread, you will need the following ingredients:

  • Bread (Brown or White): 2 slices
  • Butter: 1 tablespoon


Method: How to Toast Bread to Perfection

  • Prepare Your Pan - Start by heating a pan over medium heat. Once the pan is warmed up, reduce the flame to low-medium to ensure gentle toasting.
  • Butter the Bread - Using a butter knife or a flat spoon, smear some butter on each side of the bread slices. This step is essential for achieving a rich, golden crust.
  • Toast the Bread - Carefully place one or two slices of bread onto the pan. It's important to toast the bread over low heat to prevent excessive browning or charring, ensuring a perfect texture.
  • Flip and Finish - After a few minutes, flip the bread slices to toast the other side. Continue to toast until both sides are browned to your liking.
  • Serve and Enjoy - Once your bread slices are perfectly toasted, remove them from the pan. Repeat the process with any remaining slices.


The Showstopper: Perfect Sunny-Side Up Eggs

A perfectly cooked sunny-side up egg with a bright golden yolk, served on a white plate.
Golden Yolk Sunny-Side Up Egg - A Breakfast Classic

Mastering the Art of Sunny-Side Up Eggs

    Let’s dive into the star of the breakfast table—Sunny-Side Up Eggs! These eggs are not just delicious; they also serve as the perfect complement to your toasted bread. However, achieving that ideal sunny-side up egg requires careful attention to heat and technique.

1) Heat Control - Proper heat control is essential when cooking sunny-side up eggs:

  • Too Much Heat: If the pan is too hot, the egg whites will toughen and develop brown edges, ruining the delicate texture.
  • Too Low Heat: Conversely, cooking on too low a heat can lead to yolks that cook partway through before the whites are fully set.

To achieve perfection, start with the right heat setting—medium-low is ideal.

2) Oil is a crucial ingredient for sunny-side up eggs. A little bit of oil is essential as it helps to set the whites without covering the pan, ensuring that the yolks remain visible and perfectly runny. The hot oil creates a barrier that prevents the whites from spreading too thin while allowing them to cook evenly.

3) Seasoning - Season after the eggs are done.  Seasoning, a Sunny-Side Up Egg is always with Salt & Pepper.  I usually just sprinkle a dash of Salt. 


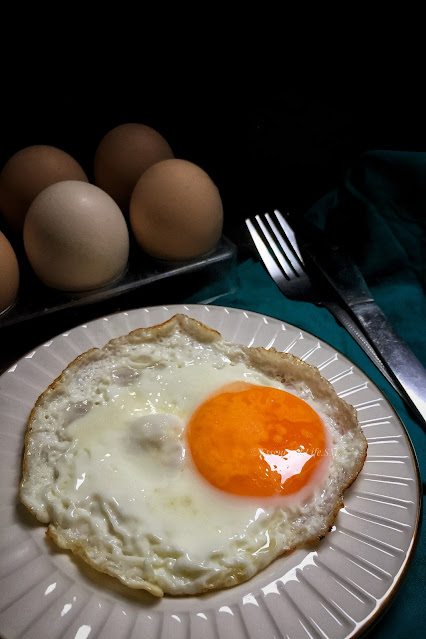
A close-up of a perfectly cooked sunny-side up egg, accompanied by a fork and knife on the side, with a tray of eggs in the background.
Ready to eat -Perfect Sunny-Side Up Perfection

Essential Ingredients for Sunny-Side Up Eggs

To create these delectable eggs, you’ll need:

  • Egg: 1 large
  • Oil: 1 teaspoon (preferably olive or vegetable oil)
  • Salt: To taste
  • Pepper: 1/4 teaspoon

Method:

  • Heat the Oil - Begin by heating the oil in a pan over medium-low flame.
  • Crack the Egg - Gently crack the egg into the pan.
  • Cook to Perfection - Cook for about three minutes, until the whites are mostly set, leaving a bit of runny white near the yolk.
  • Season and Serve - Once cooked to your liking, sprinkle a dash of salt and pepper on top. Carefully remove the egg from the pan and serve hot.

Looking for another egg dish?

  • Try this  Classic Omelette Recipe which is versatile and can be customised with your favourite fillings.
  • Try Scrambled Eggs with a Twist for a fluffy, delicious alternative that pairs well with toast!

A  tight close-up of a sunny-side up egg, showcasing its bright golden yolk and crisp white edges.
Perfectly Cooked Sunny-Side Up Egg in Close-Up

Helpful Cooking Tips & Notes:

  • When cracking the egg, aim for a gentle action—there should be no hissing sound.
  • Ensure the egg lies flat and still in the pan; if you hear sizzling or see the whites fluttering, reduce the heat immediately. Too much heat will toughen the whites, leading to an undesirable texture.
  • Remember to season the eggs after they are done cooking to avoid drawing out moisture. 
  • Try Variations: Experiment with different types of bread or toppings to put your unique spin on this breakfast classic!

Breakfast Variations with Bread

  • Garlic Bread: If you love the crispy texture of toasted bread, don’t miss this Garlic Bread recipe. It’s the perfect side for any meal and adds a delightful garlic kick!
  • French Toast: Craving something sweet? Check out Classi French Toast recipe, which offers a delicious twist on classic breakfast fare, perfect for satisfying your morning sweet tooth.
  • Japanese Egg Mayo Sandwich: If you enjoyed the eggs in this recipe, you’ll love this soft & silky Japanese Egg Mayo Sandwich. It's a unique and creamy way to enjoy eggs for lunch or a light breakfast.
  • Baguette Pizza: Looking to switch things up? Try this Baguette Pizza for a fun and delicious take on pizza that’s perfect for brunch!

 
A wholesome breakfast featuring two slices of toasted bread, a sunny-side up egg, and a cup of black coffee on a plate.
Hearty Breakfast Combo - Black Coffee, Toast & Sunny-Side Up Egg


A Breakfast to Remember

    There’s nothing quite like the delightful combination of toasted bread and sunny-side up eggs to elevate your breakfast game. This simple yet satisfying meal is not only easy to prepare but also packed with flavour and nutrition, making it the perfect way to kick-start your day. Whether enjoyed alone or paired with your favourite beverage, this breakfast combo offers a delicious blend of textures and tastes that will leave you craving more.

    Next time you ponder what to prepare for breakfast, let this classic duo be your inspiration.  Embrace the warmth of golden toast and the richness of perfectly cooked eggs to create a wholesome morning ritual that fuels your body and spirit. It's the perfect way to start a day!

    Explore More Recipes: Check out Essence of Life - Food, for more delicious recipes and cooking tips to keep your mornings vibrant and energised.    


October 12, 2022 No comments
VEGGIE & EGG
CAULIFLOWER & EGG STIR FRY

     Cauliflower & Egg stir-fry recipe is from my Mother's repertoire. Egg is one common ingredients in my Mom's kitchen and not a day goes without eggs.  Eggs turn out to be versatile and comes out in different versions & styles each day.  When we get bored with Egg Bhurji or Omelettes, she cooks up Eggs with Cauliflowers, Beans or Cabbage.  This was one frequented side dish I have taken in my Lunch Box, and so I have fond memories of her versions of Omelette with grated coconuts and Veggie & egg stir fries.

    Egg Bhurji is an Indianised Scrambled Egg converted to suit the Indian Palate.  What makes it different and unique is the addition of Spices. This recipe is similar to an Egg Bhurji with just an addition of finely chopped Cauliflowers along with it. Maybe we can all it as Cauliflower Egg Bhurji too.  This quick fix recipe goes well with both Roti & Rice. 

    Cauliflower & Egg Stir fry recipe comes handy for working folks who want to make something quick, healthy and delicious for their breakfast or for their kids' lunch box. This one is the best try for beginners venturing into cooking or students/bachelors living outside their homes. One of the best dish ever which is hassle-free and can be prepared with minimal ingredients.  Above all, combine it up with few Slices of Bread or Chapati for a complete meal.  Goes well with Rice too.
    

    In this Cauliflower & Egg Stir Fry Recipe, I have cooked Cauliflowers & then scrambled the Eggs with Onions, Turmeric Powder, Red Chilli Powder and Curry Masala(Mutton Masala).  You can also add some tomatoes while sautéing or substitute Red Chilli Powder with finely chopped Green Chillies.  You can also be easy with the Masala - use Garam Masala/Curry Masala/Mutton Masala... Anything which fancies you.  If you do not have any, simply prepare it with Onions and Green Chillies and finish off the dish with a sprinkle of Black Pepper Powder.  The options are to go along with your whims and fancies... or cook with what ingredients you readily have.  

For more EGG RECIPES, Click here...

Cuisine - Indian
Course - Side Dish
Spice Level - Medium
Difficulty - Easy
Serves - 2 -3
Author - SM

Preparation Time - 5-7 Minutes
Cooking Time - 7- 10 Minutes

HOW TO COOK CAULIFLOWER & EGG STIR FRY

VEGGIE & EGG
CAULIFLOWER & EGG STIR FRY

INGREDIENTS:

For Cauliflower & Egg Stir Fry:

Cauliflower - 2 Cups
Eggs - 2 Nos.
Onion - 1 No.
Garlic - 1 Clove
Turmeric Powder - 1/8 Teaspoon
Red Chilli Powder - 1/2 Teaspoon
Curry Masala/Mutton Masala Powder - 1 Teaspoon
Salt - To Taste
Oil - 2 Tablespoons


METHOD:

  • Clean and cut the Cauliflower into florets
  • Wash the Cauliflower florets and soak the florets in warm water with a pinch of Turmeric & a dash of Salt in it for a few minutes.
  • Allow it to dry in a colander.
  • Now, finely chop the Cauliflower.  
  • Heat oil in a pan over a high flame.
  • Reduce the flame to medium-low and add finely chopped Onions, Garlic and sauté it until Onions turn translucent.
  • Add Turmeric Powder, Red Chilli Powder and Curry Masala Powder to the above and fry this on a low flame until aromatic.
  • Add finely chopped cauliflower and give a quick stir.
  • Sprinkle a dash of salt and cook this on a low flame for a few minutes, or until the Cauliflowers turns soft and cooked.
  • Meanwhile, crack open the Eggs in a small bowl one by one and then combine it up in a big bowl.
  • Beat the Eggs lightly along with a dash of Salt.
  • Gently pour the beaten Egg into the Pan & Scramble the Eggs into tiny pieces on a medium-low flame until well cooked.
  • At this point, make sure to stir it up continuously and scramble the eggs well.
  • Once the eggs are finely scrambled and well-cooked, switch off the flame.
  • Finally, the Eggs and Cauliflower should have combined up well.
  • Serve Cauliflower & Egg Stir Fry hot with Roti or Rice.
  • This stir-fry goes well with hot fuming Rice & Rasam.(my personal preference).

NOTES:

  • Finely Chopped Cauliflowers tends to get cooked soon and also aesthetically looks good when combined with scrambled eggs.
  • I have used Red Chilli Powder in this recipe.  Can substitute it with 2-3 finely chopped Green Chillies.
  • I have used Curry Masala Powder, can substitute it with Mutton Masala/Garam Masala Powder.
  • Adjust the spices to suit your spice level.
  • The idea of breaking the eggs one by one in a small bowl and then combining it in a bowl is, by any chance one of the Eggs turns out to be bad, then the entire bowl gets wasted.
  • So I usually do this way while using up more than one egg in a recipe. 
  • Also, beating the eggs along with salt before scrambling it helps you to yield perfectly scrambled eggs.  
  • I like to scramble it up into tiny pieces and well cooked.
  • All the way while cooking I keep the flame at medium-low.
  • This way it doesn't smell "eggy" when packed in Lunch Boxes. 
  • Can cook the same recipe with finely chopped Beans/Cabbage instead of Cauliflower.


March 27, 2022 No comments

BAKERY STYLE PUFFS
EGG PUFFS WITH FROZEN PAROTTA

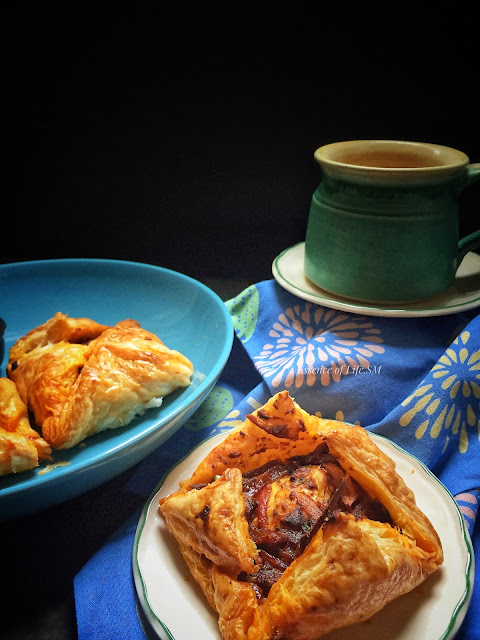
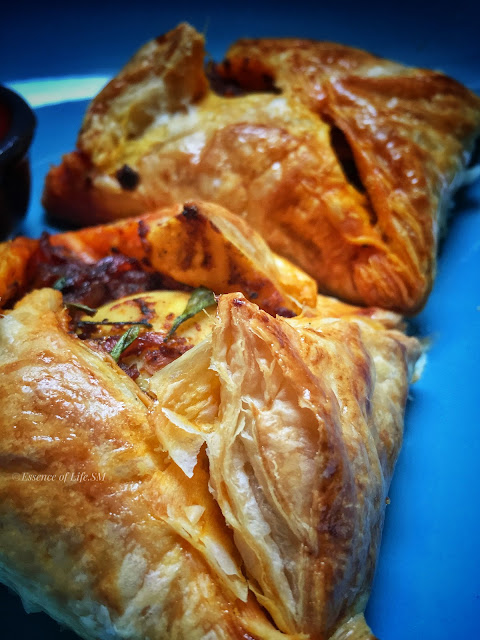
    Well, this Egg Puff recipe was inspired by Chef Pillai's Youtube Video and vis-à-vis the craving for a typical Bakery style Puffs.  Have tried making them with Pastry Sheets, but I never felt them as good as the ones sold in the Bakeries.  And the moment I saw the video by Chef Pillai, I had no doubt and right away went ahead with the recipe.  The results were amazing, and I was overwhelmed with the flaky texture, as good as the ones we get in the bakeries.

    So, now no looking back, and I have started to store up frozen Parottas now with the sole intention of making puffs out of it.  As the original recipe was made with eggs, went with the flow and made Egg Puffs.  And when I had a few side cuttings of the frozen Parotta sheets left around from making Egg Puffs, converted them into Mini Vegetable Puffs.  What went hit at home were the tiny Vegetable Puffs.  As usual, anything bite sized comes under my daughter's arena. 

    With all good efforts and not much satisfying trials & errors with Puff recipe, frozen parotta sheets came out to be a bliss out of the blue.  And now this Puff recipe with Frozen Parotta sheets is surely going to be one of the most frequented snack at home.  The moment we land in India, my husband always says, we should have a Puff and a Tea in the roadside Bakery.  So much is his love for this snack.  And my daughter on the other hand have a few craving anecdotes of tasty Puffs she ate when she was in India for a few days.  So for all the love and overwhelming craving of Puffs, here comes one of the easiest and foolproof Puff recipe.  

BAKERY STYLE PUFFS
EGG PUFFS WITH FROZEN PAROTTA

    All the more today, 17th January happens to be the 6th Anniversary of my Blog, Essence of Life - Food.  And this Puff recipe happens to be the 750th Post - another favourite recipe to mark the milestone.  After 6 years of consistency and never waning passion I hold for my blog, let me give myself a pat on my back.   I recently have started to feel that people I know relate me to food and never forget to appreciate my work. Especially my food photos and when a few come up saying that they have tried some recipes, and they liked it, I feel humbled and overwhelmed, all at the same time.  

Thanks for all the support and encouragement.


For more SNACKS & SAVOURIES, Click here... 

Cuisine - Indian
Recipe - Snack
Difficulty - Easy
Serves - 3-4
Author - SM

Preparation Time - 15 - 20 Minutes
Cooking Time - 15 - 20 Minutes
Baking Time  - 30 - 45 Minutes.


For BAKERY STYLE SNACKS, Click here...


HOW TO MAKE EGG PUFFS WITH FROZEN PAROTTA SHEETS

BAKERY STYLE PUFFS
EGG PUFFS WITH FROZEN PAROTTA


INGREDIENTS:

For the Egg Filling:

Eggs - 4 Nos.
Onion - 2 Nos.
Ginger Garlic Paste - 1 Tablespoon
Green Chillies - 3–4 Nos.
Curry Leaves - 1 Sprig
Turmeric Powder - 1/4 Teaspoon
Red Chilli Powder - 1–11/2 Teaspoons
Garam Masala - 1 Teaspoon
Tomato Ketchup - 1 Tablespoon (Optional)
Oil - 2 Tablespoons
Salt - to Taste
Sugar - a Pinch
Coriander Leaves - a few (Optional) 

For 'HOW TO MAKE PERFECT HARD BOILED EGGS, Click here ...


BAKERY STYLE PUFFS
EGG PUFFS WITH FROZEN PAROTTA


For Egg Puff:

Frozen Parotta - 8 Sheets 


For Egg Wash:

Egg - 1 No. 
Water - 2 Teaspoons


METHOD:

For Egg Masala:

  • Hard-boil the eggs and keep them aside.  Peel them and cut it into two halves.
  • Heat oil in a pan, sauté finely chopped Onions, Curry Leaves, Green Chillies until Onions turn translucent.
  • Add Ginger-Garlic Paste and sauté it until aromatic.
  • Add Turmeric Powder, Red Chilli Powder and Garam Masala to the above.
  • Fry for a while until the raw flavour goes and sauté it until oil separate from the mix.
  • Add in the Tomato Ketchup and give a quick stir.
  • Add a dash of Salt, a pinch of Sugar and mix well.
  • Sprinkle some water, if necessary, and cook on a low flame for about 5 minutes.
  • Add boiled Eggs into it and cook them on a low flame for a few more minutes.
  • Switch off the flame and garnish it with Coriander Leaves.

BAKERY STYLE PUFFS
EGG PUFFS WITH FROZEN PAROTTA

For Egg Puff:

  • Meanwhile, pre-heat the oven to 200 °C.
  • Take the frozen Parottas from the freezer just before making the Egg Puffs.
  • No need to thaw them.  Thawing can make the process cumbersome.
  • Gently peel off the plastic sheets from the Parottas and place it on a cutting board.
  • Cut off the sides and make a square out of it.
  • Leave the cut-off sides in the freezer.  Can use it to make mini puffs.
  • Now, place an Egg (place the yolk side down) from the Egg Masala, top it up with a few teaspoons of the Masala.
  • Gently fold the sides and cover the Egg & the masala, making a square shaped packet.
  • Follow the suit for the rest of the Eggs.
  • When the Puffs are packed and ready, place the Egg Puffs on a greased baking tray.  
  • Leave enough space in between. 
  • Meanwhile, beat the Egg with a teaspoon of water for the Egg Wash.
  • Gently brush the Egg Puffs placed on the baking tray with the Egg Wash.
  • Now, place the baking tray with the Egg Puffs into the Electric Oven.
  • Bake the Egg Puffs at 200 °C for about 30–45 minutes.
  • You need to bake the Egg Puffs until the crust turns golden brown & until it turns crispy & flaky.
  • Adjust the baking time according to your oven settings.
  • Serve flaky & crispy Egg Puffs hot with your choice of Sauce or Ketchup.


BAKERY STYLE PUFFS
EGG PUFFS WITH FROZEN PAROTTA

NOTES:

  • Adjust the amount of Spices to suit your taste preference.
  • Can add whole hard-boiled eggs or cut them into halves.
  • If adding full eggs, then cut small slits over the egg whites, so that the egg absorbs the flavour of the masala.
  • Adding Sugar & tomato ketchup are totally optional.


January 17, 2022 No comments
Older Posts

Search this Blog

I ME MYSELF

I ME MYSELF
"Essence of Life - Food" is all about daily cooking with a simple sense of taste and health. It is all about food. Not a day goes by without eating for most of us. So what we eat matters on the whole. Food in the mode of goodness increase the duration of life, purify one's existence and give strength, health, happiness and satisfaction. So above all ingredients, one main ingredient in cooking is love.

ASK FIRST!

Please note that all rights for the photographs and texts on this blog, unless otherwise mentioned, rests with the author. Please do not use without permission.

Recent Posts

"Guide to our Cookie Policy"

  • Cookie Policy

Follow Essence of Life - Food

Labels

AMMA & ACHAN'S SPECIALITIES (26) APPAM (11) APPETIZERS/STARTERS (24) AROUND THE WORLD (157) BAKING (22) BEEF (7) BEVERAGES (18) BIRIYANI & PULAO (27) BREADS (6) BREAKFAST (76) CAKES (17) CANDIED FRUITS (3) CHAAT ITEMS (11) CHICKEN (57) CHINESE CUISINE (41) CHRISTMAS PARTY MENU (104) CHRISTMAS RECIPES (30) CHUTNEYS & CONDIMENTS (47) COCKTAILS & MOCKTAILS (10) COOKIES (7) CURRIES (102) DESSERTS (117) DHAL (29) DINNER MENU (14) DIWALI RECIPES (72) EASTER (3) EGG (27) FAMILY HEIRLOOM RECIPES (30) FISH (25) FOOD AS MEDICINE (99) FOR THE SWEET TOOTH (150) FRIED RICE (10) FROM GODS OWN COUNTRY (172) GLOSSARY (24) HOME REMEDIES (26) HOMEMADE COOKING ESSENTIALS (1) HOMEMADE MILK PRODUCTS (7) HOW TO... (64) ICE CREAM (3) ICING & FROSTING (2) INDIAN BREADS (22) INDIAN STREET FOOD (20) INDIAN SWEETS (44) INDO-CHINESE RECIPES (11) INDONESIAN CUISINE (22) JAM (3) JAPANESE CUISINE (5) JUICES & DRINKS (66) KERALA PALAHARAM (16) KONGU CUISINE (20) KUIH MUIH (4) LUNCH MENUS (282) MALAYSIAN CUISINE (80) MIDDLE EASTERN CUISINE (12) MILLETS (10) MUTTON (24) MY STRICT APPICER'S a.k.a. MY DAUGHTER'S RECIPES (6) NAIVEDYAM/PRASADHAM (43) NOODLES (11) PANEER (11) PARTY MENU (110) PAYASAM / PRADHAMAN / KHEER (40) PICKLES (26) PIZZA (2) PUDDINGS (6) RAITHAS & SALADS (8) RASAM (14) REGIONAL DELICACIES (251) RICE DISHES (65) ROTIS (9) SADHYA (117) SAUCES (2) SEA FOOD (45) SMOOTHIES (17) SNACKS & SAVOURIES (65) SOUPS (10) SOUTHEAST ASIAN DESSERTS (18) SPICE POWDERS (18) SYRUPS (5) THAI CUISINE (13) TIFFIN ITEMS (64) TIPS & TRICKS (19) VADAGAM/VADAM/VATHAL (2) VEGGIES (107) VIRUNDHU (15) WINES (10) eBook (1)

POPULAR POSTS

  • Kanji - Rice Porridge
  • Ambalapuzha Paal Payasam Recipe: Divine Kerala Dessert for Festivals & Sadhya
  • How to Cook Kerala Matta Rice - Mastering the Art of Tradition
  • Nendhra Pazham Puzhungiyathu - Steamed Bananas: A Taste of Kerala
  • Maida Chapati - All-Purpose Flour Chapati

Blog Archive

  • ▼  2025 (8)
    • ▼  June (1)
      • Roti Jala Recipe – Traditional Malaysian Net Crepe...
    • ►  May (2)
    • ►  April (1)
    • ►  March (1)
    • ►  February (1)
    • ►  January (2)
  • ►  2024 (27)
    • ►  July (2)
    • ►  June (2)
    • ►  May (3)
    • ►  April (8)
    • ►  March (2)
    • ►  February (5)
    • ►  January (5)
  • ►  2023 (54)
    • ►  December (9)
    • ►  October (1)
    • ►  September (2)
    • ►  August (6)
    • ►  July (7)
    • ►  June (5)
    • ►  May (6)
    • ►  April (8)
    • ►  March (2)
    • ►  February (3)
    • ►  January (5)
  • ►  2022 (54)
    • ►  December (4)
    • ►  November (6)
    • ►  October (4)
    • ►  August (1)
    • ►  July (5)
    • ►  May (5)
    • ►  April (7)
    • ►  March (4)
    • ►  February (8)
    • ►  January (10)
  • ►  2021 (100)
    • ►  December (12)
    • ►  November (13)
    • ►  October (5)
    • ►  September (5)
    • ►  August (10)
    • ►  July (5)
    • ►  June (6)
    • ►  May (5)
    • ►  April (12)
    • ►  March (7)
    • ►  February (10)
    • ►  January (10)
  • ►  2020 (130)
    • ►  December (10)
    • ►  November (11)
    • ►  October (12)
    • ►  September (11)
    • ►  August (11)
    • ►  July (10)
    • ►  June (10)
    • ►  May (10)
    • ►  April (11)
    • ►  March (12)
    • ►  February (12)
    • ►  January (10)
  • ►  2019 (165)
    • ►  December (15)
    • ►  November (8)
    • ►  October (15)
    • ►  September (22)
    • ►  August (15)
    • ►  July (15)
    • ►  June (10)
    • ►  May (10)
    • ►  April (15)
    • ►  March (15)
    • ►  February (10)
    • ►  January (15)
  • ►  2018 (128)
    • ►  December (17)
    • ►  November (13)
    • ►  October (15)
    • ►  September (5)
    • ►  August (10)
    • ►  July (10)
    • ►  June (9)
    • ►  May (12)
    • ►  April (12)
    • ►  March (8)
    • ►  February (8)
    • ►  January (9)
  • ►  2017 (102)
    • ►  December (8)
    • ►  November (5)
    • ►  October (8)
    • ►  September (10)
    • ►  August (10)
    • ►  July (10)
    • ►  June (11)
    • ►  May (10)
    • ►  April (10)
    • ►  March (6)
    • ►  February (6)
    • ►  January (8)
  • ►  2016 (116)
    • ►  December (10)
    • ►  November (10)
    • ►  October (10)
    • ►  September (10)
    • ►  August (10)
    • ►  July (10)
    • ►  June (9)
    • ►  May (6)
    • ►  April (7)
    • ►  March (7)
    • ►  February (7)
    • ►  January (20)

Created with by ThemeXpose | Distributed By Gooyaabi Templates