How to Make Perfect Dosa at Home – Soft, Crispy & Authentically South Indian
 |
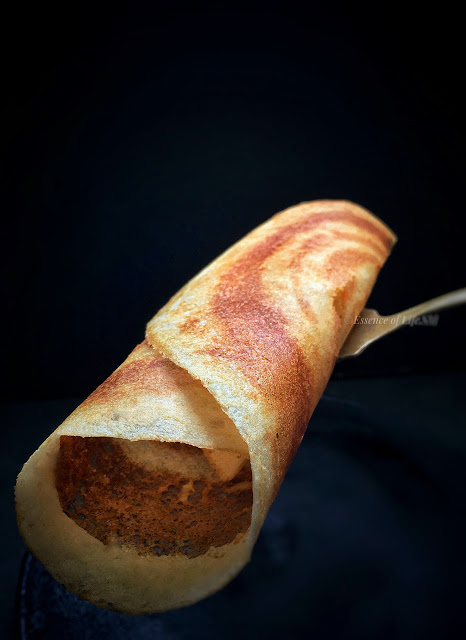
| Golden Crispy Dosa – Straight from the Tawa |
Mastering the Art of Dosa – A South Indian Classic from Batter to Tawa
If there’s one dish that defines South Indian breakfast, it’s the humble yet glorious dosa. Crisp at the edges, soft at the centre, and made with a beautifully fermented rice-lentil batter, dosa is comfort food redefined. Whether you love it plain, stuffed, or paper-thin, mastering the art of making dosa at home is easier than you think. In this post, I’ll walk you through everything — from choosing the right grinder and dosa tawa to perfecting the batter consistency and fermentation time. Plus, tips to make your dosa crispy, golden, and restaurant-style — right from your home kitchen.
A Classic, Comforting Staple That Never Goes Out of Fashion
There’s always been a post simmering in the back of my mind — dedicated purely to Dosai, the humble hero of our South Indian kitchen. Simple yet soulful, Dosa is not just food, it’s a feeling. A comfort plate. A weeknight saviour. A Sunday ritual. A tiffin-box memory. A dosa makes itself at home equally on a breakfast table, a weeknight dinner plate, or even as a 4 PM hunger hack.
Whether it's the Murugal Dosai (crisp roast dosa) you love or the Sada Dosai from your childhood — thick, white, and soft — this dish has stood the test of time and tawa - our own Dosai Kal.
*Did you know?
In many South Indian households, Idli-Dosa batter is the first thing made when setting up a new kitchen. It’s believed that the fermentation marks the start of a thriving home, full of warmth and food.
Why You’ll Love This Dosa Recipe
- Tried and tested, home-style South Indian dosa batter recipe
- Tips to get that golden crisp edge – even without a restaurant-style tawa
- Naturally gluten-free, vegan, and nourishing
- Suitable for breakfast, dinner, or even lunchbox
- Includes fermentation tips for humid/rainy or cold climatic regions.
Growing Up on Dosa – A Slice of My Story
Growing up in a typical South Indian household, Dosa wasn't just another dish — it was a dependable part of life. Alongside Idli, it was an unavoidable presence on our weekly menu. You’d always find a dabba (box) of Idli-Dosa batter resting in the fridge, like a quiet warrior — ready to save the day when you had no clue what to cook.
 |
At home, the Sada Dosai was the norm — slightly thick, soft and white, often made in small cast iron griddles. The kind you fold with coconut chutney and eat off a banana leaf at a temple feast. My Mum would make dosas for breakfast or dinner, and sometimes I’d beg her to pack them for my school lunchbox. She’d resist, saying, “It’ll go dry by lunch.” But I loved those kanju pona dosas (dried-out, slightly chewy dosas) with chutney or leftover sambar — a personal favourite even now!
From Sada to Crispy – Dosa’s Evolution
The crispy restaurant-style dosa, with its lacy, golden finish and paper-thin elegance, wasn’t always the norm at home. But thanks to the restaurant boom and the arrival of non-stick dosa pans, home cooks began recreating that beloved Murugal Dosai (crispy roast dosa) with flair. We started fine-tuning our batter, adjusting the grind, letting it ferment just so — all in pursuit of that perfect, golden crispy Dosas.
*Did you know?
The word “Dosai” (Tamil: தோசை) is said to have appeared in ancient Sangam literature. The method of fermentation used in dosa batter has Ayurvedic roots, known to boost gut health and improve nutrient absorption.
Back to the Dosa Recipe – South India’s Favourite Tiffin Staple
Let’s dive right into the recipe — because let’s be honest, South Indian cuisine is incomplete without Dosa. Among the endless parade of tiffin options — from Idlis to Upmas — Dosa stands tall, golden, and proud.
A staple breakfast item and an eternal comfort food, dosa ticks every box:
- Tasty
- Healthy
- Easily Digestible
- Budget-Friendly
In fact, most South Indian homes wake up to the soothing sizzle of dosa or idli batter meeting a hot tawa. But don’t be fooled by its simplicity — perfecting dosa is an art passed down across generations. It may need just a handful of ingredients, but that perfect texture — be it soft and spongy or thin and crisp — takes a little intuition, a little technique, and a bit of experience!
Making Perfect Dosa: It’s All in the Details
Anyone who’s flipped a dosa (or wrestled with a sticking one) knows this:
It’s not hard, but it’s not a left-hands play either.
Get your proportions right, and let that batter ferment like a dream — you’re already halfway there. But then comes the griddle test — where heat, timing, and spreading technique make all the difference.
Checklist: What Makes a Perfect Dosa?
Here’s your go-to guide for dosa mastery:
- Correct Rice–Urad Dal Ratio
- Right Type of Rice & Dal (Parboiled rice, whole white urad for best results)
- Proper Soaking Time – 4–5 hours or overnight
- Adequate Water During Grinding
- Smooth Batter Consistency – Not too thick, not too runny
- Well-Mixed Batter Before Fermenting & Cooking
- Salt Addition – After Grinding but Before Fermenting
- Good Fermentation – 8–10 hours (adjust as per weather)
- Perfect Tawa Heat + Spreading Skill – The final magic!
More Dosa, More Delight! Love experimenting different types of dosas? Discover creative twists — from Vazhaipoo Dosa to Ilaneer Dosa, Rava Dosa to Wheat Dosa. Click here to explore all Dosa Varieties!
Dosa Recipe Overview
- Cuisine: South Indian
- Course: Main Course
- Difficulty: Medium
- Author: SM @ Essence of Life - Food
Time Estimate
- Prep Time: 15–20 minutes
- Soaking Time: 4–5 hours / Overnight
- Fermentation Time: 8–10 hours / Overnight
- Cooking Time: 10–15 minutes
Craving More Tiffin Inspiration? From soft idlis to crispy vadas and everything in between — explore more South Indian Tiffin Favourites that bring comfort to every plate. Click here for more Tiffin Varieties.
The Ultimate Guide to Making Perfect Dosas at Home – Soft, Crispy & Everything In Between
 |
Discover how to make the iconic South Indian dosa in all its forms — from soft Sada Dosas to lacy Paper Roasts — using a traditional batter that’s full of flavour, history, and clever kitchen hacks.
From Soft Dosas to Paper Roasts – A Legacy in Layers
Growing up, I watched dosa evolve right before my eyes — from the soft, small homemade dosas lovingly flipped on our cast iron pan, to the paper-thin, crispy Murugal Dosas my mum perfected for my brother. She had this brilliant hack: scraping out a thin layer of semi-cooked batter just to make his dosas thinner and crispier — a technique that still works like a charm for restaurant-style paper roasts.
So here’s the deal: whether you want soft, pillowy dosas or ultra-crispy golden ones — it’s all about how you cook it. The same dosa batter can yield both, if you master the spread, heat, and cooking time. That’s the beauty of it.
ProTip: Want your dosa to be wafer-thin? Try scraping out excess batter once half-cooked for that crisp finish.
Ingredients
For Dosa Batter
- 13/4 cups of Idli Rice (Par-boiled Rice)
- 13/4 cups of Raw Rice
- 1 cup of Urad Dal
- 1/2 cup of Flattened Rice (Aval/ Poha)
- 1 tablespoon of Fenugreek Seeds
- 2 tablespoons of Tuvar Dal (optional)
- 1 small piece (1/2 an inch) of Ginger (optional)
- Salt – to taste
Pro Tip: Adding Ginger while grinding your dosa batter. It not only lends a subtle, warming aroma but also helps ease digestion — especially when using urad dal. And ginger even support better fermentation by encouraging healthy microbial activity.
For making Dosa
- Oil/Ghee - For Dosa
Method: Step-by-Step Dosa Batter Preparation
Washing & Soaking:
- Rinse all the ingredients (except Aval/Poha, Salt and Ginger) 3–4 times under running water until the water runs clear.
- Soak everything together in enough water for 6–8 hours or overnight.
- Soak the Flattened Rice (Aval/Poha) just 10 minutes before grinding the batter.
Grinding the Batter:
- Drain the soaked ingredients.
- Grind in a wet grinder or a mixer grinder (in batches) until smooth.
- Add the ginger while grinding.
- Use cold or ice water for grinding in a mixer to prevent heat build-up.
- You’ll need around 2–3 cups of water, depending on your equipment.
Mixing & Fermenting:
- Transfer the ground batter to a large bowl.
- Add salt and mix thoroughly using your hand – this helps activate fermentation.
- Optionally, mix in the thawed old batter at this stage.
- Cover and leave the batter to ferment in a warm place for 8–10 hours or overnight.
Fermentation Hack
I have lived in Malaysia for years now, and fermentation has always been tricky. So here’s my kitchen fix — I freeze about 1/2 a cup of old fermented dosa batter, thaw it on the day I grind a new batch, and mix it into the fresh batter. Works like a charm to kickstart fermentation.
ProTip: Old batter contains active cultures that accelerate the fermentation process. Think of it as your dosa sourdough starter!
How to Make the Perfect Dosa – Three Styles |
For Crispy Dosa (Murugal Dosai):
- Heat the pan on high, then lower to medium.
- Grease well using oil and an onion slice or cloth.
- Pour batter and spread evenly in a circle.
- Cook on medium flame until golden and crisp.
- No need to flip. Roll it and serve!
ProTip: Adding ghee/oil at the edges gives that extra restaurant-style crunch.
For Paper Roast (Paper Dosai)
- Follow same process as crispy dosa.
- When half cooked, scrape off excess batter using dosa ladle to make it super thin.
- Cook on medium heat till very crisp.
- Serve as is, no flipping required.
Note: This scraping technique was my Amma’s trick to keep my brother happy with restaurant-style crispness!
Pro Tips & Notes
- Always use Idli rice + Raw rice combo for balanced texture.
- Addition of Aval or cooked rice - helps with fermentation and gives you crispy dosas with the right balance — without compromising on that golden crunch!
- Use a dedicated dosa pan – either non-stick or cast iron or a traditional bronze.
- Mix batter thoroughly each time before pouring.
- Cold weather? Leave batter near the oven light or wrapped in a towel.
- Don’t add salt while grinding – it can slow down fermentation.
Storing Dosa Batter
- Refrigerate once fermented.
- Keeps well for 3–4 days.
- Bring to room temperature before use.
- Adjust water to get desired consistency.
Serving Suggestions
Dosa isn’t complete without its loyal companions:
Want to try more chutneys for your dosa platter? [Click here for Chutney Recipes]
Want to try more chutneys for your dosa platter? [Click here for Chutney Recipes]
Feeling indulgent? Dosas also go brilliantly with hearty South Indian curries — both vegetarian and non-vegetarian:
Variations You Can Make With the Same Batter
- Masala Dosai
- Kari Dosai (Minced Meat Dosai)
- Tomato Dosai
- Mutta Dosai/Egg Dosai
- Podi Dosai
- Uthappam
- Kal Dosai
- Paniyaram
Looking for a Idli Dosa Batter that works with just a blender (mixer-grinder)? [Click here – I’ve got you covered!]
Variations You Can Make With the Same Batter
- Masala Dosai
- Kari Dosai (Minced Meat Dosai)
- Tomato Dosai
- Mutta Dosai/Egg Dosai
- Podi Dosai
- Uthappam
- Kal Dosai
- Paniyaram
Looking for a Idli Dosa Batter that works with just a blender (mixer-grinder)? [Click here – I’ve got you covered!]
FAQs
Q: Why are my dosas not golden?
- Could be not enough fenugreek seeds in the batter. Fenugreek helps yield that lovely golden hue.
Q: Can I use the same batter for idlis?
- Yes! Usually, the freshly fermented batter is ideal for idlis. If you're planning idlis, grind the batter a little thicker.
Q: Why are my dosas not thin and crispy?
- The batter may be too thick or under-fermented. Adjust water to thin the batter and let it ferment properly.
Q: My batter didn’t ferment well – what can I do?
- Allow it to ferment in room temperature for few more hours or make uthappams with it! Slightly thick, soft dosas topped with onions or veggies work beautifully.
Q: My dosa sticks to the pan – what am I doing wrong?
- Could be low heat, unseasoned pan, or wrong batter consistency. See my pan rescue tips below!
My 25-Year-Old Non-Stick Dosai Kal – Convex, Loyal & Completely Mine
Let me share a little slice of my kitchen legacy — I’ve been using the same non-stick dosai kal since May 2000. That’s right — she’s 25, and in my eyes, she’s ageing like cast iron. Strictly reserved for dosai — nothing else touches her surface, nothing whatsoever.
Now here’s the twist: thanks to the super high-flame wok suitable burners we have in Malaysia, my dosai kal has developed a gentle convex curve right at the centre. It's bowed ever so slightly, like a proud old soldier. My Amma can’t believe I still use it. She once looked at it, eyebrows raised, and said, “How on earth do you manage to pour dosai on this? Won’t the batter just run off the sides?” I laughed and replied, “Maybe for others. But this one listens to me.”
Because truly — my dosai kal may be domed, scratched in memory, and heat-kissed over decades, but to me, she’s an obedient confidant. She understands the swirl of my hand, the rhythm of my ladle. When it’s just me and her in the kitchen, making dosai — it feels effortless.
Even my daughter walks carefully around it. She's the only other person allowed to flip dosais on it — though even she admits, “I’m not sure if you’re more excited that I’m cooking… or silently panicking inside.”
And yes — I now own a shiny new bronze dosai kal, beautifully seasoned and all that. But this one? This one is legacy.
How I Grease My Dosa Pan – Not Just a Step, It’s a RitualBefore pouring that first ladle of batter, the pan needs to be just right — and so does the oiling. Here’s what I do: I slice off the top of a big onion, stick a small fork tightly into it, and swirl it around the hot pan with a few drops of oil. Trust me, this isn’t just my quirk — most Indian kitchens swear by this time-tested trick. The onion adds a slight caramelised touch and ensures the oil is spread evenly.
Of course, you’ll find other methods too:
|
 |
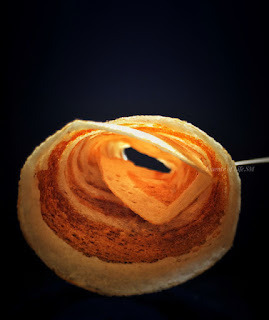
Paper Dosai – Crispy, Wafer-Thin, Rolled & Golden to Perfection |
Bonus Dosa Pro Tip – When the Pan Gets Too Hot!
Ever find it hard to spread your dosa batter evenly? Or your dosa browns too fast without crisping? Chances are, your pan is too hot.
Here’s a trick that’s as old as dosa kal itself:
After oiling the pan, if it’s overheated, just sprinkle a handful of room temperature water over it. You’ll hear a quick sizzle — wipe it off immediately using the same onion-on-fork or banana rib you used to grease the pan.
It not only cools the pan instantly, but also evens out the surface temperature — giving you that golden hue and perfect texture.
ProTip: This step is especially helpful if you're making batches back-to-back. It resets the pan and keeps each dosa consistent.
 |
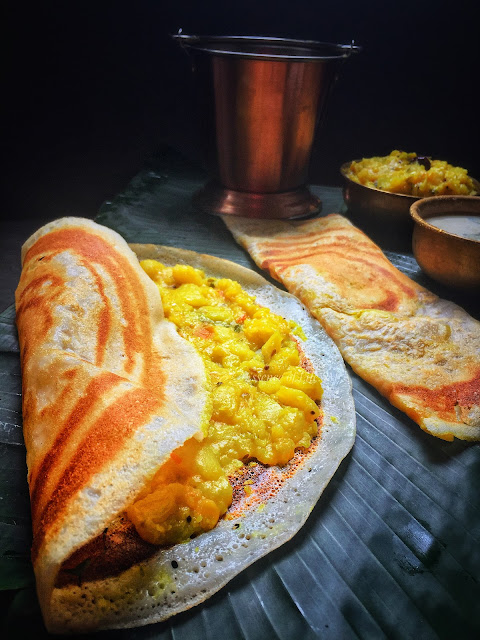
Authentic Masala Dosa - Crisp Outside Spiced within |
Dosa Chronicles
And just like that, a ladle of batter becomes a memory — of Amma’s hands, morning aromas, the sizzle of a well-worn tawa, and quiet breakfasts before the world wakes up.
Dosa isn’t just food — it’s a rhythm we grew up with, a quite constant through the noise of life. Whether it’s made in a slow, sunlit kitchen or amidst the clang of a busy morning flat, its comfort never wavers. If this post brought back a slice of your own story, I hope you’ll carry it forward — in your kitchen, in your conversations, maybe even in your own pan that ages lovingly over the years.
- Dive into more Dosa Varieties - from Quick-fix ones to the most traditional ones.
- Pair your dosa with that perfect chutney or curry of your choice.
- Or just come back here when you need a little culinary comfort.
Let’s keep the Dosa swirling, one memory at a time.


0 comments